A Simple Rollover Button
File: i_button.isc
This example shows how to create a simple rollover button, i.e. a button
that changes image when the mouse passes over it. Usually an Isaac work contains
more than a simple button, but this is just to have a first example to be followed
step by step.
Follow these steps to create the button:
- start Isaac or create a blank work
- import ica_xar01.gif from the help\clipart
folder
 click the
 button to
crop the image
button to
crop the image- drag a rectangle including the button to be clipped

- click the
 button to "catch" the image
- click the
 button to add the bitmap to the list
- click the
 button to close the Crop window
- choose Create A Copy from the Bitmap menu
 choose Colorize
from the Bitmap menu
choose Colorize
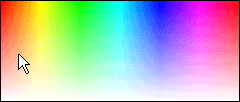
from the Bitmap menu- choose a bright color from the Hue-Saturation panel

- click the
 button to close the color picker
- on the bottom right of the window you can read the dimensions of your new
bitmap: 45x42 pixels. Set the work dimensions as 45x42, selecting Width
and Height from the File menu
- click the
 button to add the button to the work
 click the
 Events button
on the top-right of the window to open the Events window
Events button
on the top-right of the window to open the Events window- from the "MouseOver Image" list choose the name of the other bitmap

- type the link name in the "Link" field

- click the
 button to close the Events window
- click the
 Preview button to see your work in action (note: this work is too narrow to
be viewed and exported with the unregistered version of Isaac. Click
here for details. So, if you really want to see the result of your work,
you must set the width to the minimum allowed, e.g. 106 pixels)
 save the
file and
  export
it to the final folder
Back to Ideas
 click the
 choose Colorize
from the Bitmap menu
 click the
 click the
 choose Colorize
from the Bitmap menu
 click the