| Made with | Isaac | JavaScript | ||||||
| Rendering |
|
|||||||
| Images needed | 1* | 18 (!) | ||||||
| Bytes needed (HTML code included) | 4,867* | 21,364 | ||||||
| Runs on Netscape Navigator 3.0 | Yes | Yes | ||||||
| Runs on Netscape Navigator 4.0 | Yes | Yes | ||||||
| Runs on Internet Explorer 3.0 | Yes | No | ||||||
| Runs on Internet Explorer 4.0 | Yes | Yes | ||||||
| Runs on Internet Explorer 5.0 | Yes | Yes |
If you use JavaScript and make images with any image editor, you will appreciate Isaac and will be immediately productive with it. Just look at the image used by the example above (the border is not part of the image):
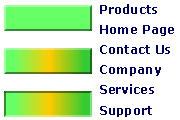
As you can see, you don't have to design a button for each item of the menu: just do it once and then you will build the button from within Isaac. As you can see, the image contains the "elements" used by the menu, without repetitions. This means that images loading will run faster: just look at the example to see it!
The best way to use Isaac is to create an image (or more images) containing all the needed elements, and then reobtain the single bitmaps from within the program itself. You will often use transparency when you create the images. Look at the image used in another example in the gallery (again, the border is not part of the image):
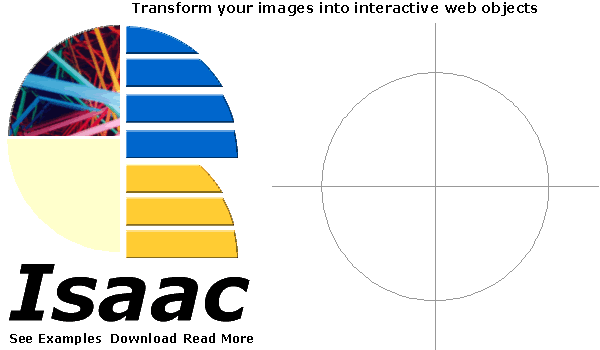
As you can see, elements are clearly visible and it's very easy to crop them with Isaac.
*: the browser will also download the class file (11 Kb), but this will be done only once, because the browser will store it in its cache it and that's the same file for any use of Isaac. So if, for example, you use Isaac ten times in your website, the class file will be downloaded only the first time a visitor looks at one of your pages. After that, it will remain in memory even for future visits.