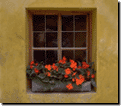
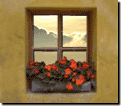
Trimming a pictureGeneral term that includes photos, graphics, clip art, and objects. Any photo or project in this product. or an object removes part of a picture or object and leaves that area transparent.


To trace the area manually:
-
Select the picture or object you want to trim.
-
On the Format menu, click Trim.
-
Click Trace it on my own.
-
To trace the edge, drag the cursor along the edge of the area you want to trim.
-
Click the yellow diamond to close the trim area.
-
Adjust the outline by clicking and dragging the trim boundary.
-
Click Next.
-
Click Done.
To use a cookie cutter shape:
-
Select the picture or object you want to trim.
-
On the Format menu, click Trim.
-
Click With a cookie cutter shape. The gray shaded area represents the portion of the picture that will be deleted.
-
Under Click a cutout shape, click the shape you want.
-
Use the move handle
 to drag the cutout shape.
-
Pause over the edge of the object or picture until the pointer changes to
 , and then drag the cutout shape to change its size or shape.
-
Click Next.
-
Click Done.
To use the Edge Finder:
-
Select the picture or object you want to trim.
-
On the Format menu, click Trim.
-
Click With the Edge Finder.
-
Click along the edge of the object you want to trim.
-
To close the outline, click the yellow diamond.
-
Adjust the outline by clicking and dragging the trim boundary.
-
Under Edge Finder width, select the width of the trim box. The width of the trim box determines the area Edge Finder will search to locate the exact edges of the object.
-
Click Next.
-
Click Done.

