Creating a navigational frame layout
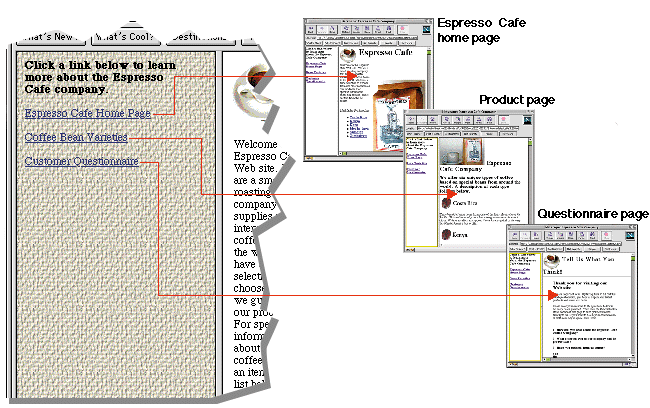
You can set up a navigational frame that contains a list of links
and make the linked pages display in another frame. This is useful
for creating a table of contents for your Web site that always
remains visible.

To create this type of layout you need to create a navigational
frame and a target frame, assign a page to each frame, and name the
target frame. Then you need to create links in the navigational list
to the pages in your site and refer each to the target frame.
Before you set up the frames, you need to create the pages for
your Web site, including the page that contains the navigational
list.
To create a navigational frame layout:
- Open the Web page that contains your navigational list and the
first page you want to display in the target frame.
Usually the first page you want displayed in the target frame is
the first item in the navigational list.
- Create a page that uses frames by choosing New from the File menu, clicking
Create New,
selecting Frame Page and clicking OK.
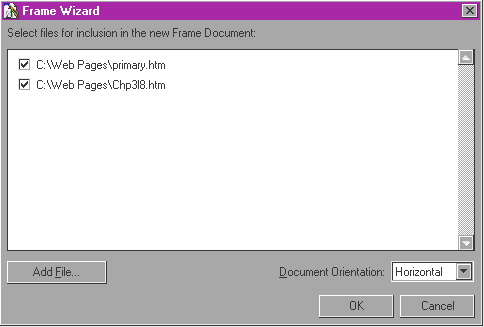
A list of the open Web pages appears in the Frame dialog box.
- Select the page that contains the navigational list and then
select the first page you want displayed in the target frame.
- Click OK.
An untitled page appears with two frames displaying the two
assigned pages in Edit Frame mode.

- Double-click the target frame to open the Frame Object
Editor.
- Click the Content tab, if necessary.
Note If you want to
change the page that is assigned to the frame, type the new name
in the URL
text box or choose it from the URL pop-up menu in the Frame
Object Editor.
- In the Frame
Name text box, type a name for the target frame.
Type a name that's easy to remember, such as "target."
- Close the Frame Object Editor and save the page.
Note To modify the
message that your audience will see if their browsers don't
support frames, click the Edit Page button on the toolbar
and type a new message. To switch back to the frames, click the
Edit Frames
button.
- In the page that contains the navigational list, specify the
target frame for each linked page. Do one of the following:
Specifying the target frame for linked pages
When you create a navigational frame layout, each item in the
navigational list that is linked to a page must also refer to the
target frame. You specify the target frame for each link in the
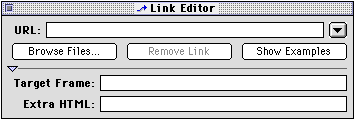
navigational list using the Link Editor.
Note If you haven't
created the links yet, you can set up a shortcut so that you'll only
have to specify the target frame once. See "Creating links that refer
to the default target frame" next.
To specify the target frame for each link in the list:
- In the page that contains the navigational list, select the
first item in the list and click the Link Editor button
 on the toolbar.
If necessary, click the triangle to expand the Link Editor.


Note The name of
the page that the item is linked to appears in the URL text box. (If you
haven't created the link yet, this box is blank. See "Creating
links that refer to the default target frame" next.)
- In the Target
Frame text box, type the name of target frame.
Be sure to match the name of the target frame exactly as you typed
it in the Frame Object Editor (for example, "target").
- Repeat these steps for every item in the list and save the
page.
You can test the page that uses frames in Preview Page mode by
clicking the links in the navigational frame and viewing the
alternating pages displayed in the target frame.
Creating links that refer to the target frame
You can set up a default target frame that Claris Home Page
automatically refers to whenever you create a link. This is useful if
you haven't created the links yet in your navigational list to the
pages you want displayed in a single target frame.
Note You can specify
a different target frame for individual links in the Link Editor.
To create links that automatically refer to the target frame:
- In the page that contains the navigational list, choose
Document
Options from the Tools menu (Windows) or Edit menu
(Macintosh).
- Click the Parameters tab in the Options
dialog box.
- Type the name of the target frame in the Default Target Frame text
box.
- Click OK
to close the Options dialog box.
- Create links to all the pages by selecting each item in the
list, choosing Link to
File from the Insert menu, selecting the page you want
to link the list item to and clicking Open.
For each link you create, the target frame is automatically
specified. You can change the target frame for an individual link
by selecting the link, opening the Link Editor, and typing a new
name in the Target
Frame text box.
For more information on creating links, see
Linking to external Web pages and
resources.
You can test the frame layout in Preview Page mode by clicking the
links in the navigational frame and viewing the alternating pages
displayed in the target frame.
Previous topic |
Contents


