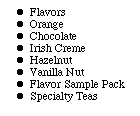
There are several ways you can format text to help you organize information on your Web page. Using lists is one popular method. You can create three kinds of lists using Claris Home Page: bulleted, definition, and numbered lists.
The first step in creating a list on your Web page is deciding which kind of list to use.
|
Use this kind of list |
For this type of information |
|---|---|
|
Bulleted list |
Items that don't necessarily follow a sequence (also known as an unordered list). In this kind of list, a bullet precedes each item. |
|
Definition list |
Terms that might be unfamiliar to the user. Definition lists consist of terms that are followed by their definitions. |
|
Numbered list |
Items that need to be listed in a sequence (also known as an ordered list). In this kind of list, a number or letter precedes each item, which you can specify. |

Note When you create a numbered list in Edit Page mode, you see a number symbol (#) or an X in front of each entry. The actual numbers or letters only appear when you view your page in Preview Page mode or in a browser.
To create a bulleted list:
Note You can also start a new bulleted item by clicking anywhere in the text and choosing List from the Insert menu.
To add an item to a list, click in the list where you want to begin a new item and press Enter (Windows) or Return (Macintosh).
To create a numbered list:

To add an item to a list, click in the list where you want to begin a new item and press Enter (Windows) or Return (Macintosh).
There are five number styles you can use for a numbered list.
To change the number style:

To create a definition list:
To add an item to a list, click in the list where you want to begin a new item and press Enter (Windows) or Return (Macintosh).
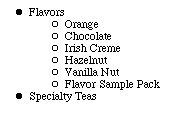
A nested list is indented within another list to show subcategories.
To create a nested list:


To remove the nested list style, click the Decrease Indent button ![]() .
.
You can drag list items to a new position in the list.
To select a single list item that you want to reposition, you need to select the entire item (including the paragraph return at the end of the line).
Note If you change the order of numbered list items, they're renumbered automatically.