Advanced Database Concepts
Parameterized Queries with Data Modules using JBuilder
Michael Rozlog
NOTE: The views and information expressed in this document represent those of its author(s) who is solely responsible for its content. Borland does not make or give any representation or warranty with respect such content.
Introduction:
As we are all aware, Borland's JBuilder makes
it incredibly easy to create 2-tier database applications. A couple of
areas that seem to cause a great deal of questions include the following
subjects: parameterized queries and Data Modules. In the following
simple example, we will walk through the steps needed to use a Data Module,
and how to put queries that use parameters inside a Data Module. You will
see that Borland makes it quite simple to implement this process.
In just seven (7) simple steps, we will make an application that will introduce
both Data Modules, and parameterized queries. The lab is constructed using
JBuilder Client/Server 1.01 however, you could also use JBuilder Professional
1.01.
Before we get started, lets ask the obvious questions: what are parameterized
queries and why would I use them, and second, what is a Data Module and
why would I use it? To answer the first question I refer to the JBuilder
help to give the definition:
"A parameterized SQL statement contains variables, also known as parameters,
the values of which can vary at run time. A parameterized query uses
these variables to replace literal data values, such as those used in a
WHERE clause for comparisons, that appear in an SQL statement. These
variables are called parameters. Ordinarily, parameters stand in
for data values passed to the statement. You provide the values for
the parameters before running the query. By providing different sets
of values and running the query for each set, you cause one query to return
different data sets."
Data Modules are non-visual containers that can be used to hold all of
your non-visual components, especially the database components. Data
Modules give a separation between your presentation layer and your business/data
layer in a 2-tier model.
The Lab:
The lab is quite simple by design. It
is meant to give you an introduction to the JBuilder environment and the
work-arounds for Sun's Java JDK and Borland's Data Modules. It will consist
of a limited interface that includes the following JBCL (JavaBeans Component
Library) components:
|
Quantity of Components
|
Component Name and Location
|
|
1
|
ButtonControl - Controls tab
|
|
1
|
CheckboxPanel - Controls tab
|
|
1
|
FieldControl - Controls tab
|
The application will be responsible for returning
whether or not a Company exists in a database. We will pass the contents
of the FieldControl to the parameter in the Data Module and the Data Module
will search the database and return the result set to the calling program.
Parameterized queries can be run with named parameters, with parameter
markers, or with a master-detail relationship. This lab only covers
named parameters, while the other topics are outside the scope of this
paper. Please refer to the JBuilder help book: "Database Application
Developer's Guide" for more information.
Steps for creation:
Step 1: Setup Application
1. The first step is to create a new Application.
-
This can be accomplished by clicking the File menu and selecting the New
item. This should be the first item on the File menu.
-
The gallery will be displayed next; this is a code and object repository
that is used by JBuilder. The following screen should be displayed.
-

-
Double click on the Application icon or click the application icon and
press the OK button located at the bottom of the screen. This will start
the New Project Wizard.
-
The Project Wizard will be displayed. This is where you can set up
the package that will be associated with the application that is being
created.
-
\JBUILDER\myprojects\ - is set up as the base directory for your application,
the next directory setting is related to the package that will be generated
in the final process.
-
Let us call the package advConcept1 for this project.
-
The last item on the file line is the .jpr. This file is used by
JBuilder as a general house-keeper since it maintains all of the files
and JBuilder settings used during the development process.
-
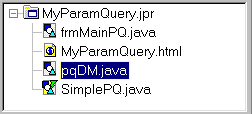
Let us call the .jpr file, MyParamQuery.jpr.
-
The rest of the information on the Project Wizard is optional. You
may fill it in if you so desire, however for this project it is not needed.
-
Once completed, you may click the finish button. This action will automatically
start the Application wizard.
-
The first step in actually creating an application starts with the application
wizard. This wizard will walk you through the steps to generate an application.
The most important part of step one is the fact that you are setting up
the Class name that will be used to call your program from the Java VM
(virtual machine).
-
The Package line will already be filled in for you, it was completed in
the last step.
-
Lets change the Class line to reflect what we will call the program once
we have completed it using JBuilder. Replace the text that currently says
Application1 with a more descriptive name like simplePQ for simple
parameterized query.
-
The next option deals with the application style. This checkbox refers
to whether or not you would like to see the information you typed in on
the Project Wizard included in all source code created in this project.
-
For this example, select Generate header comments.
-
Select the Next> button to continue to step two (2) of the Application
wizard.
-
Part 2 of the Application Wizard.
-
-
Change the frame class to reflect the frmMainPQ for the name.
This will be the class that is called from the SimplePQ class that was
set up in the prior step.
-
Change the title for the frame to reflect Parameterized Query Example.
-
Check the Status bar option and the Center frame on screen option.
-
Click the finish button.
-
The AppBrowser should appear as the following.
-
Setting up the Application complete, click the save all icon,  or
select the Save All from the File menu. or
select the Save All from the File menu.
Step 2: Setup a Data Module
Adding a Data Module to the project.
-
Click the File - New.
-
In the gallery, double click on the Data Module or select Data Module and
press the OK button.
-
-
A new Dialog will be displayed asking for a Data Module Class Name.
-
-
Change the name area to reflect pqDM for the name.
-
Press OK button.
-
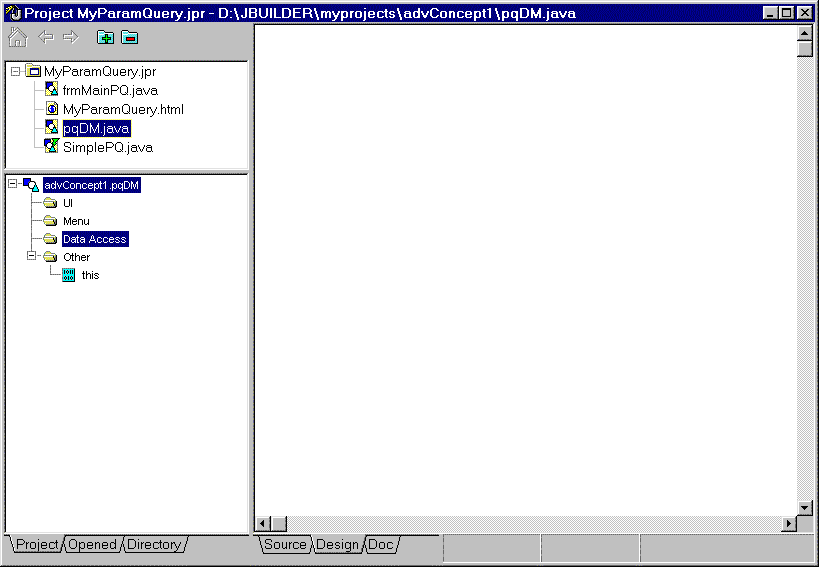
The AppBrowser should appear as the following:
-
Setting up the Data Module complete, click the save all icon, or
select the Save All from the File menu.
Step 3: Configuring the Data Module
Inside the Data Module unit
-
Click on the pqDM module in the navigational pane as above.
-
-
Select the Design Tab
 under
the content pane. under
the content pane.
-
The AppBrowser should appear as below.
-
-
Select the Data Access tab on the JBCL component pallet.
-
-
Select the Database icon
 -
first icon. -
first icon.
-
Drop icon into the Structure pane.
-
The component should show under the Database tree.
-
Select a QueryDataSet icon
 -
fourth icon. -
fourth icon.
-
Drop icon into the Structure pane.
-
The component should show under the Database tree.
-
Select a ParameterRow icon
 -
eighth icon. -
eighth icon.
-
Drop icon into the Structure pane.
-
The component should show under the Database tree.
-
Select the Database component in the structure pane.
-
-
Go to the Inspector, it should be representing the Database object.
-
-
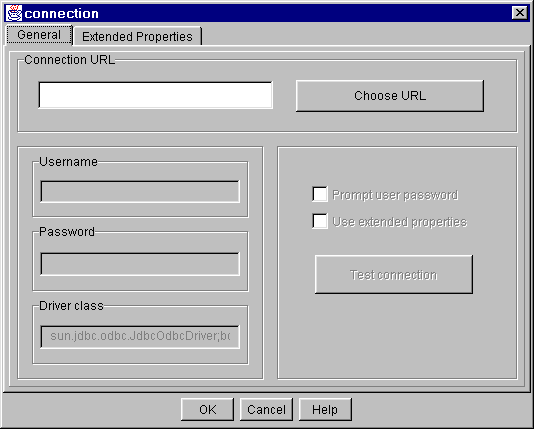
Click on the connection item.
-
This will give us the connection dialog.
-
The connection dialog should appear as below:
-
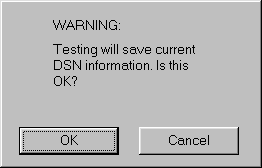
NOTE: if you have not set up a database with either a BDE
(Borland Database Engine) alias or an ODBC (Open
DataBase Connectivity) DSN (Data Source Name), please press the following
link for setting up a DATABASE for this application.
-
Press the Choose URL button.
-
This will display a Choose a Connection URL dialog.
-
At this point you have two options.
-
Use ODBC Drivers or use Borland's DataGateway
Product.
-
For the ODBC Drivers, press the Show data sources
button, the following dialog will appear. For using DataGateway proceed
to step viii.
-
This will show a different Connection Dialog however the principles are
the same.
-
If you have not already pressed the Show data sources button, do so now,
it will return a list of ODBC data sources currently
setup on the machine.
-
If you have not set up a specific data source for this lab or you don't
have one that you can use, please refer to the DATABASE
setup link.
-
Select the Data Source to use for this project and press the OK button.
-
For Borland's DataGateway product follow these steps, if you need ODBC
follow the steps listed in step vii.
-
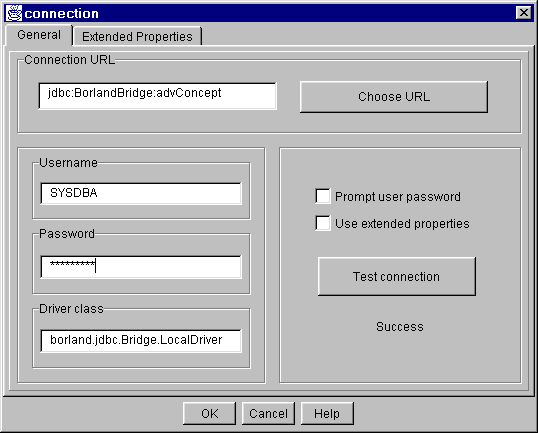
Press the local button in the DataGateway box.
-
Select the jdbc:BorlandBridge:advConcept line.
-
If you do not have a line that represents the above, you must define a
BDE (Borland Database Engine) alias for the database.
-
Press the OK button.
-
The connection dialog should have the Data source or BDE
Alias in the Connection URL edit box.
-
-
Input the Username field.
-
For Interbase databases remember that it is SYSDBA (upper case)
if you have not setup a user name already.
-
Input the Password field.
-
For Interbase databases remember that the password is masterkey
in lower case.
-
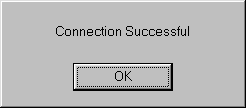
Press the test connection button.
-
Success should appear under the button as above.
-
Press the OK button.
-
Select the ParameterRow1 component in the structure pane.
-
-
Click the plus (+) symbol to the left of the parameterRow1 item.
-
This should show a new column.
-
Select the new column in the structure pane as shown from above.
-
Go to the Inspector, it should be representing the parameterRow1 object.
-
-
Click on the dataType.
-
Select String data type.
-
Change the columnName item to reflect currentCustomer - watch case.
-
Remember to hit return or enter after changing the name, changes only happen
after a carriage return.
-
Select the QueryDataSet component in the Structure pane.
-
-
Go to the Inspector, it should be representing the QueryDataSet object.
-
-
Click on the query option.
-
This will activate the query dialog.
-
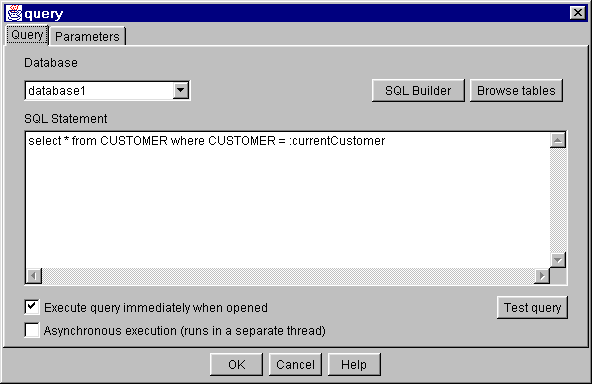
Inside the query dialog select database drop-down listbox.
-
The only database that should appear is the database1.
-
The SQL Builder button (Client/Server package only) and the Browse tables
button should become activated.
-
You can use the Browse tables to build the query or you could use the SQL
Builder to build the SQL statement. You can also add text to the
SQL Statement area; this is how we will build the query for this exercise.
-
Note: If you use the SQL Builder, realize that it will appear on the task
bar not on top of the desktop. Click on the icon in the task bar and activate
SQL Builder.
-
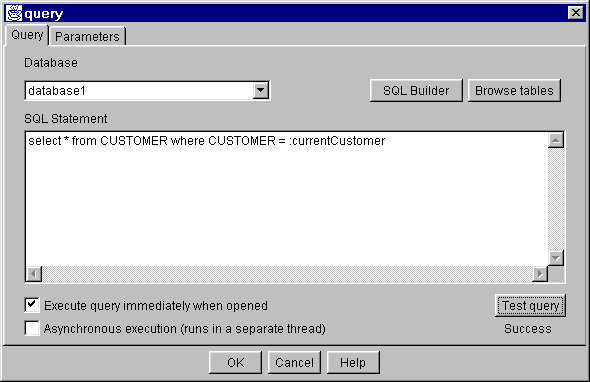
In the SQL area type the following.
-
Select * from Customer where Company = :currentCustomer.
-
As shown above.
-
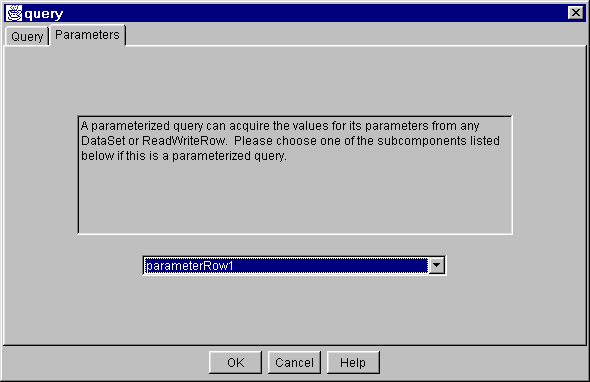
Click on the Parameter tab.
-
Select the parameterRow1 from the drop-down listbox in the pane.
-
Click on the Query tab.
-
-
Press the Test query button.
-
Success should be display under the test button.
-
Press the OK button.
Configuring the Data Module complete,
click the save all icon, or
select the Save All from the File menu.
Step 4: Getting the frame to recognize the Data Module
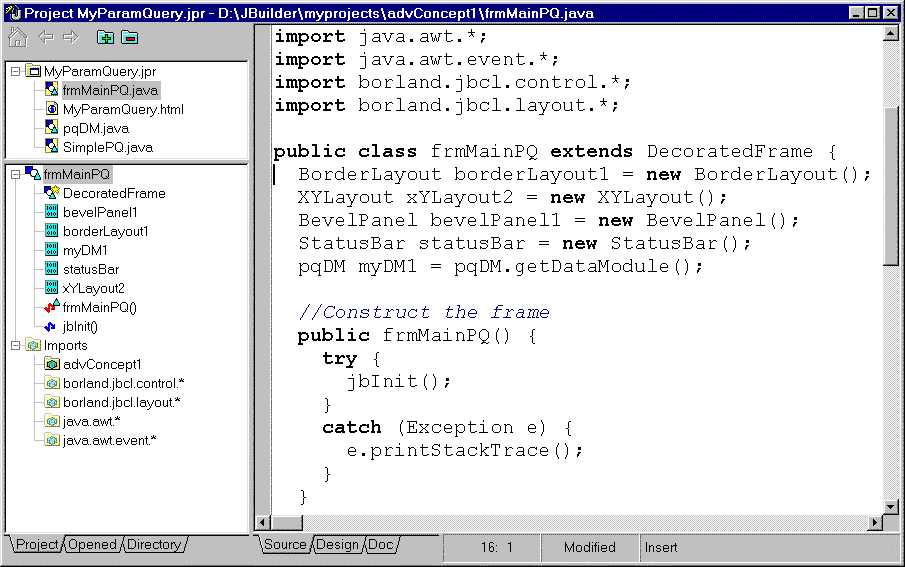
In the Navigator Pane select the frmMainPQ.java file.
-
Click on the source tab under the content pane.
-
-
Go to the class definition and the class constructor.
-
-
Add the following line.
-
pqDM myDM1 = pqDM.getDataModule();
-
Now press the Save all button
to continue.
-
Press the rebuild icon on the speed bar on the main window.
-
Return to the source code by clicking on the source tab.
-
Copy the line that was added in step 4.d.i.1
-
Add this line to the first line under the class definition.
-
Comment out the old line.
-
Select the design tab
-
You should see the following text in the structure pane:
-
Parsing text... please wait.
-
-
The structure pane should show the myDM1 under the Data Access tree.
-
NOTE: This process will need to be done every time a change is made to
the Data Module. This is because the Data Module class is already loaded
and needs to be reevaluated. This process will not always work, if the
changes are not reflected in the dataset property, exit JBuilder, then
restart JBuilder. This process will remove all references to the Data Module
and when the project is loaded the changes will be reflected.
Getting the frame to recognize the Data Module complete,
click the save all icon, or
select the Save All from the File menu.
Step 5: Defining the User Interface
While in design mode, click on the JBCL component pallet and from
the controls select the following:
-
One (1) fieldControl.
-
One (1) textControl.
-
Change the text property to read Company Name.
-
One (1) buttonControl.
-
Change the label for the button control to read Find Company.
-
One (1) checkboxPanel.
-
Add two (2) labels.
-
Click the labels property.
-
The picklistitemeditor will appear.
-
Press the add button two (2) times.
-
Change the items to read.
-
Record Found
-
Press return.
-
Record NOT found
-
Press return.
-
Click on the Grouped property.
-
This will change the items in the checkboxPanel to a radiobuttons.
-
Radiobuttons are mutually Exclusive.
-
Set the selected index to 1 for Record NOT found.
-
Set the orientation to horizontal.
-
The interface should look like below.
User Interface now complete, click the save all icon, or
select the Save All from the File menu.
Step 6: Add the code
-
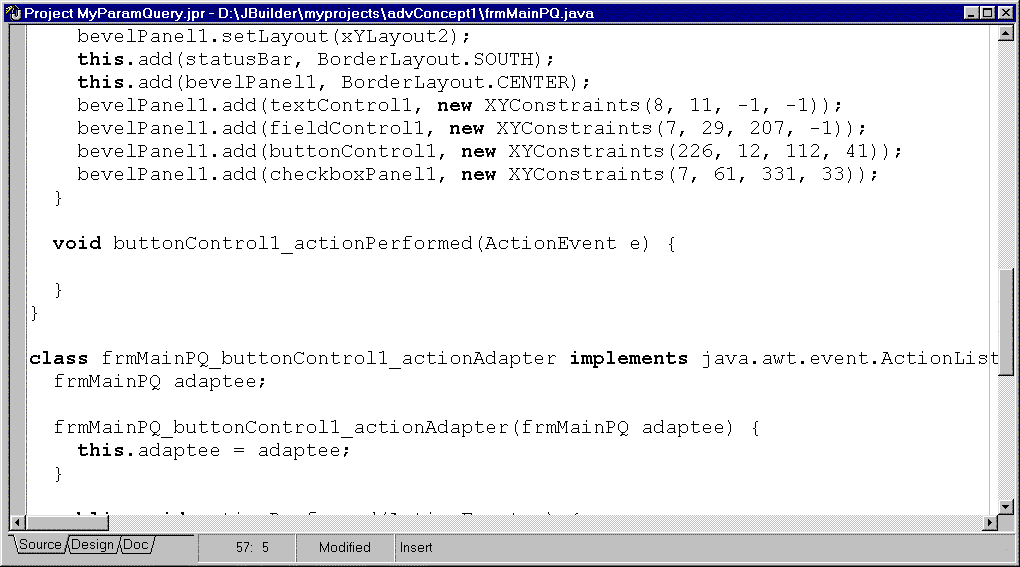
Now double click on the buttonControl1.
-
This will take you inside to the snippet that must be performed when the
button is clicked.
-
Comments =
commented lines.
-
Actual Code = Actual code lines.
-
Add the following code.
-
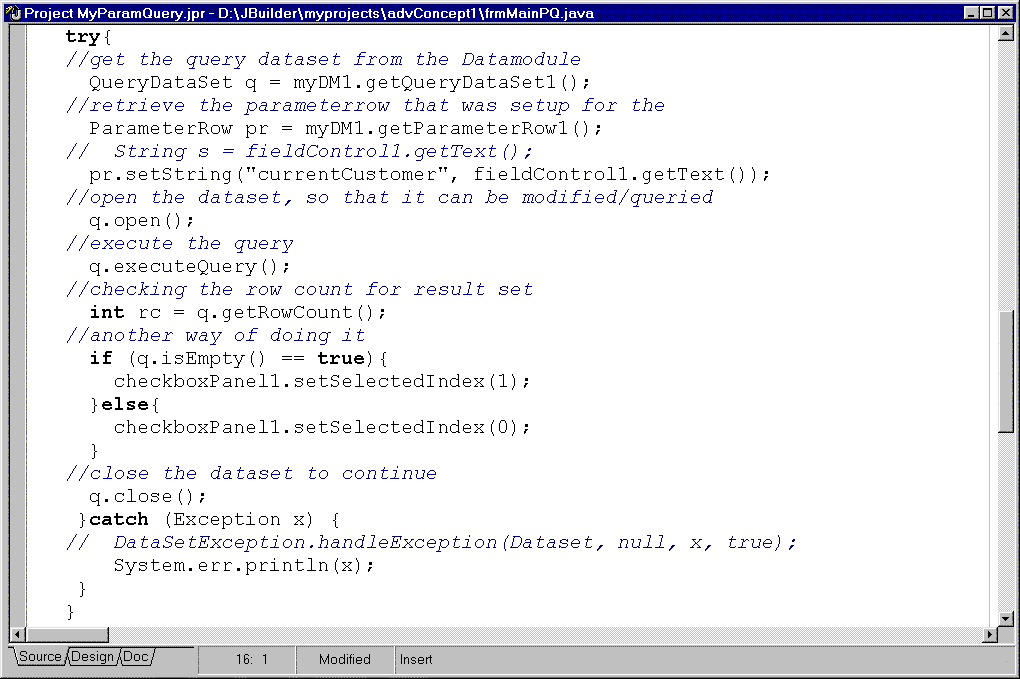
try{
-
//retrieve
the querydataset reference from the Data Module
-
QueryDataSet q = myDM1.getQueryDataSet1();
-
//retrieve the parameterrow reference
from the DataModule
-
ParameterRow pr = myDM1.getParameterRow1();
-
// Set the currentCustomer parameter
to the contentents of the
-
// fieldControl1
-
pr.setString("currentCustomer", fieldControl1.getText());
-
//Setting up the query...
-
//open the dataset, so that it can
be modified/queried
-
q.open();
-
//execute the query with the new
parameters
-
q.executeQuery();
-
//checking the row count for result
set, this is informational.
-
//Just another way to check.
-
int rc = q.getRowCount();
-
//another way of doing it
-
if (q.isEmpty() == true){
-
checkboxPanel1.setSelectedIndex(1);
-
}else{
-
checkboxPanel1.setSelectedIndex(0);
-
}
-
//close the dataset to continue
-
q.close();
-
}catch (Exception x) {
-
// DataSetException.handleException(Dataset,
null, x, true);
-
// Simple output for errors, notice that
'e' was not used, it was defined
-
// in the base snippet as an ActionEvent
-
System.err.println(x);
-
}
-
Remember All database access must be put inside a try...catch block.
-
Catch the general exception (Exception x).
-
The last thing that must be completed is to add the classes to support
database objects in the frame class.
-
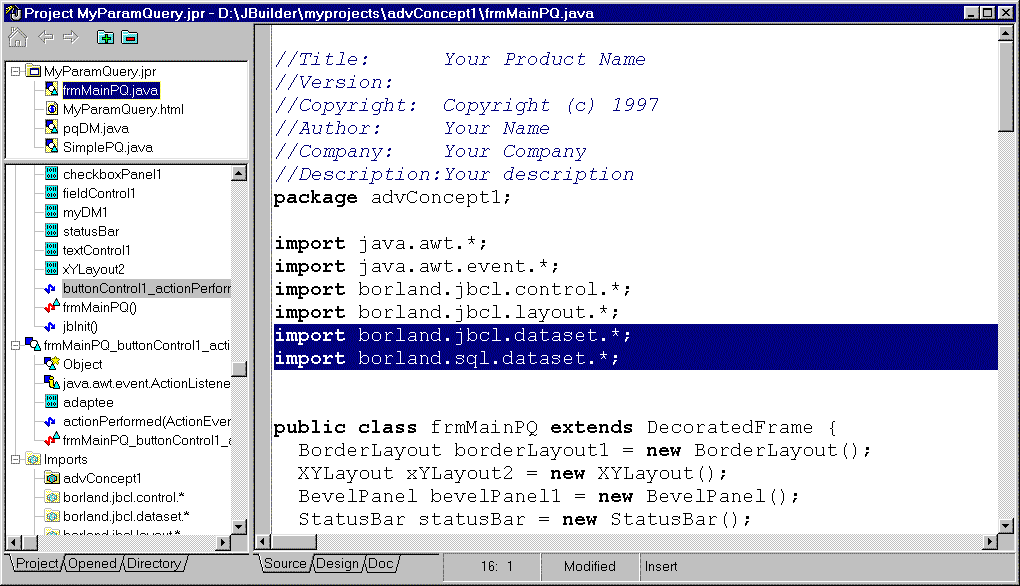
Click the pqDM.java file name and click the source tab.
-
Select the two (2) import statements that deal with databases.
-
They should be the last ones of the import statements, see below.
-
Copy them into the clipboard (ctrl-c).
-
Click the frmMainPQ.java file name.
-
Copy them into the import statements.
-
Paste (ctrl-v) in the list of imports.
-
import borland.jbcl.dataset.*;
-
import borland.sql.dataset.*;
Coding complete, click the save all icon, or
select the Save All from the File menu.
Step 7: Compile and Run
Compile and Run
-
For a company, insert Max and press return or enter.
-
Press the Find Company Button.
-
It should return found.
-
Test other options.
LAB COMPLETE!
Database Setup
Setup BDE
and or ODBC
Setup BDE:
-
Start by clicking the Start button on the task bar
-
On the start menu select the Settings item to show a child menu. The first
menu item on the child menu is the Control Panel.
-
Select the Control Panel option and the following window will be displayed.
-
-
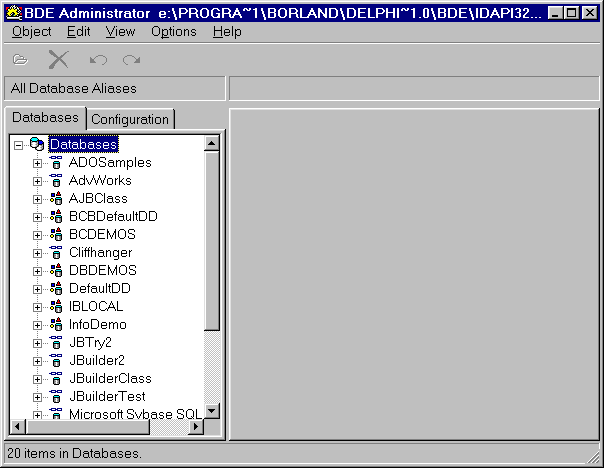
Double click on the BDE administrator icon.
-
This will display the following window:
-
Configuration of the BDE Administrator
-
Select the Object menu item.
-
Select the New menu item to display the following interface:
-
New Database Alias Dialog
-
-
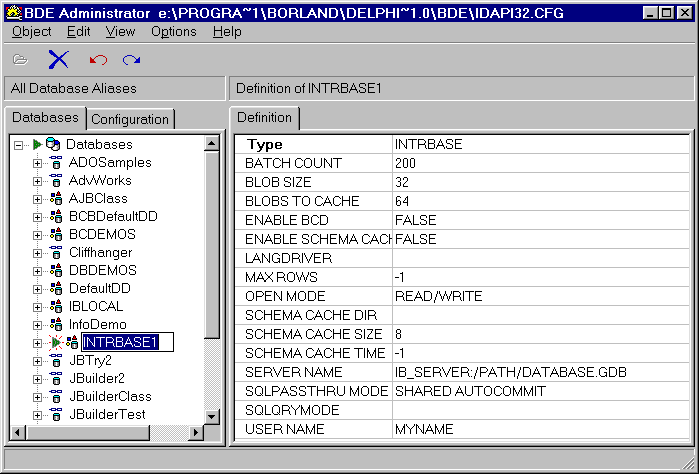
Click the drop-down listbox and choose the INTERBASE database type.
-
Then click the OK button
-
The following is a representation of what it will look like:
-
The Database pane will be displaying the INTERBASE in highlight.
-
Change the name from INTERBASE to advConcept and press return/enter.
-
Next change the Server Name to reflect where the database is located.
-
NOTE: This lab has been setup with the knowledge that you have purchased
JBuilder Professional or JBuilder Client/Server. Both products come with
either Local Interbase for the professional version and Interbase Server
for 95 or NT with the client/server addition.
-
Both databases ship with an example database. Click the Server Name
item in the options pane (right side) and ... (ellipsis) will be shown.
Change the directory to where the example database is located.
-
Select the Employee.gdb file and press the open button.
-
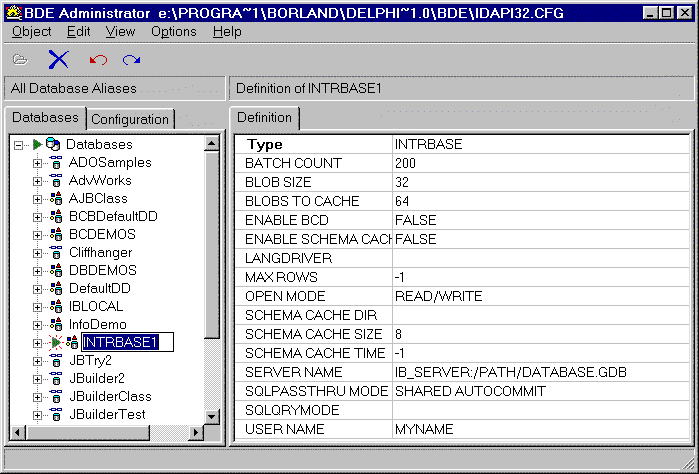
Next change the User Name from MYNAME to SYSDBA.
-
Once the changes have been made the BDE interface should look as below:
-
The last operation that must be completed is to apply the changes.
-
Two options are available.
-
Right mouse click anywhere a context sensitive menu will be displayed.
Select the Apply option, you will be asked to confirm changes.
-
Press OK
-
or
-
Select the Object menu item and select the apply option. It will display
a confirmation dialog.
-
Press OK
-
To check the setup, double click on the advConcept item in the database
pane.
-
The following dialog should appear.
-
-
Type in masterkey as the password and press the OK
-
If everything was successful then the advConcept name should have
an icon to the left of it with a yellow-green box around it. This represents
connection.
-
If successful, right mouse click on the advConcept and select the
close option. The icon to the left of the advConcept should return
to normal.
BDE is now setup.
Setup ODBC:
-
Start by clicking the Start button on the task bar
-
On the start menu select the Settings item to show a child menu. The first
menu item on the child menu is the Control Panel.
-
Select the Control Panel option and the following window will be displayed:
-
-
Double click the 32bit ODBC icon.
-
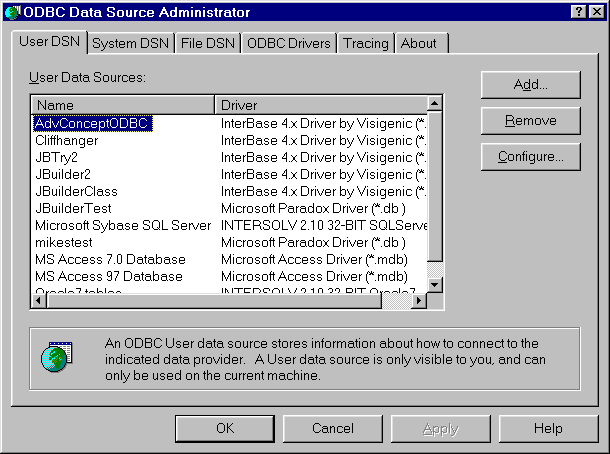
The following window will be displayed:
-
Configuring the ODBC Data Source Administrator
-
Click the Add button.
-
The Create New Data Source will be displayed.
-
Select the InterBase 4.x Driver by Visigenic (*.gdb) inside the listbox
as shown below.
-
Select the Finish button.
-
InterBase ODBC Configuration dialog will be displayed next.
-
Fill in the Data Source Name with AdvConceptODBC.
-
Fill in the Description with Advanced Concept Lab.
-
-
In the Database edit box type in the directory where the Interbase example
database is located.
-
NOTE: This lab has been setup with the knowledge that you have purchased
JBuilder Professional or JBuilder Client/Server. Both products come with
either Local Interbase for the professional version and Interbase Server
for 95 or NT with the client/server addition.
-
Both databases ship with an example database. Fill in the Database
area with a directory name such as:
-
D:\Program Files\Borland\InterBase\EXAMPLES\employee.gdb
-
The database we should use is the Employee.gdb file.
-
Next change the Username to SYSDBA.
-
Press the OK button, the program will return to the main Administration
screen.
-
From the Administrator screen, press the Configure button.
-
This will display the Interbase ODBC Configuration screen, with the fields
filled in for you, except for the password.
-
Type in masterkey as the password, you will notice that the test
button becomes active.
-
Press the Test Button.
-
-
The following confirmation dialog will be displayed:
-
-
Press the OK button.
-
If the database was found and was able to be connected to, the following
dialog should appear:
-
-
If you do not see the above dialog, most likely the path name is incorrect.
-
Correct path name and try again.
ODBC driver is now setup.
Back To Top
Home Page
|