Temple of Models


Diffuse shading

 (Position 1)

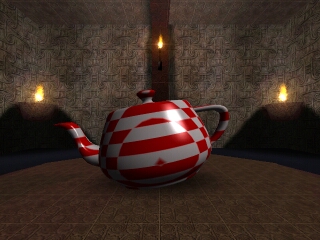
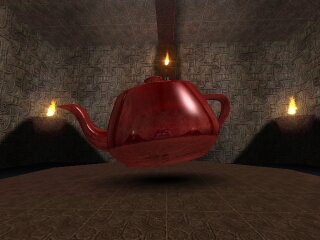
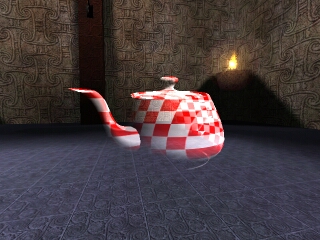
This is the simplest rendering mode for models. Plain texture mapping and diffuse (gouraud) shading. Effective point light is on the upper right and there is a significant ammount of ambient light.
Also pay attention to the soft model shadow on the floor under the teapot.

Total rendering passes: 1


Specular shading

 (Position 2)

This is usual rendering mode used for metalic, glass, wooden and plastic models. Besides texture mapping and diffuse shading, there is also a specular component of light, which is done by additional rendering pass, and not only calculated in vertices, so the specular highlight moves smoothly across polygons.

Total rendering passes: 2


Environment mapping

 (Position 3)

Environment map is used for metalic and glass objects. The effect is here used together with texture mapping, diffuse shading, and specular shading. Mapping coordinates are not generated by usual GL_SPHERE_MAP, but are rather custom calculated for full 360 degrees view independent environment mapping. The environment map is generated using all 6 environment views from the object position.

Total rendering passes: 3


Bump mapping

 (Position 4)

This is 3 pass bump mapping that takes in account viewer position, light position and point normals of the object. That way, specular highlighting of the bumps is generated using common functions of rendering hardware. No special bump-mapping rendering chips are required.
Additional pass is made for the specular shading.

Total rendering passes: 4


Translucency and transparency

 (Position 5)

Translucency is acomplished by usual alpha blending methods.
Model has smooth transition between opaque and transparent areas. That is, object is blured and blended into the background.

Transparency is done by alpha testing.
Limit between the opaque object and the background is sharp, but rounded, not jagged.


Multiply and add blending

 (Position 6)

Blending by multiplication and adding is used for some special effects.

Multiply mode darkens the background behind model. Note that the left object in the room (multiplication) is barely visible when you enter the room. That is because it darkens the background and is therefore best viewed on bright background. Approach from a different angle to observe it better.

Add mode brightens the background behind model. The right object is rendered by add-blending.


Particles

 (Position 7)
Here you can see particle effects. Fountain on the left is alpha-blended, smoke in the middle is multiplied, and the stardust effect on the right is added to the background.

Models in fog

 (Position 8)
Finally, layered fog can be applied on all kinds of models. All models behave similary when in fog. When approached from far, they smoothly appear. When watched from above (from the room entrance), lower part of models is in fog and the upper part is not.