
Visitors appreciate web sites with roll-over effects, as they add dynamic to the page. When the mouse cursor moves across an image, it can change its colors, shadows, transparency, or other aspects of its appearance.
Rollover effects are commonly used as visual clues for graphic links. But they are also a highly effective way to draw attention to follow-up information, which only becomes visible when the mouse rests over an area of the page.
In this technique, the appearance of a single image is altered, while the mouse cursor rests over it.
Place an image on the page and open the Image Toolbox to choose any image processing.
Click the ![]() Roll-Over Mode button on the tool bar. The mouse cursor will change to red.
Roll-Over Mode button on the tool bar. The mouse cursor will change to red.
Open the Active Tools from the context menu.
Change or add tool settings to be used when the image is in rollover mode, e.g. colorize the image or change to black & white.
Repeatedly click the Roll-Over Mode button on the tool bar to preview the result.
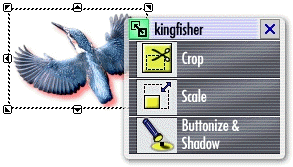
In a variation of the single image technique, a button will appear to have been pressed while the mouse cursor rests over it.
Add a suitable image to a page, layout or layout template.
Apply the Buttonize and Shadow tool. Set the direction to the top/left corner and a shadow distance of 3 pixels.
Press the Roll-Over button on the toolbar
Apply the Buttonize tool, but turn off the shadow.
Apply the Offset tool, to 3 horizontal, -3 vertical.
Repeatedly click the Roll-Over Mode button on the tool bar to preview the result.


In this technique, the visitors mouse cursor will ôuncoverö an alternate image.
Create two images of the same size, one for the "normal state" and one for the "roll-over state".
Place the "roll-over state" image at its final location.
Select the "normal state" image and open the Image Toolbox.
Click the Roll-Over Mode button on the tool bar.
Set the Transparency to a center position. This will help with aligning both images perfectly over each other.
Drag the "normal state" image perfectly on top the "roll-over state" image.
Set the Transparency of the "normal state" image to 100%. (The system should still be in roll-over mode at this time!) This will make the "normal state" image invisible in roll-over mode, allowing the "roll-over state" image to appear.
Repeatedly click the Roll-Over Mode button on the tool bar to preview the result.
The mouse cursor will uncover a narrative description.
Create a text block with the text that is to ôpop upö.
Open the Image Toolbox and apply the Backdrop tool.
Choose a suitable color, set the transparency to about 70% and set the corner radius of 0.
Place a suitable image to cover up the text and itÆs backdrop.
Right-click the image. From the context menu, select Stacking Order û Send to Back.
Place the same image a second time.
Click the Roll-Over Mode button on the tool bar.
Set the Transparency for the second image to 100%.
Repeatedly click the Roll-Over Mode button on the tool bar to preview the result.