 |
| Previous Top Next |
|
Symbols and icons
|

|

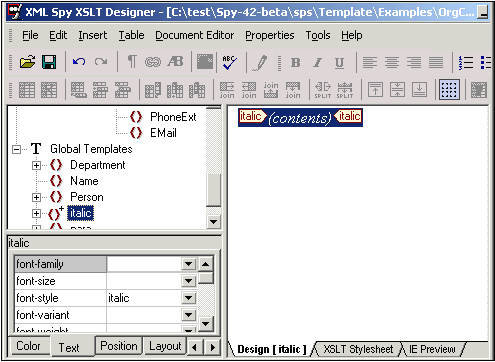
| 1. | Click the global template you want to apply formatting to (italic. in this case).
|
| The Design view now displays the italic. template. The tab also contains the name of the global template Design [italic].
|

|
| 2. | Define the attributes the global element is to have using the HTML properties window (font-style = italic).
|
| Wherever this element appears (or is applied to) text in Designer view, it will appear in italic.
|
| 3. | (Clicking the italic icon in the title bar in Document Editor inserts this element and changes the text to italic.)
|
| 1. | Click the placeholder and press the keyboard Del. key.
|
|
|
| This deletes the placeholder in the Design tab, and causes the XML data to be suppressed in the IE Preview.
|
|
|
| 1. | Click between the two tags where you want to insert the placeholder.
|
| 2. | Click right (at the cursor position) to open the context menu, and select "Insert Contents".
|
|
|
| The placeholder is inserted at the cursor position.
|

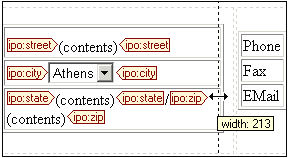
| · | Place the cursor over any table or cell border and drag when the mouse pointer changes to the double headed arrow.
|

|
| The moment you click and drag, the cell or table dimensions appear in a popup allowing you to precisely define its size.
|
|
|
| You can also use the same method on table borders that have been hidden, by clicking the View table cell bounds icon, |
| · | You can apply formatting (bold etc.) to parts of a table eg. only some of the column headers, some cells etc., by just marking them and applying bold or any other HTML formatting for example.
|
| · | Using drag left allows you to mark multiple cells and apply formatting.
|
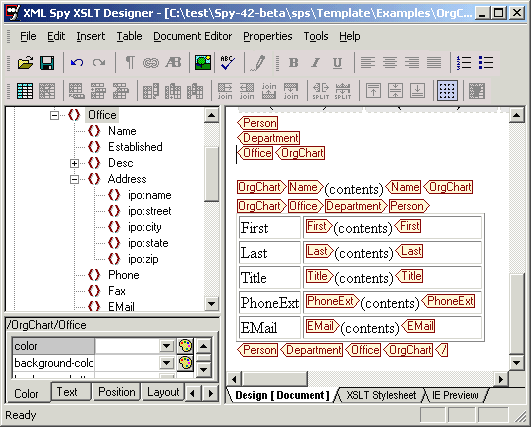
| · | Clicking an element tag marks the whole element, to which you can then apply the specific formatting. In the diagram above, clicking the <Altova><Person> element would mark the whole table.
|
|