
 |
| Previous Top Next |
|
Creating Identity constraints
|
| 1. | Open the No-constraints.xsd file in the Tutorial folder of XML Spy.
|
| 2. | Click the Altova element to select it and click the Identity constraints tab.
|
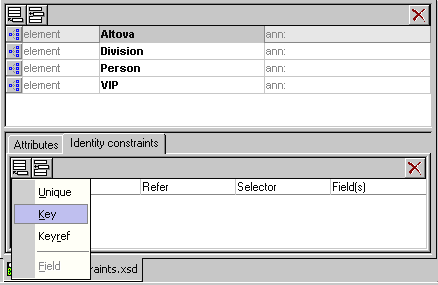
| 3. | Click the Append icon and select the Key entry.
|
|
| 4. | Enter Altova-Primary in the Name field and hit the Tab key.
|
| 5. | Enter a period character "." in the Selector field and hit the Tab key again.
|
| 6. | Enter PrimaryKey in the Field(s) cell and hit Return to confirm.
|

|
| This has defined the Altova element as the top-level table.
|
| 7. | Click the Division element in the schema overview, click the Append icon and select the Keyref entry.
|
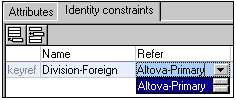
| 8. | Enter Division-Foreign in the Name field, hit the Tab key and select Altova-Primary from the combo box and hit the Tab key.
|
|
| 9. | Enter a period character "." in the Selector field and hit the Tab key again.
|
| 10. | Enter ForeignKey in the Field(s) cell and hit Return to confirm.
|
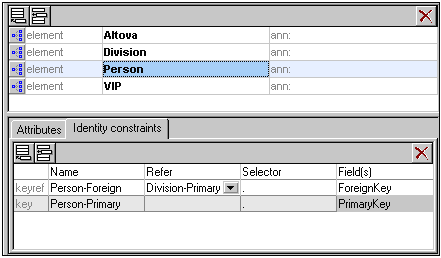
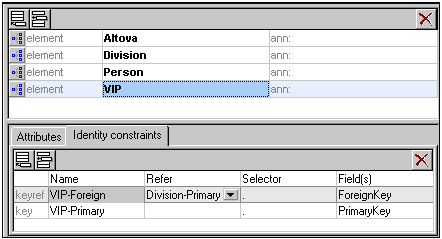
| 11. | Click the Append icon and select the Key entry. Use the same method to enter the following data: Name=Division-Primary, Selector=".", and Field(s)=PrimaryKey.
|

|
| You have now created a relationship between the Altova and Division tables/elements, where the Division table is linked to the Altova table.
|
| 1. | Select the menu option Convert | XML import based on DB Schema.
|
| 2. | Select Altova as the root table in the dialog box that opens.
|
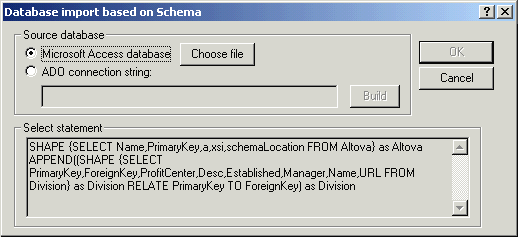
| This opens the "Database import based on Schema" dialog box. The automatically generated shape string appears in the Select statement text box. The select string shows that the Altova table is related to the Division table.
|
|
| 3. | Click the Cancel button to close the dialog box for the moment.
|
|
|
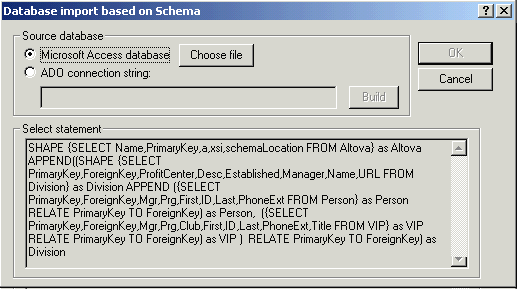
| 1. | Select the menu option Convert | XML import based on DB Schema.
|
| 2. | Select Altova as the root table in the dialog box that opens. (You can choose any one of the entries as the root table, Division, Person or VIP.)
|
| This opens the "Database import based on Schema" dialog box. The automatically generated shape string appears in the Select statement text box.
|
|
| 3. | Click the "Choose file" button, select the DB2schema.mdb file in the Tutorial folder, and click the Open button. This enables the OK button in the Database import... dialog box.
|
| 4. | Click the OK button to start the data import.
|
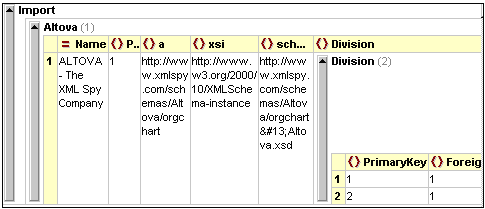
| The XML document appears as an "Untitledx.xml" file in the main window. Scroll right to see the complete structure.
|
|
| Please note:
|
| If you want to edit the select statement, start a new data import using the menu option Convert | Import database data. The select statement is automatically made available to Select statement text box after having used the Convert | XML Import based on DB Schema. You can now edit the select statement and import the data from here.
|
|