|
_______________________________________________________________________marine
missions
"UNWELCOME GUESTS"
- Proceed
according to your orders, using your flashlight as much as
possible.
- When
you get to the east landing bay, look for a ladder heading
down. Go down the corridor and flip the switch on the
generator, then return to the deck.
- Go
through the nearby door, up the elevator, and then turn on the
beacon at the console. Return to the deck, speak to the
General, and grab the grenade launcher from the box beside
him.
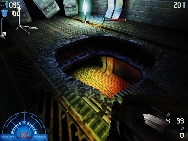
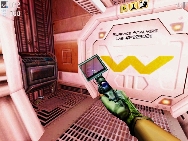
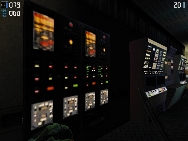
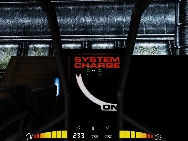
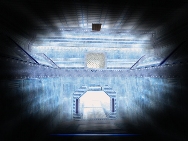
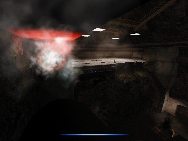
- Go
to the open bay. Go through the unlocked door and then through
the half-open door. Go left until you find a room
with a huge hole in the floor (see pic, below). Jump down the hole and
look through all the rooms until you find the one with the
security matrix. Hack it, and then get your guns ready.
 |
- Look
for an airshaft in the security room. Fight your way
through it until you come to a ladder. Take it up. Fight
your way back to the landing deck.
- When
searching for Hall, donÆt ignore dead-ends ù
power-ups are often hidden down there.
- Kill
everything in the hive, including the eggs and Hall.
|
"COLLATERAL
DAMAGE"
-
Head
to the huge open pipe to the south of your starting position.
-
Keep
moving until you come to a ladder. Go up it, and then move to
the first entry station. Activate the switch.
-
Follow
the APV. Kill the Alien behind you, and then hack the nearby
keyboard. Flip the switch to open the next set of doors.
-
Go
down the short steps in the next room; stick close to the APV,
as it offers fire support. Move into the nearby room, killing
all the Aliens. Pick up the smart gun, flip the switch, and
then go back up the short steps.
-
Make
sure your smart gun is in target-lock mode (a green reticule)
so it will lock on to the Aliens.
-
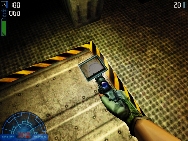
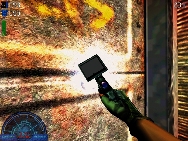
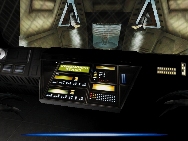
Move
through the nearby door up the steps. Grab the torch from the
lock box on the ground, and then turn around. Look for a metal
plate on the ground. Weld the two hinges off (see pic below).
- Move
straight through the underground passage. Climb up the
ladder. Kill the two Aliens and look for the nearby
armor.
- Go
down the airshaft that the Aliens just came through.
Fight your way to a ladder, and then head upward.
- Kill
the Aliens, and then look for another ladder into the
ventilation system. Go up the ladder, across, and then
down into the next room. Flip the switch in the room.
|
 |
-
Leave
the room and head toward your APV. To the right of the
APV is a door: go in there and take a right. Head down
the stairs. Look under the stairs for health and
smart-gun ammo.
-
Move
out into the main hallway and into the nearby room. Move
down the service shaft and follow it to the other
ladder. Go up the ladder and kill everything in this
large hallway.
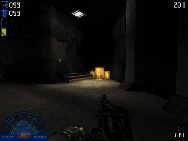
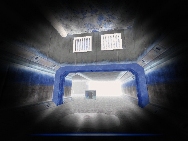
-
Look
for some explosive canisters near a door (see pic, right). Shoot them, go
through the door, and then hack the security grid.
|
 |
"BETRAYAL"
- After
you wake up, take the knife and kill the guard. Move up the
ladder and kill the other guard. Be sure to look for the
nearby lock box.
- Go
out the room and look for a ladder. There are green switches
on the wall that open the gates. Move to the top of the ladder
and go through the shaft on the wall.
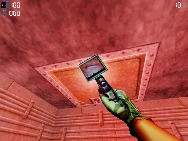 |
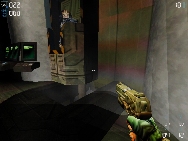
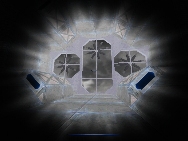
- Move
through the shaft until you come to an elevator. Hop on
the netting on the bottom of the elevator and wait for
it to go up. When it stops, move through the shaft
behind you to a nearby room. Kill the face hugger, grab
the torch, and cut the lock on the ceiling panel (see pic, left).
- Climb
up and move into the hallway. Move through the labs;
look for a door marked "Surface Analysis Lab" (see pic, middle left).
To the left of the door is a padlock on the ground. Use
torch to cut it.
|
 |
- Go
into the airshaft and move until you get to a ladder.
Take it down until you get to a gate with a green lock
on it. Hit the switch and move through the gate.
- Hop
down into the lab with the Predator. Hit the switch on
the wall behind him, and then jump down the opening
behind the PredatorÆs cell (see pic, bottom left). In the next room,
look for an air vent above some containers. Shoot it
and then climb through.
|
 |
- Cut
the next two padlocks. Move into the lab headquarters.
After the mysterious watcher contacts you, grab the
health, turn on the belt, and look in the nearby drawers
for ammo and napalm.
- Turn
off the specimen security. Go down the ladder and kill
the two guards and any face huggers. Grab their
flamethrowers. Crouch onto the conveyer belt. Make your
way across the other side of the egg chamber to the hole
in the floor. Swim down the hole.
|
- Cut
the first padlock and climb up the nearby ladder. Flip the
security switch and then climb back down. Cut the second
padlock and swim on. When you get to the second egg chamber,
get the hell out of the water by running to the ladder on the
other side of the room.
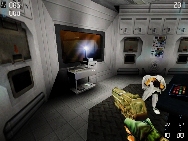
- Go
through the door the guards come out of. Look for a door in
the middle of the dark corridor. Go through it and up the
ladder. Work your way around to the elevator. Get in.
- Get
out of the elevator. Go left. Find the nearby ladder. Go
down. Go through the only unlocked door. Clear out all
the guards. (The flamethrower works best.) Cross
the bridge to the next section. Go up the ladder.
Find the lab with the lone technician in it. Take your
hacking equipment by the window (see pic, right).
- Exit
the lab and go left. Go down the ladder and then go left
two more times. Kill everyone in the office you come to.
Be sure to check the lock box for health.
|
 |
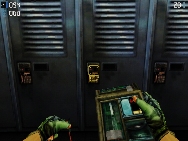
- Return
to the first level you entered ù the one with the
bathroom and lockers. Open all the lockers; hack the
ones that are locked (see pic, right). Grab the shotgun and the health.
- Look
for the locking systems just outside the bathrooms. Open
them up and hack them. This will unlock the personnel
quarters. Search all the rooms for the ID card. Take the
ID.
- Go
left out of the room with the ID. Go up the ladder. Go
through the hallway directly behind you. YouÆll come
to another ladder. Climb down it and go to the left. You
should be back in the office you were in a few minutes
ago. The turnroom in the back corner will unlock.
- Go through the turnroom.
It will take you up to an observation deck. Grab the CD
on the corner and return to the turnroom. Clear out the
office. Go right and then up the ladder. Go through the
hallway and take a left at the elevator.
- After
you escape the elevator, enter the nearby control
room. Look for a panel on the wall that can be
activated (see pic, right). Open it, go through. Hack the sentry-gun
panel to turn on the guns.
- Follow
the skybridges around to the service elevator. Take the
elevator to the surface. Quickly climb down, grab your
gear, and kill the guards. To use the rocket
launcher effectively, be sure it is in
"seeker" mode (green reticule) so it will lock
on to targets.
|
 |
 |
|
"A
LONG DETOUR"
- Open
the nearby lock box. Go down the hole the Aliens came out of.
Fight your way through hallways.
- Use
the torch to burn the locks off the door at the end of the
hallway (see top pic, below). Fight your way into the main room. Go down the ramp,
killing everything you can with the flamethrower. Turn on the
power and grab the smartgun from the nearby lockbox.
 |
- Follow
the corridor around to the large room. Take the ramp
down to level 2. Go in the only unlocked room. Cut the
padlock; turn on the power. Using the crates, hop up to
the upper level and flip the crane control switch. One
of the lockers can be hacked for more armor.
- Look
near the crane for an unlocked door. Go through it,
proceed down the hall, and turn on the sentry guns.
|
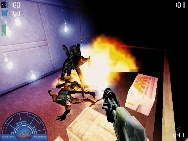 |
- After
the load screen youÆll get on a platform lift. Wait
for it to stop. Lay down some flares and kill the
incoming Aliens (see pic, left). As soon as the rush stops, look for a
ledge behind the lift. ThereÆs a ladder that you can
take up.
- Go
outside and then into the unlocked door. Follow the path
around until you come to some electrical arcs across the
hallway. Go in the nearby control room and turn off the
power.
- The
easiest way to kill the Predator (see pic, left) is to go to the very
end of the path, where he will face you on the ground.
Use the heat-seeking rockets to take him out.
"LOOSE ENDS"
- Follow
the path around, killing anything that gets in your way.
- Go
to the comm. center and get it back online. Grab the
mini-gun.
- Go
back to the landing bay. Some health is hidden in a vent
near the entrance. Kill the Alien. Get aboard the
dropship.
|
 |
"SAVIOR"
- Make
your way down the shaft. Kill all Aliens. When you get
to the elevator, look for an energy switch (see pic, right). The handle
can be hard to see: just move your view around until the
reticule turns green. Turn on the power, get in the
elevator, and take it down.
- Kill
all the Aliens. There are two mysterious generators. At
the top of them are some struts that are preventing them
from working. Destroy all the struts at the top of both
generators (see pic, bottom right).
- Move through the double
doors the generators open. Unleash missiles on the
Aliens.
- Head on and look for a
hole in the floor.
- After
you get out of the exo-suit, head through the hive. Look
for weapons lying on the floor around the queen.
(Fighting her with the mini-gun is your best bet.) Once
sheÆs dead, go out the hole in the wall opposite
the one you came in. Haul ass to your dropship.
|
 |
 |
________________________________________________________________alien
missions
"BIRTH"
- Hop
out the open window. Make your way to the ground. Stick
close to the walls while you work your way through the
streets. Sneak past the guards.
- Look
for an open cargo area and the truck by its entrance.
Behind the truck are some cats. Climb into their pens
through a hole in the fence.
- After
you eat the cats, kill the first two guys who discover
you.
- Follow
the path around, killing all the guards. YouÆll soon
come to some animal pens/labs. Look for a hole in
the ceiling of the second lab. In the top of the lab is
a vent. Go through it (see pic, right).
|
 |
"SURPRISE"
 |
- Look
for a console at the end of a hallway. Smash the console
to release your fellow Aliens. Exit the room and head
down the elevator shaft that opens up.
- Kill
the guards and move into the courtyard. Smash the door
on the other side of the courtyard and move on.
- When
you get to the open area with the two trucks on lifts,
look below the trucks for a vent (see pic, left). Follow the vent into
the adjoining room. Kill the two guards and look for the
vent over the door. Enter it.
|
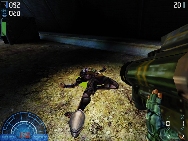
"ESCAPE"
- Kill
the first few guards. Look for a metal grate over the doorway (see pic, below left).
Climb into the ventilation shaft and destroy the electrical
boxes controlling the fans.
- Move
through the vents. Hop down and kill the guards. Go to the
hallway with the turrets. Destroy them and look for a grate on
the ground. Destroy it and move through.
 |
- The
rest of this level consists entirely of moving through
the ventilation shafts. Keep an eye out for grates that
can be destroyed.
- To
defeat the Predator, move down to the bottom level
without letting him see you. Use your leap attack
(default E) and then claw him. As soon as he dies, leave
the room the same way you entered to avoid the
explosion.
|
"VENGEANCE"
- Make
your way through labs. Look for grates that can be
destroyed on the ceiling. Destroy the control panel in
front of the xenomorph storage facility (see pic, top right).
- After freeing the Aliens,
go back outside the lab. Go through the door the guard
comes through. Follow the path to a room with two sets
of stairs. Go up the right one and look for a grate in
the ceiling. Enter it.
- Follow
the vents, killing everything in your path. When you
come to a room with three Aliens floating in containers,
kill the guards and then destroy the console that
controls the crane. After the crane makes a hole in the
floor, jump through.
- When you get to the bottom
of the hole, destroy the nearby console.
- Continue
through the hallways. Destroy the electric relay by the
artificial hive. Move into the room with the scientists.
Look for a metal plate on the floor. Crawl through it
and then follow it up the shaft to the opening without a
fan at the top (see pic, bottom right).
|
 |
 |
"ABDUCTION"
- Stay
close to the walls so those sentry guns donÆt blow you
apart.
- When
you get to the first major dead-end, look for a tunnel by the
steam.
 |
"PURSUIT"
- Make
your way through the corridors, killing anything you
see. Smash the electrical boxes on the walls to open
doors.
- Look
for fragile vents above doors (see pic, left). To destroy the large fan
at the top of the shaft, destroy the three power
generators at the bottom of the shaft.
|
"FREEDOM"
- When
you come to the generator control room, look for a basement
area. Once there, destroy the generator. Go back up to the
control room and kill the two guards.
- Defeat
the next Predator the same way you did the first one. Then
look for a steam vent ù your exit to the cavern (see pic, below).
 |
- Climb
up through the enormous elevator shaft. Look for the
rusty vent at the top.
- Climb
through the pipeworks and destroy the two hydraulics
consoles. Make your way to the flight control room and
destroy the telemetry relay.
- Defeat
the two Predators the same way you beat the first two.
- Destroy
the landing beacon in the room behind the platform.
- Destroy
Dr. Eisenberg.
|
|