|
___________________________________________________________________________general tips
COMBAT TACTICS
Unlike most other space combat ôsimulations,ö I-War 2 serves up a rather high level of honest-to-goodness simulation. The game takes a little thing called ôinertiaö into account when modeling the space-flight characteristics of its spacecraft and weapons. This means you wonÆt be able to stop and turn on a dime when engaged in combat. Why? Remember your Physics 101: Objects in motion tend to stay in motion ù especially in space, where thereÆs zero friction to slow Æem down! As a result, performing the delicate maneuvers necessary to scan ships up-close, pick up looted goods, and survive a dogfight takes a lot more skill and patience than you may be used to.
We found it very beneficial, after a lot of practice, to ignore the throttle controls, electing instead to use the keyboardÆs forward and reverse thruster-override keys in combination with the lateral thruster keys. These are located in a Quake-friendly A-S-W-D keyboard configuration that many should find comforting. Using these keys and your joystick for direction and roll movements (a SideWinder stick is well-suited to the task) makes controlling your spacecraft much easier than using your keyboard or joystick alone. Plus, youÆll be able to reduce the occurrence of unwanted high-power ôslides,ö where your forward momentum makes it next to impossible to execute a turn or reverse your direction. If you find yourself in this situation, use reverse thrust override and lateral thrust to regain control. If the situation is dire, hit the manual LDS key ù ôMöù and hope for the best.
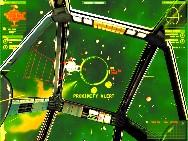
Never travel straight at a target. Instead, apply alternating left and right thrust as you attack. Like your ship, enemy missiles are unable to execute quick, dramatic shifts in direction. Therefore, relatively minor adjustments in the lateral position of your ship will cause many incoming missiles to miss their mark.
Always engage your enemy from a distance! When approaching a waypoint you know will be hot, turn off the Autopilot when youÆre still at least 50 kilometers away. Stop and carefully assess the situation with your scanners from a safe range. Target the closest enemy and then creep close enough to engage it with long-range weapons (Harrower or Seeker missiles). Often, only the targeted enemy will react to your presence and you can take it out quickly. Then, just repeat the process until youÆve eliminated all nearby ships.
 |
Never put your ship between two or more baddies! Your shields automatically apply extra power to the areas taking incoming damage at the cost of reducing shielding in other areas. If more than one part of your ship is getting hit, your shields wonÆt be able to compensate, and youÆll be blown up in a hurry. Use this shield limitation to your advantage when attacking the enemy: strike ships from multiple sides, using your wingmen for assistance.
|
| <
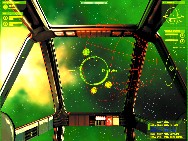
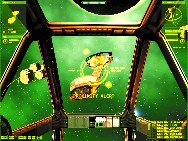
Good haul! Now tag the containers and then zip home and save
the game. Stick around too long and you'll have to deal with the
owners. |
Try not to engage in combat while traveling within a portÆs influence. Your speed will automatically be kept to less than 250mps (use the manual thrust override to get around this), and youÆll be a sitting duck for enemy missiles and concentrated laser fire.
Your Quake skills can be put to good use by ôcircle-strafing,ö or moving laterally and using the joystick to maintain your aim on the target. This maneuver is particularly effective against larger or heavily armored targets such as
Gunstars.
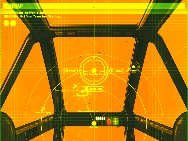
In a dogfight, itÆs imperative that you move into attack position on the tail, or ôsix,ö of your enemy. His shields are weakest here and heÆs gonna be hard-pressed to shoot back. Apply full power to your shields and fly toward your intended victim in a ôhead-onö pass, firing and applying right and left lateral thrust as you close in. When you get to within 10km or so, start to slow down by applying reverse thrust override (donÆt go faster than 1,000mps to 1,500mps). Turn to follow your target just before it starts to pass by (preferably overhead) while applying forward thrust override and appropriate lateral thrust if itÆs passing on your right or left. You should be able to swing quickly onto his ôsixö as he zooms by you. Switch full power to guns, and
blammo!
Never undock your Turret Fighters when taking on multiple enemies or a heavy ship. TheyÆre easy pickings when left on their own, and too valuable to lose!
A PATIENT PIRATE LIVES LONGER
Take the time to scout around and find easy targets that offer big payoffs, particularly early in the game. For example, donÆt waste your Disruptors on a tug carrying a mere few thousand bucks worth of rice. Instead, sneak around and wait for a fat target with more valuable cargo, unescorted if possible (there are plenty if you know where to look ù try the Griffon Transfer Station). Try not to engage a tug with more than two escorts in Act I. Once you gain access to the Turret Fighters, you should be able to engage up to four escorts and stay alive.
Once youÆve bagged the loot and called in Jafs for the pickup, scoot home and save your game. Jump to a new sector at the very least. If you stick around too long, the authorities and/or the owners of the cargo are sure to come looking for justice.
Hang around transfer stations, trading posts, and l-points. Wait for fights to break out between Marauders and the authorities or between other ôoutlawsö and independent shippers. During the chaos, youÆll be able to slip in close to the action and steal other would-be piratesÆ loot while theyÆre busy fighting. Also, youÆll be able to engage cargo-bearing targets and their escorts with less fear of interference.
If possible, target the thrusters on cargo ships with your PBCs and force them to drop their cargo before you engage the escorts. ThereÆs nothing more frustrating than successfully eliminating the escorts only to find the real target has escaped!
To take out a pair of escort fighters quickly, close to less than 10km and target and blast one escort with a Disruptor missile. Immediately target the remaining escort and take it out with a close-in barrage from your Rapid Fire PBCs (with full power to weapons). The first escort should still be disabled by the time youÆre finished with his partner, so plucking him off should be a cinch. If youÆve got Turret Fighters, this tactic can be used to take out up to four escorts relatively easily. Hit two with your Disruptors from afar, and then close in fast on the remaining two and crush Æem fast with close-range PBC fire or your Gatling
Cannon. Remember, donÆt position your ship between two hostiles!
|
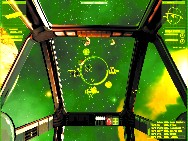
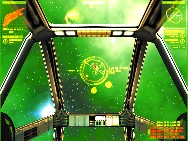
Fortune
cookie says: Be patient and you'll soon be rewarded with big
payoffs. > |
 |
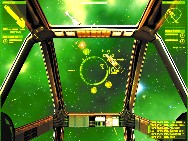
| Check your trade screen before you leave base. Look for trades that will give you either better weapons or electronics for your ship. If you donÆt have the items needed to complete the deal, scout around for the required cargo on your next pirating raid. |
____________________________________________________________________________mission tips
THE HEIST
First, snag some loot to trade with Bill for the IFF. Anything of value (4,000 or so) will do ù gemstones or antiques should be easiest to acquire. The trick to stealing the mystery fighter is to remote link to the garbage tug, dock it to the ôuseful-looking cargo container,ö and then drop that container near the crate of fighters. Finally, dock with the fighters and take them over to the garbage dump. Simple!
JOINT FORCES
Take out the Marauder fighters by engaging them from 20km to 25km with your Turret Fighters. At the same time, have your wingmen protect you during the fight. Then scout around and locate the cache of cargo crates carrying all sorts of incendiary goodies. Dock with a crate of neutron warheads and position your ship 15km to 20km from the base (you can ignore the Gunstar, but be careful to stay out range or it wonÆt ignore you). Order your wingmen to attack the base as a way to draw fire away from you, and then fly directly at it at around 1,800mps. Hit ôUö to undock with the crate when youÆre about 5km to 6km away from the base. Then accelerate to full speed and zoom past the base. If you did this right, the crate should collide with the base and take it out. If not, dock with another crate and try again.
THE TROUBLE WITH GUNSTARS
This is perhaps the most frustrating mission in Act I, as it requires perfect timing and judicious use of Disruptors to pull off. Load up with as many Disruptors as you can carry before starting the mission. When you dock with the station, the Gunstars will be activated. However, a power flux makes each Gunstar go offline intermittently. Target the closest Gunstar and wait for it to go offline (itÆll turn yellow on your sensors). As soon as it does, undock from the station and fly directly at the Gunstar as fast as you can. Engage the Autopilot Dock when youÆre 3km to 4km away. If the Gunstar becomes active before you can engage the Autopilot Dock, hit it with a Disruptor. Remain docked with the Gunstar until Smith disables it and your ship is 100 percent repaired (the Gunstar itself should shield you from taking critical damage while youÆre docked). Repeat this process with the remaining five Gunstars. Patience is key ù make sure you wait for repairs and for each targeted Gunstar to go offline before you attempt to dock with it.
|