 Use Tables to Enliven Document Formats Use Tables to Enliven Document Formats |
|
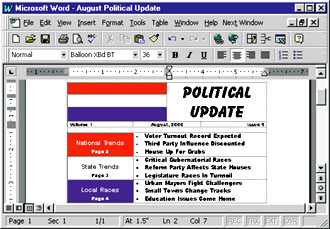
Give your documents more impact by using Word or WordPerfect tables to make page layouts more colourful and captivating. As FIGURE 1 shows, you can create colours and alignments in tables that would take a long time to do with text boxes and graphical tools. Word 97 and 2000: To create a table anywhere on the page, select TableòDraw Table. Put table cells where you need them by clicking and dragging with the table-drawing mouse pointer, which is easier to use than the InsertòTable command. To turn off the table-drawing mouse pointer, simply choose TableòDraw Table again or click the Draw Table icon (the first option on the Tables and Borders toolbar). The lives of a cell: Normal text can't appear next to a table cell, so create cells for text as part of the table. Adjust the position and size of cells by moving the mouse pointer over a border until the pointer changes into a double-headed arrow. Then drag the border to a new position. To equalise height or width, select the cells and choose either Distribute Rows Evenly or Distribute Columns Evenly on the Tables and Borders toolbar. Crossing the border: To remove border lines from your table, click TableòSelect Table, then select FormatòBorders and Shading. Under the Borders tab of the Borders and Shading dialog box, select None, and click OK. To add a colour or pattern background to a cell or group of cells, click in the cell or select a group of cells, choose FormatòBorders and Shading, and click the Shading tab in the Borders and Shading dialog box. Select a colour for the cell in the Fill area, or choose a pattern or percentage of shading from the Styles list in the Patterns area. Click OK to apply the background. Tabling text: To align text within a cell, select it, and click the desired text alignment icon (Align Left, Center, Align Right, or Justify) on the Formatting toolbar. Format text to include a contrasting text colour for cells with colour backgrounds by selecting the text and then choosing FormatòFont. After making your changes in the dialog box, click OK. WordPerfect 8 and 9: To create a table you can position anywhere on the page, select InsertòTable. Confirm that Drag to create a new table is checked, set the number of rows and columns for the table, and click Create. Click and drag the table to its new location with the hand-and-rectangle mouse pointer. To move the table, place the mouse pointer over the sizing border until it becomes a four-way arrow, then click and drag the table to a new spot. Adjust cell size by moving the mouse pointer over a border until the pointer becomes a double-headed arrow, and then dragging the border to a new position. Cell division: To split a cell into multiple cells, move the mouse pointer over the cell border until it changes into a double-headed arrow, and right-click. Select Split Cell from the context menu, and pick Columns or Rows in the Split Cell dialog box. Specify the number of new cells, and click OK. Invisible borders, colourful backgrounds: To remove border lines from a table, drag across the table to select it, right-click, and choose Borders/Fill from the context menu. Click the Cell tab, then the button to the right of 'Inside', and select the upper left 'X' icon (<None>). Repeat for 'Outside', and click OK. To add a colour or pattern background, right-click in a cell or group of cells, choose Borders/Fill from the context menu, and click the Cell tab in the Properties dialog box. Click the Fill button, choose a pattern for the background, click the Foreground button, choose a colour for the fill, and click OK.
|
Category:Word Processing Issue: September 2000 |
These Web pages are produced by Australian PC World © 2000 IDG Communications