Rotate text in Word Pro
Rotate text in Word Pro
|
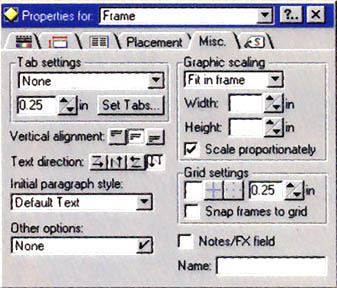
Tip A vertical line of text running up the left side of your letterhead or down the right side of a brochure can be striking, and it's easy to create in Word Pro 96 and 97. Here's a quick six-step guide to changing text direction in Word Pro: 1. Start by selecting Create--Frame. In the Create Frame dialogue box, click Size and Place Frame Manually. 2. Drag a frame onto your document, then release the mouse button. 3. Type your text inside the frame, then select it and choose a font, size, and colour using normal Word Pro formatting commands. If you've created a long vertical frame, much of the text you enter won't be visible until it's rotated to fit the frame. 4. Right-click the frame, then select Frame Properties from the resulting menu. 5. In the Properties for Frame InfoBox, click the Misc. tab, then click one of the four Text Direction icons to display text horizontally, from left to right; vertically, up the left side of the page; horizontally and upside down, from right to left; or vertically, down the right side of the page Click one of the Vertical Alignment icons to position the text at the top of the frame, in the centre, or at the bottom. While the InfoBox is open, set other frame options such as borders and background colours and patterns. 6. Close the InfoBox, then adjust the frame's size and position if necessary. - George Campbell
Change the direction of text in a Word Pro fram by selecting from this InfoBox
| Category: Word processing Issue: Oct 1997 Pages: 160 |
These Web pages are produced by Australian PC World © 1997 IDG Communications