 Make Your Backups Painless and Brainless Make Your Backups Painless and Brainless |
|
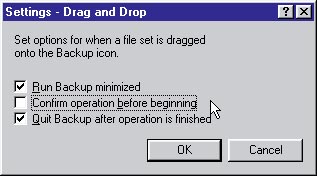
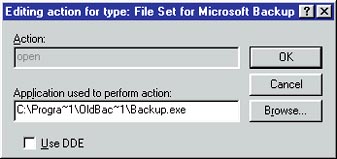
We all know we should make copies of our files in case of emergencies, but few of us do it regularly. Taking a few steps to set up a good system, though, can make the task of backing up files too easy to bother avoiding and too automatic to forget. Divide and conquer: If you want truly automatic backups, the copied files must fit on the destination medium without your having to swap tapes or disks. Tape drives, Jaz disks, Zip disks, and network drives are ideal destinations for backup files because they can hold so much data. Even these media can fill to capacity, however, if you back up your entire system in one swoop. The solution is to create several mini-backup systems, each with its own schedule and destination. For example, if you use Microsoft Backup, you can create one backup .set file that copies your Windows and root directories on Mondays, another that copies your Program Files folder on Wednesdays, and a third that copies your data files on Fridays. Then you just have to remember to put in a disk or tape with sufficient space every couple of days. Automation 95: If you have Windows 95 and Microsoft Plus, you can use the System Agent utility to run Microsoft Backup. Begin by choosing StartòProgramsòAccessoriesòSystem ToolsòBackup. Use the check boxes in the left and/or right panes to select the folders or files you want to back up. Then click Next Step and select a destination folder, disk drive, or tape drive for your backup. Choose SettingsòOptions, click the Backup tab, and check Quit Backup after operation is finished. Next, specify any other desired settings on the Backup tab of the Options menu, and click OK. Choose FileòSave As, specify a name and location for this backup set, and click Save. Choose SettingsòDrag and Drop and uncheck Confirm operation before beginning (see FIGURE 2). Click OK, and choose FileòExit. Now double-click the System Agent icon in the tray area of the taskbar. Choose ProgramòSchedule a New Program, and click the Browse button. For the "Files of type" designation, choose All Files (*.*). Navigate to the folder where you saved your backup set, select it, and click Open. Doing this adds the set to the Program dialog box. Ordinarily, you'd include the actual backup program here, but since .set files are associated with Microsoft Backup, simply listing the file will launch Backup when you need it. Now click When To Run, specify your desired schedule, and click OK. Close the System Agent window. If you want to schedule multiple backups for different sets of files and/or for different locations, repeat the steps in this tip, using a different .set file name each time. Automation 98: Now for the bad news: The Microsoft Backup version that accompanies Windows 98 does not permit automated backups. Sure, you can use the Task Scheduler to start Microsoft Backup, but it will still need input from you before it does anything useful. If you upgraded from Windows 95 and don't mind using the Win 95 version of Backup, you can use the older version to automate backups. First, make a new folder on your hard drive to hold the old version of Backup. For easy configuration, give this folder a name containing no more than eight characters, and make sure its parent folders have short names, too. Next, pop your Win 95 CD into the CD-ROM drive, and use Windows Explorer to locate the Win 95 .cab files, which are the compressed "cabinet" files holding the files you want. Make a note of the path. Now choose StartòRun and type three things: the command to extract the files-namely, Extract /a /l-followed by the path to your new folder (use quotation marks if the path contains spaces or long file names); the path to the .cab file you want to begin looking in (win95_04.cab should work in most cases); and the names of the files you want to extract. The three elements should be separated by spaces. The /a switch ensures that the command looks through all .cab files, starting with the one you name; and the /l switch lets you specify the destination of the extracted files. If your new folder is C:\Program Files\Old Backup and your Win 95 .cab files are in E:\win95, your command would look something like this: Extract /a /l "C:\Program Files\Old Backup" E:\win95\win95_04.cab backup.* Chiadi.dll Chikdi.dll Qic117.vxd. (Of course, your paths will likely differ somewhat.) Then press <Enter>. A DOS window will open as the program extracts and copies files. If you don't obtain all the necessary files, check your typing and try starting with an earlier .cab file number (such as win95_02.cab). When you've successfully copied the files, close the DOS window (if necessary), and move the Qic117.vxd file from your new folder to the Windows System folder. Now you need to associate your backup .set files with this Windows 95 program so launching them will automatically back up the specified files. In Explorer, choose ViewòFolder Options and click the File Types tab. In the list of registered file types, select File Set for Microsoft Backup, and click Edit. Select Open in the Actions list, and click Edit. In the next dialog box, click Browse, find and select the newly installed Win 95 backup.exe file, and click Open. If your backup application is stored in a path that uses no spaces or long folder names, the path you see in the dialog box will have no quotation marks. If so, everything's fine. If not, you need to revise the path to address some quirks involved in using this program in Windows 98: Start by deleting the quotation marks; then edit any long folder names or names with spaces to delete all but the first six characters and eliminate the spaces. Finally, add ~1 to the end of each truncated folder name. For example, if you used the path from the above example, your edited text would read C:\Progra~1\OldBac~1\Backup.exe (see FIGURE 3). Again, your specific path may differ. When you've finished trimming the path appropriately, click OK and Close twice to close all dialog boxes. Now you can start the old backup application by double-clicking the backup.exe file (or a shortcut to it). Follow the instructions in "Automation 95" above to configure Backup and to create a custom .set file. (For easiest configuration, save your .set file with a short file name in a path with short folder names.) This time, however, you will use Task Scheduler instead of System Agent: Double-click the Task Scheduler icon in the taskbar's tray area (the area near the clock), or double-click the Scheduled Tasks folder in the My Computer window. Then use Explorer to locate the .set file you created, and drag it into the Scheduled Tasks window. Right-click the icon and choose Properties. If the path in the Run box has any long folder names, long file names, or spaces, trim it to eliminate the quotation marks and the excess characters, just as you did with the path to backup.exe. For example, if the path in the Run box reads "C:\My Documents\My Backup.set", edit it to read "C:\MyDocu~1\MyBack~1.set". Click the Schedule tab, and specify when you want the backup to be made; then click OK.
By Scott Dunn |
Category:Windows 9x Issue: November 2000 |
These Web pages are produced by Australian PC World © 2000 IDG Communications