 Create more attractive return address labels
Everyone needs a few sheets of return address labels occasionally, and today's word processors can create them quickly. You just need to know a few tricks. Word 6.0 and later. Word uses the default left-aligned Normal style for label text, but the program's standard menu and keyboard formatting commands don't work in the dialogue box. 1. Select ToolsûEnvelopes and Labels. 2. Click the Labels tab in the Envelopes and Labels dialogue box, then click Full Page of the Same Label if that option is not already selected. Click Options. 3. In the Label Options dialogue box, choose the type of label you have on hand from the Product number list. Click OK. 4. Type the return address you want to print, then highlight it. Next, right-click the highlighted text, choose Font from the pop-up menu and select a font style and size for your address. You may want to apply a different font to the company name. 5. With the address still selected, right-click again, but this time select Paragraph. Choose Centered in the Alignment list of the Paragraph dialogue box, then click OK. 6. To adjust the text vertically on the label, position the cursor at the beginning of the first line of text, then press the <Enter> key. Click to the left of the resulting blank line, then right-click and select Font from the pop-up menu. Adjust the type size in the Font dialogue box as needed. 7. You'll probably need to print more sheets of these labels from time to time, so instead of clicking Print in the Envelopes and Labels dialogue box, click New Document. Word then creates a document containing a full sheet of labels. Save this file for reuse the next time you need return address labels. WordPerfect 6.1 and later. WordPerfect makes it easy to format labels, since you can use the program's normal commands and buttons. But getting a full sheet of the same label is a little tricky. 1. Select FormatûLabels. 2. In the Labels dialogue box, choose the type of labels you have on hand from the Labels list, then click Select. 3. WordPerfect will display a single blank label on the screen. Type your return address, formatting it using normal WordPerfect commands and toolbars. 4. To centre your address horizontally on the label, click the Alignment icon on the toolbar and select Center. 5. To centre the address vertically, select FormatûPageûCenter, then in the resulting dialogue box select Current and subsequent pages and click OK. This works because the program treats each label as a page. 6. If you want to get really fancy, select FormatûPageûBorder/Fill and choose a border style and options from those available. If you do this, be sure to deselect Apply border to current page only in the Page Border/Fill dialogue box, if it's not already greyed out. 7. Once you like the way your label looks, select the text in the label, press <Ctrl>-C to copy it to the Clipboard, then press the right arrow key to remove highlighting. 8. Press <Ctrl>-<Enter> to create the next blank label, and press <Ctrl>-V to paste the formatted text. Repeat this step until you have a full page of labels. 9. Save the resulting document. û George Campbell

Use Word's envelopes and labels command to create and print sheets of return address labels
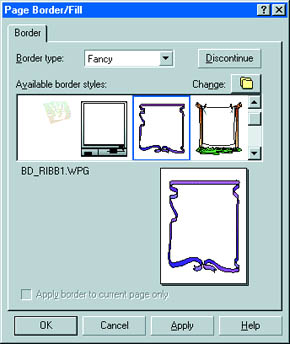
In WordPerfect you can enhance address labels with a page border
Category: word processing
Issue: May 1998