Back to main AniPack page
Download Photoshop file
Note: we recommend that you save out a new version of the Photoshop animation file before customizing the animation so that if you end up with something you don't like or want to generate a new variation, you can always start over. Of course, you can always download the Photoshop file from the NavWorks site again, but it will usually just be easier and faster if you make your own copies.
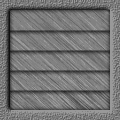
Due to the unique requirements of the vent animation, each frame's contents are in a separate Photoshop file. To customize the Vent animation Photoshop files, fill the "Top Texture" layer with the desired color or texture. The color or texture that you use for the "Top Texture layer should match the background color or texture of the Web page that the animation will be playing on. Most of the Photoshop documents contain a "Bottom Texure" layer that looks like the inside of an airshaft. If you want the opened vents to show something else, you'll need to put your artwork on or above the "Bottom Texture" layer. Finally, you can customize the vent blades texture or color. In the "vent1.psd" file you would need to colorize or fill the "Closed 1-5" layers. The rest of the Photoshop files allow you to customize the vent blades via a single layer called "Open Texture." Finally, note that the "vent1.psd" files contains five "Metal Source" layers. These layers were used to generate the 5 blades. Using different textures for each blade makes the effect more realstic. They are included for your convience.
While it's admittedly tedious to have 5 separate Photoshop files for the vent animation--it does simply things a bit in terms of creating the animation. To create the first frame, open the "vent1.psd" file. Make sure all layers are visible (except the Metal Source layers). Click on a visible layer and Select All. Select Copy Merged from the Edit menu, open a new document, and paste the contents into the new document. To create frame 2, open "vent2.psd", make all layers visible (be sure to customize "vent2.psd" with the same customizations applied to "vent1.psd"), Select All, Copy Merged, and paste into the same document that you pasted frame 1 into. Repeat this process with the rest of the vent photoshop files.
Note that for this animation to loop correctly you will need to make duplicates of many of the layers. For instance, the 5 frame animation would start with frame 1, go to frame 5 and then would go back through frames 4, 3, and 2 to loop back to frame 1.
|
|