CLICK TO DOWNLOAD
fader1.zip -- 22 Kb
|
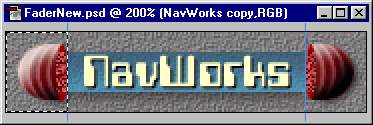
This animated effect for the "fader" animation is actually achieved using three separate animations. The two rounded end caps are separate two-frame animations that display a sort of barber-shop style effect along with a random noise effect that simulate a sort of power field on the inside tips of the end cap animations. At the center of these four animations is a text field animation that fades a short message on and off. By itself, the animation is relatively intriguing, but it loses its luster after you read the message a time or two. Text animations are particularly susceptible to causing the user to lose interest because once a viewer interprets the message, they tend to ignore the animation. We will use Javascript to randomly choose from a series of text/message animations for the center animation to help avoid this problem. Download the fader1.zip file available above and open the fader.psd file to follow along this tutorial. |
|
1. The fader.psd Photoshop file has been designed so that you can easily customize the layers to
create your own fader/random message animation. The "background," "Holes Texture," and "Ends Texture" layers are colored gray. To
customize the "background" layer to your specifications or needs fill the "background" layer with the desired color or texture.
To customize the "Holes Texture" and "Ends Texture" layers, fill with desired color or texture use the Hue/Saturation feature
with the Colorize option on. Be sure to have the Preserve Transparency option on to preserve the unique shape of the layer.
You can also customize the following layers using the Hue/Saturation feature with the Colorize option on: "25% Fade," "75% Fade,"
"Fade complete," "End 1," and "End 2." Typically you would want to make the "Fade" layers the same color and the "End" layers
the same colores.
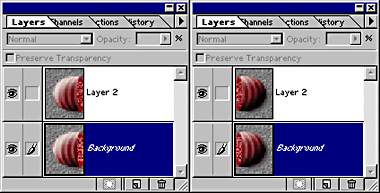
Use the type tool to add in your own text on a new layer above the "Fade complete" layer. Make sure it fits within the area as defined by the "Fade complete" layer. Center your text over the "Fade complete layer." Next make 2 copies of your text layer. Move one copy above the "75% Fade" layer and move one copy above the "25% Fade" layer. Select the copy of the text that is above the "25% Fade" layer. Open the Channels palette, load the 25% Fade Channel and then go back to the layers palette. Make sure the text layer above the "25% Fade layer is selected, press the delete key, and then deslect or remove the selection. Now select the copy of the text that is above the "75% Fade" layer. Open the Channels palette, load the "75% Fade" Channel and then go back to the layers palette. Make sure the text layer above the "75% Fade layer is selected, press the delete key, and then deslect or remove the selection. After you have customized the animation file to suit your design, save the Photoshop file with the new name "FadeNew," so that you can come back to original file if things get out of hand. 2.Now you have everything you need to create your animations. As mentioned, we are going to create three animations. First let's create the easier animations. If guides are hidden select View Guides from the View menu and ensure that the Snap to Guides feature is on. Use the guide on the left to create a selection of the left side of the FadeNew photoshop file as shown below:
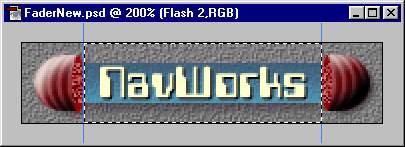
3. Now let's look at how to create the middle animation, go back to the "FadeNew" Photoshop file. Use the guides to select the middle portion of the document as shown below:
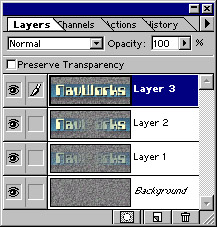
To create the second frame of the middle animation, turn on the visibility of the following layers: "25% Fade" and "25% Fade Shadow" as well as the text layer above the "25% Fade" layer. Select the "25% Fade" layer, choose Copy Merged and paste into the "MiddleFadeAnim" document. Your second frame for the middle animation should look something similar to this: Finally, to create the fourth frame of the middle animation, turn off the visibility of the following layers: "75% Fade" and "75% Fade Shadow" as well as the text layer above the 75% Fade" layer. Now turn on the visibility of the following layers: "Fade Complete" and "Fade Complete" as well as the text layer above the "Fade Complete" layer. Select the "Fade Complete" layer, choose Copy Merged and paste into the "MiddleFadeAnim" document. Save the "MiddleFadeAnim" document. The layers in your "MiddleFadeAnim" Photoshop document should look similar to those below:
In order to use the following javascript code as is, you will need to name the middle animation "center.gif". Any additional animations for the middle area would need to be named "center2.gif," "center3.gif" and so on. If you want to add more animations to the array, simply add them the the javascript image array. This will be explained in more detail below. 5. Now letís look at the script:
Basically this script randomly chooses between the three animations and then writes the HTML for the animation on the fly. Before we start parsing out this code, note that even though this Javascript handles images, it does not require a browser check. Since this code does not actually reference the image object, it is compatible with older browsers, so a browser check is not required. This particular script is written to be very flexible, letís look at how it works. Weíll start with the first function:
This function called "imgs" has four parameters: filename, width, height, and link. Each line within the function merely defines an object. Without the rest of the javascript below, this function is worthless. However, each line serves to define an attribute of the animations and give it a name. For instance, "this.filename" will be used to define the animationís filename as "filename." As we will see, the order of the parameters is very important. The next function is the random generator:
Javascript has a built in random function called "Math.random()". Invoking the "Math.random()" function is a simple matter of making a call to it. This function returns a floating point number (not a whole number) between zero and one. However, a floating point number is of little use to use unless we convert it to a whole number. So, first the result of (Math.random is multiplied by the "range" (which in this case is three because we have three images in our image array as we will see in a moment). The "+start" is an added level of flexibility. While it is not actually used in this example, it allows for a range to exist that does not start at one. For instance, if we wanted the code to randomly choose from one set of images in the morning and another set of images in the evening, we could just define a different set of "start" and "end" numbers for each part of the day. In this example, start is always "0" so "range+start" will always equal whatever the range is (3 for this example). So, basically the code in parentheses says "parse the floating number that the "Math.random()" function gives us and multiply it times 3" This gives us a number with a decimal point. For example, if "Math.Random()" came back with ".65" than ".65" would be multiplied times 3 and we would get 1.95 (3 x .65). This number is still not useful, which is why the "ParseInt" command is there. Basically "PareInt" lops off the decimal point leaving a whole number. So, "out" would equal one. Now that we have a random generator, we need to define what will be randomly chosen; that is, we need to define our animations. This is a job for an image array:
In this array, each of the image objectís parameters are listed in an order to coincide with the order of parameters defined in the "img" function. For example, the first parameter within the first object in the array is "center.gif." This paramter is thrown into the "img" function whose first parameter is filename. Since the img function says that "this.filename = filename;" this defines "center.gif" as the filename for the first object in the array. The width, height and link attributes are defined in the same way.
Youíll notice that thereís nothing defined for the link within these image objects. This is because the animations on this page arenít used as links. However, this script was written so that links could easily be added. This explains the need for the next two functions in the script:
These two functions are very similar. The first one is for random images with links and the second is for random images without links. Since this example only uses the nolink() function, Iíll talk about it first. The "nolink()" function starts off by defining a variable called "r" equal to the random generator function and passes the parameters "0" for "start" and "imgs.length-1" for "end." As discussed in previous chapters, Javascript starts counting at 0 while we nutty humans start counting at 1. For Javascript zero equals one. So, "imgs.length-1" basically counts how many images there are in the image array and then subtracts one. Therefore, in this case the "start" parameter of the "random" function is set to "0" and the "end" parameter is set to "2." Javascript starts counting at 0, so that means that the "random" function will choose a random number between three numbers: 0, 1, and 2. Below this "r" variable is a Javascript "document.write" command. This command writes the HTML for the randomly chosen animation. First notice the first quotation mark after the opening parenthesis. Everything within this quotation mark and the closing quotation mark is taken or written literally. For example, the text "<img width=" will all be written exactly as it reads when the "document.write" line is executed by the "nolink()" function. However, within the overall set of quotation marks are a set of embedded quatation marks that delineate Javascript that is not to be written literally. In other works "+imgs[r].width+" will not be written literally. Instead the Javascript will insert the result of this function call. In this case, "+imgs[r].width+" calls the "imgs" function. The results of the "random" function are fed into brackets. Once the image object is determined (the results of the random funtion), it uses the "img" function to grab the width assigned to that image object. Then this number replaces the text "+imgs[r].width+". In other words, the results of the random function is a number between one and three. So, when the number is fed into the brackets, the javascript then becomes a description for the width of one of the three images. For instance if the results of the random function were "1" then the javascript would read "+imgs[1].width+". Well in this example the "imgs[1}.width is defined early in the javascript as 119 So, this translates to the text "<img width=119."
This process is repeated for the Javascript within each set of quotations resulting in the HTML being written for each attribute of the IMG tag on the fly. The "link()" works almost exactly the same except that it also writes an anchor tag with an HREF attribute using the "link" parameter of the "img" function to write any link that is associated with the randomly chosen image object (in the example, no URLs were associated with the image objects, so the "link" function wouldnít work properly). Thereís one more thing we need to look at. We have all this flexible code, but we still need to actually put something within the HTML that will run the code. Hereís the HTML used to display the overall animated effect:
Each animation has been placed within a HTML table cell to help guarantee that they will all be placed together seamlessly. The third cell contains a call to the "nonlink" function. If links were defined within the images objects, you could simply replace "nolink()" with "link()" and the Javascript would not only randomly write one of the animations, but it write in any link that you specified for it.
|
©1998 NavWorks, All Rights Reserved.