

CLICK TO DOWNLOAD
porthole1.zip -- 200 Kb
|
|
|
1. The porhole.psd Photoshop file has been designed so that you can easily customize the layers to
create your own fog or cloud animation. The layers named
"Bottom Texture" is colored gray. To customize the "Bottom Texture" layer to your specifications or needs fill the "Bottom Texture" layer with
the desired color or texture using the Preserve Transparency option to preserve the unique
shape of the layer. Fog and water frames have been included for your convenience. If you wish to animate your own fog or
cloud textures, place them below the Highlight layer and use the "Window" channel to delete out any portions of the texture that is
outside of the porthole's hole or window. After you have customized the animation file to suit your design, save the Photoshop
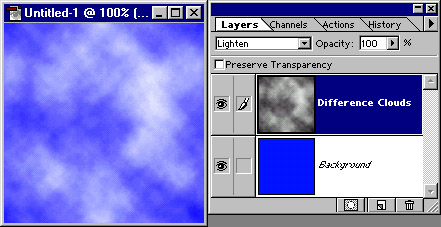
file with a new name, so that you can come back to original file if things get out of hand. 2.First we need to generate a seamless tile with the Difference Clouds or Clouds filter. The Difference Clouds and Clouds filters automatically generate seamless tiles if the files size in is divisible by 256 pixels. So, the Differnce Clouds filter and Clouds filter will create a seamless tile if you're file is 256 pixels square, or 512 pixels square, or 768 pixels square, etc. Open a 512 pixel square RGB, 72 dpi document. Press D to ensure that the foreground and background colors are black and white respectively. Apply the Difference Clouds or Clouds filter. 3.Now we have a seamless tile that you can resample to any size that your wish. To see this, resize the file to 200 pixels square. Now make a copy of the Difference Clouds tile on a new layer and name the layer "Difference Clouds". Now fill the background layer with a nice rich medium Blue color. Next select the Difference Clouds layer and change the layer mode to Lighten. Your file should look something like this now:
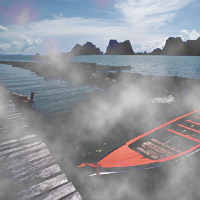
Before we move on, we'd like to share a quick trick that you can use to make sure that you have a seamless tile. Select the Difference Clouds layer and then select the Offset filter from the Filter, Other menu. Make sure the Wrap Around feature is selected and enter a value of something like 50 for the Horizontal and Vertical settings. Observe the preview. If there is no visible seam, then you know you've got a seamless tile. 4.While the file currently looks like clouds, we actually have the fog effect here. To see this, copy a picture (such as one of the samples that comes with Photoshop) below the Difference Clouds layer (see below). So, to generate the animated fog effect, follow the steps found in the Scrolling Texture Technique. Note that some subject may be too light to generate the fog effect. To fix this, place a layer in between the subject (the image that you want fog to display over) and the Differince Clouds layer. Then fill this layer with black and change it's opacity to 40-50%. This make the Fog effect show up better. See the "Dark Mask" layer in the porthole.psd for an example of this.
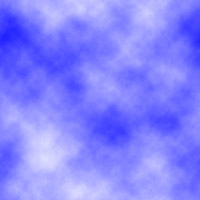
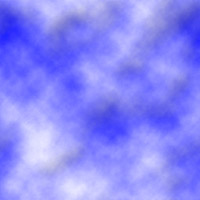
5.Now, let's go back to the file we had that looked like clouds. Fill the background layer with blue again and merge the file to the background. You're file should look similar to this:
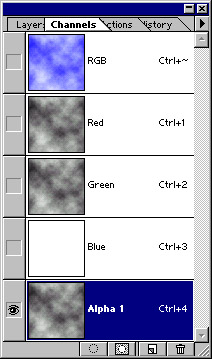
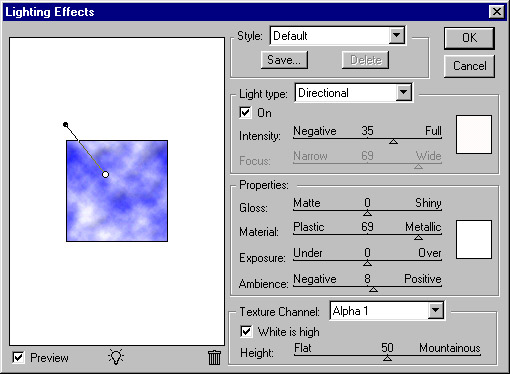
6.While this does look a bit like clouds--it is a tad flat. Clouds are more puffy looking. So let's add a little dimension to those clouds. Click on the Channels palette. Now click and drag the Red or Green Channel down to the Create New Channel button to create a new channel. Your Channels palette should look something like this:
|

©1998 NavWorks, All Rights Reserved.