 Configuring Network SettingsConfiguring Network Settings
The following procedures are available in this section:
Using the Network page (below)
LED flash, if necessary, to identify an IO-Link Master
You can use the following procedure to configure the IO-Link Master network settings if you have administrative rights. If you need more information about the options on this page, see the Network Configuration Parameters table.

The rotary switch settings override network settings configured on this page. The default rotary switch setting uses the settings configured in the flash.
Click the EDIT button.
Optionally, enter a host name.
Select the IP type, Static or DHCP.
If using a static IP address, enter the static IP address, subnet mask and IP gateway address.
If using DNS:
Enter the DNS primary server IP address.
Optionally, enter the DNS secondary server IP address.
If you want the IO-Link Master to send syslog messages to a syslog server:
Enter the syslog server's IP address (or host name if using DNS).
Enter the syslog server's port number (default is 514).
If you want to enable the SSH server, click Enable.
If necessary, change the EtherNet/IP Specific Options as required for your site:
Optionally, disable IP Address Conflict Detection.
Optionally, change the TTL Network Value.
Optionally, change the Multicast IP Address Allocation Control from Automatic to User-Defined.
Optionally, change the value for the User-Defined Number of Multicast IP Addresses.
Optionally, change the User-Defined Multicast Start IP Address.
Click Submit to save the changes.
Rotary switch settings override the network settings on this web page. The rotary switch controls the last three digits an IP address starting with 192.168.1. Default rotary switch settings are set to 000.
Switch Position |
Description |
000 |
Use the configuration in the flash. This is the default setting from the factory. |
001-254 |
This is the last three digits in the IP address. This uses the first three numbers from the configured static address, which defaults to 192.168.1.xxx. |
255-887 |
Reserved |
888 |
Reset to factory defaults |
889-997 |
Reserved |
998 |
Use DHCP |
999 |
Use default IP address |
The switches only take effect during startup, but the current position will always be shown on the Support web page.
Use this procedure to set the rotary switches.
Using a small Phillips screwdriver, unscrew the window retaining screws.
Open the window and use the screwdriver
to rotate each switch to the appropriate address. A small arrow points
to the address setting that is used.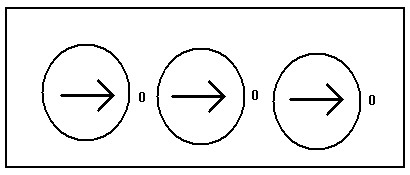
Close the window and replace the screws.
You can force the IO-Link port LEDs on this IO-Link Master into a flashing tracker pattern that allows you to easily identify a particular unit.
Click the ON button to enable the LED tracker feature on the IO-Link Master. Click the OFF button to disable the LED tracker. The LEDs remain flashing until you disable the LED tracker feature.
