


TV Cards
Matt Thompson is on the telly...
Watching the telly on a computer was unheard of many years ago, but as technology advances things change. Now we are in a position where we can stick the old goggle box on and it can be watched whilst sitting at the computer screen.
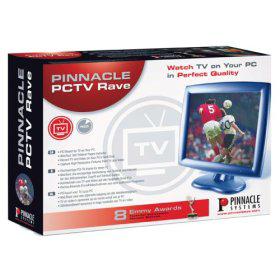
Before I start I should mention that this article is based on using a TV card on an Iyonix PC. The first thing you need to do before you can watch any TV is to get hold of a suitable TV card. I am using the Pinnacle PCTV Rave card, which I bought from a certain RISC OS dealer who just happened to have it in stock!
Pinnacle have produced many different TV cards, two basic types are supported with software for the Iyonix. These use either the BT878 or SAA7134 chips. The version of card you obtain will dictate the software you require. See www.hounsome.org.uk/remote/ident_card.html for more info.
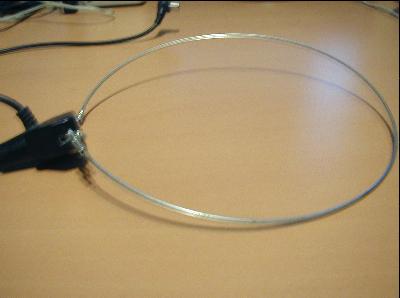
In addition to the TV Card you will also need an aerial to get a good picture reception, just as with a real television. I use the aerial shown below which is nothing special but works fine, but then as I can see the local TV mast from my room so that may have something to do with it. In other areas something better may be needed. The aerial is plugged into the computer via one of the connections on the TV card at the back of the computer.
The TV card works really well and does the job perfectly, I have had no problems with it at all. This card should cost around £30.00. There are many other TV cards available but this one is known to work perfectly with the Iyonix.
So once you have your TV card the next thing to do is to fix it into the computer. This is not a particularly difficult task but it is well worth obtaining an online guide to fitting a TV card into an Iyonix, which you can download from here http://pcitv.iconbar.com/fitting.html.
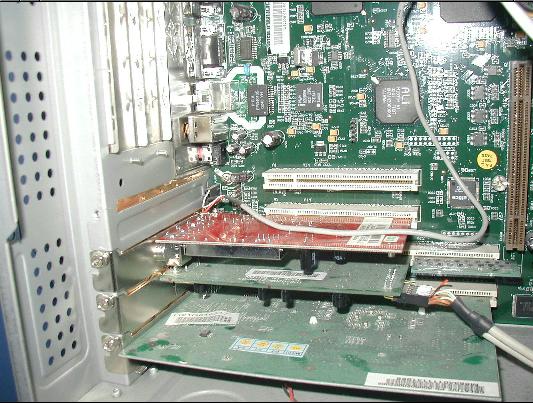
The picture below shows what the inside of the Iyonix now looks like with it's new addition. The TV card is the red circuit board, and notice the nice collection of dust building up in there too!
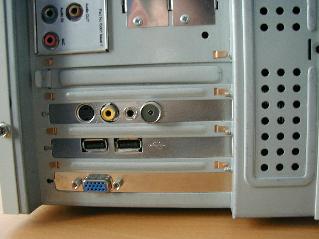
This next picture shows the new connections from the TV card sticking out of the back. The TV card connectors are the the four sockets in the third row up from the bottom of the Iyonix.
So with the computer back together and the card successfully installed the next step is to obtain the software. The TV card I have requires the program !Remote, which is written by Robin Hounsome, and you can download it from www.hounsome.org.uk/remote/index.html The latest version is V0.11.
There is another program available for other TV cards !PCITV which is written by Simon Wilson and is available from http://pcitv.iconbar.com the latest version is V0.08d.
A third program exists which is called !PCITVtext, which is also written by Robin Hounsome. This, as you may have guessed, enables teletext to be displayed, this program is currently only compatible with TV cards which are compatible with Simon Wilson's !PCITV application. A version of !PCITVtext for use with !Remote is in development.
!Remote

When you have downloaded !Remote you can now install it. As is usual with RISC OS applications it is very easy to install and to get it up and running. However, if you are upgrading to the latest version of !Remote from a previous version then installation is slightly different, so refer to the supplied documentation for the correct installation procedure.
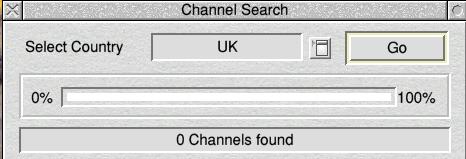
The first time you run !Remote you will need to tune in the TV channels, as you would if you had just bought a new Television. To do this run !Remote, which will install on the icon bar, then using the programs menu select the 'Channel Search' option and the following panel will appear.
There is a quick way of doing the above, if you are using !Remote for the first time (no previous installation) then clicking with the Select mouse button on the !Remote icon bar icon will automatically start it in channel search mode.
According to the accompanying helpfile, if you live in one of the listed transmitter areas you can skip the channel search and go back to the program menu and this time select 'Choices' then you will see the 'Remote Choices' window, select the 'Profiles' option in the bottom left hand corner of the panel and select your transmission area and then save it.
If like me your transmission area is not on the list (mine is Beckley, Oxford if anyone is interested) then you select 'Channel Search' and from the panel select country 'UK' in this case, then click on 'Go' and the channel search will begin. When it is complete the number of channels found will be displayed.
You will now probably need to manually shuffle the channels as they are not in the correct order as they would appear on a normal television. During scanning as each channel is found it is given a number, for example on my channel search BBC1 was channel 57 and BBC 2 was channel 63.
It is also possible to find the channel numbers online by going to the website www.bbc.co.uk/reception/transmitters/tv_trans/. Move the mouse pointer over the UK map, and move it to the area of the country you are in. Then click on the coloured area and a page of general information about that region will be displayed. If you click on the green blob it will take you directly to the transmitters for the area. For reference this link shows the channel numbers for me
You will notice that Channel 5 is not listed. To find the Channel 5 number return to the BBC transmitter reception website and you will see a link to Channel 5 coverage and you can obtain the Channel 5 number from there.
Using the program Choices panel you can now enter the channels' details. There are three fields for each channel which you enter 'Station Name' which is the station's name e.g. BBC1, 'Channel' which is the number of the channel as found in the channel search, and the 'Country' of the channel, in this case UK. The panel below shows my settings.
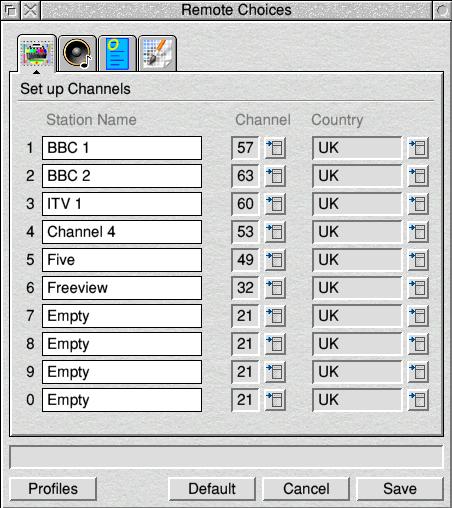
You will notice from this window that the 6th line has 'Freeview' as the station name. This is as because you can connect a freeview box to use with your TV card as well, should you wish to do so, I have not tried this to see how well it works, what with the computer being some distance away from the television with the Freeview box, but it should work without any problems.
Another way of connecting a Freeview or Sky set top box is to use the Co or Y/C inputs. This will result in a much better picture and stereo sound. An RF connection as described above will only provide mono sound.
The screenshot below shows control panel for !Remote, it is effectively the same as a normal television remote control.
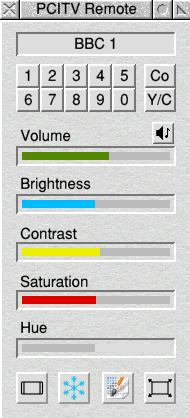
At the top of the panel it shows the name of the channel being displayed and below this is a numeric keypad which is used to select which channel you want. Number 1 being BBC 1 through to number 5 for Channel 5, with the other numbers for other channels such as number 6 for Freeview.
The 'Co' and 'Y/C' options allow the input of pictures from auxiliary equipment such as Freeview or other digital TV boxes, DVD players or Camcorders. There are standard television controls which are volume levels, brightness, contrast and saturation of the picture. The 'Hue' option is only needed and will only work when an NTSC picture source is detected.
The Pinnacle cards allow the input of composite or Y/C video and the Co and Y/C options allow these to be selected. The Pinnacle cards do not however provide any audio inputs, so for these the Iyonix own audio input must be used. A tab is provided in Choices to allow audio routing.
Finally at the bottom of the panel are four icons which perform other useful tasks. The first makes the television picture widescreen instead of normal display, the second is used to freeze the display from which you can then use the third icon - the screen grab - more effectively.
If you just grab the screen the image may be a bit blurred, but if you freeze the picture first then do a screen grab it looks a lot better. When you have made a screengrab you can open up the !Remote application by double clicking on the icon whilst holding down shift you will see the files are inside. This is the default setting, and you can customise this so that the screengrab files are put wherever you want them to go.
Finally we come to the last icon. This allows you switch from desktop mode to full screen mode.
The choices and preferences used in !Remote are found by selecting 'Choices' from the programs application icon on the icon bar. There are four sections to the choices menu, selected by clicking on one of the four tabs which are situated in the top left hand corner of the screen.
The first section is the 'Set Up Channels' which we covered earlier in the article.
The next is 'Audio Input'. This allows audio sources associated with composite and Y/C signals to be routed to the Iyonix sound system. For this to work correctly the audio from the TV card must be linked internally to the Iyonix mother board. (See the Remote help file for full details).
The third section is 'Miscellaneous Options'. From here you can configure various aspects of Remote such as window size on start up, and also modefile definitions for use with the full screen mode.
The fourth and final section is the 'Save Still Image' configuration. Here you will see the Save path option. The default is Remote$Dir which, as previously mentioned, means that all screengrabs will be put in the !Remote program directory. You can change this path to the directory where you want to put the pictures.
Below are a few screenshots taken using the framegrab option on the Remote control panel.
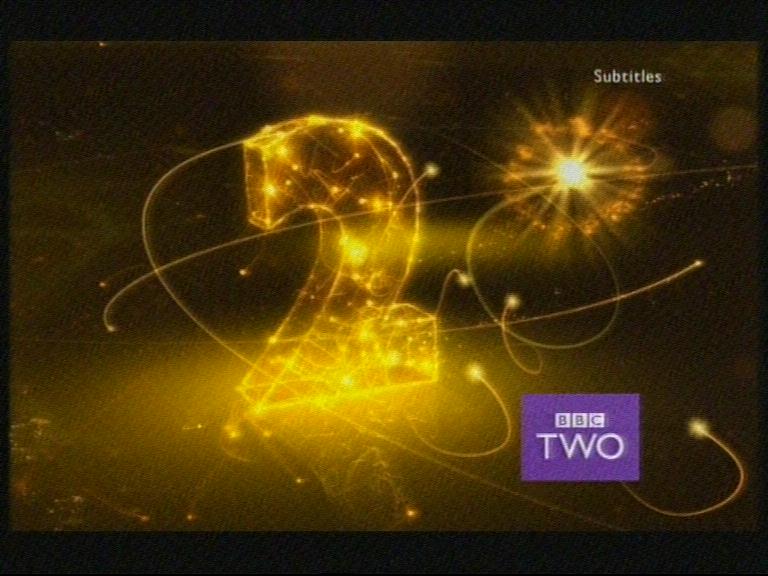
This Is BBC2
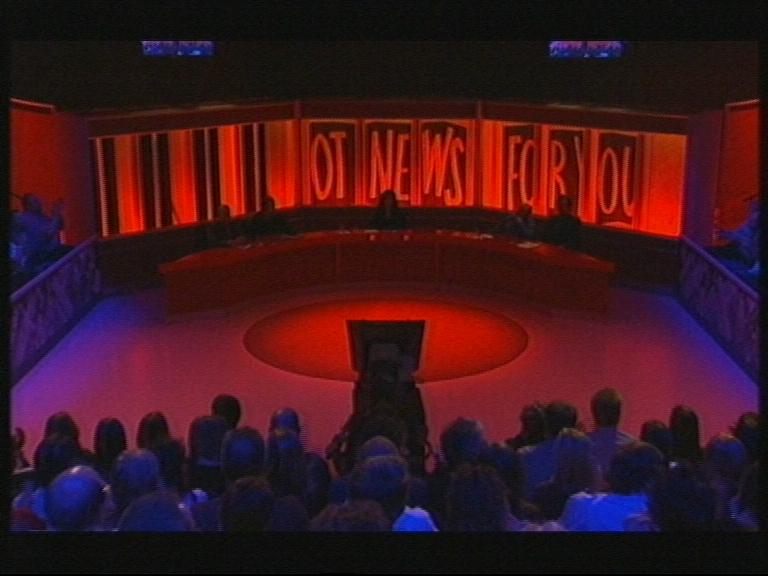
Have I Got News For You
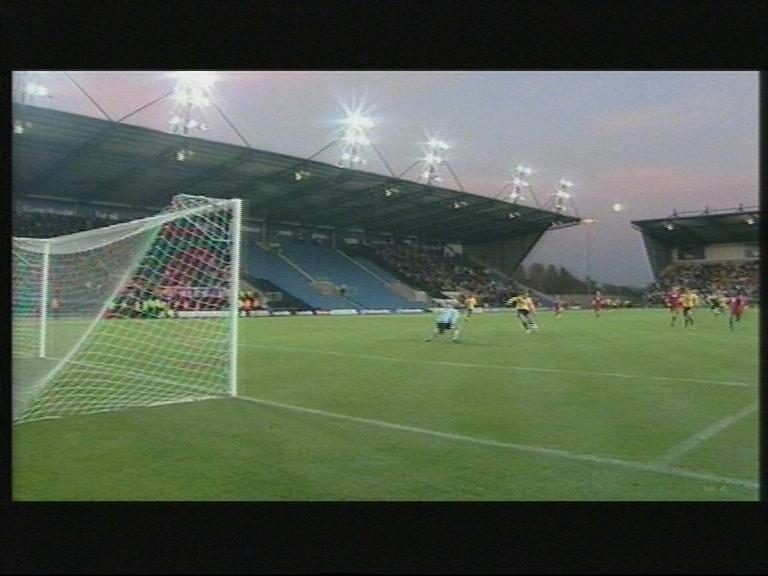
Andy Burgess makes it 2-0 to Oxford Utd against Aldershot
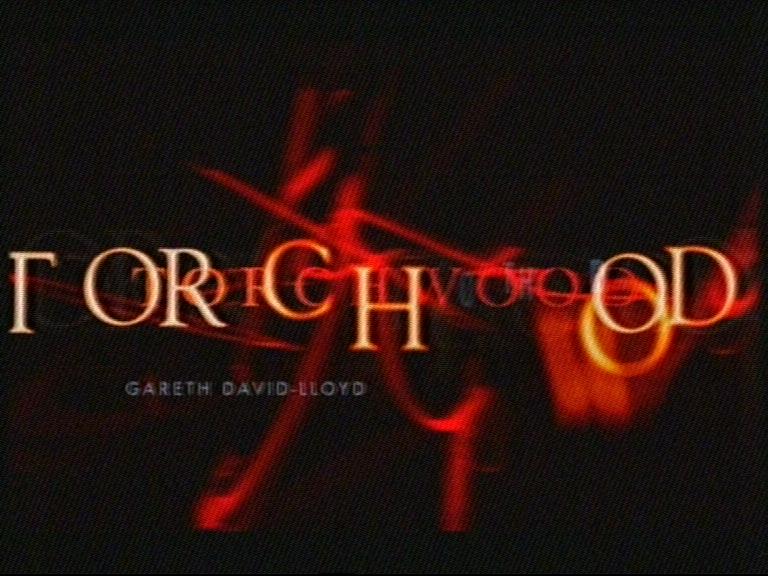
Torchwood
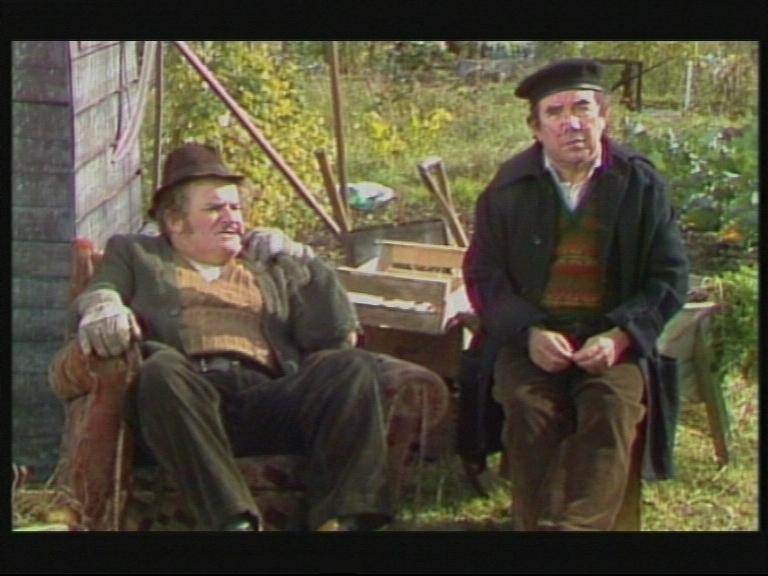
Down on the allotment with the Two Ronnies
Overall adding a TV Card to your computer is not the most important upgrade you will ever make. It is a bit of a novelty really, but it does have some uses. The most obvious is if you don't have a telly, or cannot get to watch your programe because someone else is watching Eastenders or live football. Then it's the Iyonix to the rescue!
As I have the Iyonix away from a television, I find it useful to have a desktop window open with, say, BBC1 on ready, so I don't miss the start of a programme when I'm not near a television.
The !Remote software is easy to set up and use, and it should be noted at the time of writing this it is not the finished article.
The TV card does have it's uses and is quite a nice little feature to add to the Iyonix, and is also another thing to add to the list of things that RISC OS can do. The TV card should only cost you about £30.00 and the software is free. It is a nice and cheap addition to the computer and is well worht the cost, although I don't think the living room television is under too much threat just yet!
Many thanks to Robin Hounsome for providing technical information for this article so that it all makes sense, and also for his help and support in using !Remote.
Matt Thompson