My Library is used to store all your personal photos. Everyone who uses a sign-in and password on the Welcome! screen automatically gets their own personal Library. Here's how My Library works:
In The Photo Room, click once on the scrapbooks sitting on the bookshelf.
Click once on any of the albums. Use the up and down arrows to see all the photos available. Click once on any of the photos in the filmstrips. As you work on more and more photos and Fun Projects, your filmstrips will get longer and longer.
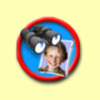
To get a better look at a photo, click it once, and then click on View My Photo (the button with the binoculars). Click the button a second time to see The Photo Room again.
If you change your mind and would rather load a photo from another device, just click the device once on the right side of the screen at any time.
Choose a photo in the filmstrips by clicking it once and then clicking the OK checkmark. The selection will be loaded into The Fun Lab. To select more than one photo at a time, hold down the CTRL key while clicking the photos. After you click “OK”, the last photo you clicked will be opened in The Fun Lab.
By default any new photo you load is first stored in the My Photos album in your Library. You can then reorganize your photos into your own albums with their own names. Here is how:
|
Click File on the Menu Bar, and select New Album, or click CTRL + N
on your keyboard. A new book will appear on the shelf. |
|
|
When the new album is created, type the name of your choice over the
highlighted text. |
|
|
To organize your photos into albums, just drag and drop them from one
album to another. Here's a tip: you can drag and drop more than one
photo at a time by holding down the CTRL key while you select the photos! |
We recommand that you delete your old photos every so often in order not to overload your computer. Here's how to do it:
|
|
Use the right and left arrows to scroll through the books, and click one to open it. Then select a photo in the filmstrips. Click the View My Photo button at the bottom of the Left Panel. |
|
|
Drag and drop the photo onto the Trash button under the preview of
your photo. If you want to delete a number of projects at once, hold down the CTRL key while you click the thumbnails. Then drag and drop them onto the Trash button. To select all the photos of an album in your Library, click Edit and Select All on the Menu Bar, or click CTRL + A on your keyboard. |
|
|
Remember that you can immediately get back the photo you've just deleted by clicking the Undo button. |
|
To delete an album, click File and Delete Album on the Menu Bar. All
the photos it contains will be moved to the Trash Album. |
Note: To free up some room on your computer, don’t forget to delete any photos saved in the Trash album. Just click File and Empty Trash on the Menu Bar. To free up additional room, also delete the photos saved in the two directories MGI/ PhotoFun/ Kodak PhotoNet and MGI/ PhotoFun/ Sony ImageStation.