Beginning Visual Basic .NET - Project 2

Using a Scroll Bar

The Second Project

For the second Visual Basic project, you will create a program that displays a window with a Text Box, Horizontal Scroll Bar, and an Exit Button. The Background Color of the form will start out as white. Changing the position of the Thumb button on the Scroll Bar will change the value of the Form’s BackColor property, and so the background color of the Form will change. The value of the Scroll Bar’s Value property will be displayed in a Text Box.

Removing your old project and creating a new one

Run Visual Basis .NET and open your Solution (<your name>.sln).

Right-click on the Project1 project in the Solution Explorer window and select Remove from the context menu (as shown below): 

This does not delete your project, but just removes it from this Solution.  Click the OK button on the following dialog:

Drop down the File menu and select New Project under the Add Project menu item:

The Add New Project dialog appears:

Make sure that the Visual Basic Projects folder is open in the Project Types pane, and that the Windows Application template is selected in the Templates pane.  Type Project2 in the Name textbox.  Then click the OK button.  This creates a new folder inside the \Visual Studio Projects\<Your Name> folder named Project2:

        ...My Documents\Visual Studio Projects\<Your Name>\Project2.

Note: When class is over, be sure to follow the instructions at the end of this project that tell you how to copy your project to your floppy diskette so you can take it home with you.

Rename the Form file and change it's Name and Text properties

With the form file (Form1.vb) selected in the Solution Explorer window, so that it's File properties are displayed in the Properties window, change the File Name property to frmProj2.vb (don't forget to include the .vb extension).

Now click on the form in the Designer window to display it's properties:

Setting the Startup Object

Right-click on the Project2 project in your Solution Explorer window, click on the Properties item at the bottom of the context-menu.  In the Project2 Property Pages dialog drop down the Startup object list and choose frmProj2 and click the OK button.

Before going on, click on the Save All button on the toolbar to save your project:


Adding a TextBox, HScrollBar, and Button to the form

Use this illustration as a guide and place a TextBox, HScrollBar, and Button control as shown:

Use the following table and assigned these values to the listed properties:

Control Property Value
frmProj2 BackColor White
TextBox1 Name txtColor
  TextAlign Center
  Text 255 Color Value
HScrollBar1 Name hsbColor
  Minimum 0
  Maximum 255
  Value 255
  LargeChange 1
Button1 Name btnExit
  Text Exit

The hsbColor scroll bar control has 3 parts:

  The Left scroll arrow button
  The Right scroll arrow button
  The Thumb button

The user can move the Thumb button back and forth by clicking on either the Left or Right scroll arrow buttons, or by clicking and dragging the Thumb button itself. The position of the Thumb button determines the value of the hsbColor.Value property. With the Thumb button at the extreme right, the value of hsbColor.Value is 255; At the extreme Left, the value of hsbColor.Value is 0 (these are the Maximum and Minimum properties of the hsbColor control which you set above).

Adding code to the Scroll event procedure of hsbColor

Double-Click on the hsbColor scroll bar to go to it's Scroll event procedure in the Code view window.  Now type the following code in the hsbColor_Scroll event procedure:

'Create an Integer variable to store the number in the Value property of hsbColor
Dim iColor As Integer
'Assign the number in the Value property of hsbColor to iColor
iColor = hsbColor.Value
'Concatenate the string " Color Value" to the number stored in iColor,
'    and assign that joined string to the Text property of txtColor
txtColor.Text = iColor & " Color Value"
'Use the FromArgb method of the System.Draw.Color class to change
'     the BackColor property of frmProj1 (referred to in code as Me)
Me.BackColor = System.Drawing.Color.FromArgb(iColor, iColor, iColor)

The first line of code above dimensions an Integer variable (iColor) that we use--in the second line of code--to store the number in the Value property of the horizontal scroll bar (hsbColor).  The number in hsbColor.Value is set by moving the Thumb button of the horizontal scroll bar back and forth along the length of the scroll bar.  Because we set the Minimum property of hsbColor to 0 and the Maximum property of hsbColor to 255, the number in hsbColor.Value will always be a number greater than or equal to 0 and less then or equal to 255.

Take a look at this line of code from above:

txtColor.Text = iColor & " Color Value"

If iColor is equal to 146, then the purpose of the line of code above is to have the txtColor textbox display this string:

The statement: iColor & " Color Value" joins together, or concatenates, the number in iColor with the literal string " Color Value".  The result is then assigned to the Text property of the txtColor textbox.

The line of code from above that actually changes the back ground color of the form is this one:

Me.BackColor = System.Drawing.Color.FromArgb(iColor, iColor, iColor)

Whenever you want to refer to the form (frmProj2 in this case) in code, you must use the generic term Me.  To change the BackColor property of the form, we use the FromArgb method of the System.Drawing.Color class.  The FromArgb method takes three parameters--numbers--which specify the luminosity value for the three computer primary colors: Red, Green, and Blue.  These number values must range between 0 and 255--hence our choice of 0 for the Minimum property of hsbColor and 255 for the Maximum property of hsbColorFromArgb takes these three luminosity values and generates a color that is assigned to the BackColor property of the form.  By combining different luminosity values for Red, Green, and Blue, the FromArgb method can generate up to 16,581,375 unique colors. 

Before going on, click on the Save All button on the toolbar to save your project:

Testing the program so far

Let's test run the program and see what happens.  Click on the Start button on the toolbar.  Once the program runs, try changing the position of the Thumb button on the hsbColor control.  Does the back ground color of the form change?  why does the color change from white to darker and darker shades of gray and finally to black?   By assigning the same value to the luminosity settings of Red, Green, and Blue (by passing iColor in all three parameters), white, black and shades of gray are the only colors possible.  We'll take care of this issue in the enhancements for this project.

Stop the program by clicking on the close button in the upper right corner of the form:

Required Enhancements

Add these three lines of code to the Declarations section.  The Declarations section is at the the top of the View Code window.  Add the follow three lines immediately below the Inherits System.Windows.Forms.Form statement.  Also be sure to add the comments at the end of each line (Comments begin with a single quote):

Dim iRed As Integer        'Variable to store the Red color luminosity value
Dim iGreen As Integer     'Variable to store the Green color luminosity value
Dim iBlue As Integer         'Variable to store the Blue color luminosity value

Change to design view and select the txtColor textbox so that it's properties are displayed in the Properties window.  Modify these properties:

Property Value
Name txtRed
BackColor Red
ForeColor White

Now select the hsbColor horizontal scroll bar to view it's properties and change it's Name property to hsbRed.

After making the above modifications return to the View Code window.  Note: If the Windows Form Designer Generated Code section is expanded when you return to the View Code window, just collapse it by clicking on the minus (-) sign at the beginning of the line:

The Windows Form Designer Generated Code section automatically expands sometimes when you rename controls, so that you can verify the changes made to the code there.  All the code in this section is generated by the form designer. This section contains all the code to create the controls you place on a form when building a project.  Never make modifications to the code in the Windows Form Designer Generated Code section!  The collapsed Windows Form Designer Generated Code section should look like this:

How event procedures Handle an event

At the end of every event procedure declaration is a Handles statement where the control.event name that triggers (raises) the event procedure are specified.  Normally, the event procedure name matches the name of the control.event that handles it, like this:

Private Sub hsbColor_Scroll(...)  Handles hsbColor.Scroll

In the above event procedure declaration hsbColor_Scroll handles the hsbColor.Scroll event procedure, which makes perfect sense.  The above declaration is what the hsbColor_Scroll event procedure declaration looked like before we renamed the hsbColor scrollbar hsbRed.  However, after changing the name of the hsbColor scrollbar to hsbRed, the only thing that changes in the original hsbColor_Scroll event procedure declaration is the Handles statement at the end of the line, like this:

Private Sub hsbColor_Scroll(...)  Handles hsbRed.Scroll

The name of the event procedure is still hsbColor_Scroll, but the Handles statement says that it handles the hsbRed.Scroll event procedure.  This means your code will still work after renaming a control, but it has the down side of making your code harder to read when the names of the event procedures don't match the names of the controls that trigger (raise) them.   You can fix this by editing the declaration name.  Change hsbColor:

Private Sub hsbColor_Scroll(...

to hsbRed:

Private Sub hsbRed_Scroll(...

Note: Always be very careful when editing an event procedure declaration.  Just one small typo will completely screw it up. 

Now modify the code in the newly named hsbRed_Scroll event procedure so that it looks like this:

Dim iColor as Integer Delete this line of code!
'Assign the number in the Value property of hsbRed to iRed
iRed = hsbRed.Value
'Concatenate the string " Color Value" to the number stored in iRed,
'    and assign that joined string to the Text property of txtRed
txtRed.Text = iRed & " Color Value"
'Use the FromArgb method of the System.Draw.Color class to change
'     the BackColor property of frmProj1 (referred to in code as Me)
Me.BackColor =  System.Drawing.Color.FromArgb(iRed, iGreen, iBlue)

Save and run the program, and see what happens when you move the Thumb button on the hsbRed scroll bar.

Continue this enhancement by adding 2 more HScrollbar controls and name them hsbGreen and hsbBlue. Set their properties exactly like the properties of the hsbRed scrollbar (refer to the properties section for hsbColor on the last page). Copy the code from the hsbRed_Scroll event procedure to the hsbGreen_Scroll and hsbBlue_Scroll event procedures, and modify the code so that it looks like this:

‘for the hsbGreen_Scroll event procedure

iGreen = hsbGreen.Value
txtGreen.Text = iGreen & " Color Value"
Me.
BackColor =
 System.Drawing.Color.FromArgb(iRed, iGreen, iBlue)

‘for the hsbBlue_Scroll event procedure

iBlue = hsbBlue.Value
txtBlue.Text = iBlue & " Color Value"
Me.
BackColor =
 System.Drawing.Color.FromArgb(iRed, iGreen, iBlue)

Now add 2 more Textbox controls and name them txtGreen and txtBlue.  Position them next to their corresponding scrollbars. Set their properties exactly like the properties of the txtRed textbox (refer to the properties section for txtColor on the last page).

In Visual Basic when a number variable (Integer, Double, etc.) is Dimensioned it is automatically initialized to a value of 0 (zero). Since all 3 Scroll bars start off with their Value properties set to 255, you must be sure to manually set the values of the iRed, iGreen, and iBlue variables to 255 (So that the very first time the FromArgb method is called zeros don't end up getting passed as two of the color intensity parameters). Add the following code to the frmProj2_Load event procedure.  To access the Event Procedures of the frmProj2 form, drop down the Class Name list at the top left side of the code window and choose (frmProj2 Events).  Then select the Load event procedure from the Method Name drop down list at the top right of the code window:

iRed = 255
iGreen = 255
iBlue = 255

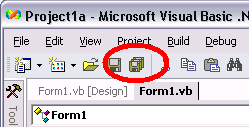
Now save the program and run it.

Scope

It is very important that the declarations for iRed, iGreen, and iBlue were placed in the Declarations section. This allows these variables to retain any values that they were assigned throughout the entire program (within every event procedure). Once declared in the Declarations section of a form, a variable has Global Scope (also called Public scope). A variable’s Scope determines its range of visibility:


Beginning Visual Basic - Project 2

Properties/Procedures Table

Properties

Control Property Setting
Form Name frmProj2
  Text Project 2
Button Name btnExit
  Text E&xit
TextBox Name txtColor
  Text 255 Color Value
  TextAlign Center
HScrollBar Name hsbColor
  Minimum 0
  Maximum 255
  Value 255
  LargeChange 1

Event Procedures

Control Procedure Code
btnExit btnExit_Click

Me.Dispose

hsbColor hsbColor_Scroll Dim iColor as Integer
iColor = hsbColor.Value
txtColor.Text = iColor & " Color Value"
frmProj2.BackColor = System.Drawing.Color.FromArgb(iColor, iColor, iColor)

To copy a Project folder from your Solution on the Hard Drive to a floppy diskette, follow these steps:

  1. Exit Visual Basic .NET and insert the floppy diskette, that you want to copy the Project folder to, into drive A:
  2. Select the My Documents item on the Start Menu to open the My Documents folder.
  3. In the My Documents folder, double-click the Visual Studio Projects folder to open it.
  4. Double-click on your Solution folder to open it (it should have your name).
  5. Open the Project folder that you want to copy, by double-clicking on it.

Deleting the Obj and Bin folders from inside the Project folder before copying it.

  1. Inside the Project folder, delete the Obj and Bin folders--these folders are created automatically when you open a project.  You do not need to copy them, or their contents, to your floppy diskette.
  2. Hit the Backspace key once--or click the Back button on the toolbar.  This moves you from inside the Project folder to back inside your Solution folder.
  3. Right-click on the Project folder and selected: 31/2" Floppy A: on the Send To fly-out menu.  This copies the Project folder to your floppy diskette.