Close your last project
and creating a new one
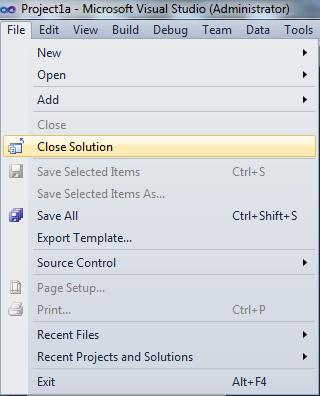
If you still have
the Project1a project open,
select the Close Solution item on the
file menu to close it, as shown below. This does not delete your project1a,
but just removes it from the Visual Studio development environment:
Once the solution is closed, select the New option on the File drop down menu
and select Project on the fly-out
menu. The New Project
dialog appears:
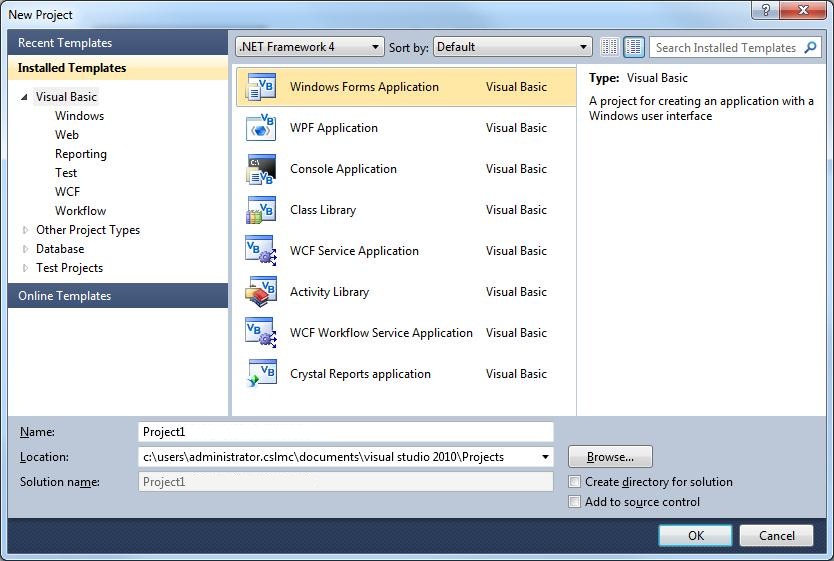
Be sure the Windows Forms Application template is selected
in the Templates pane on the right
side, then type
Project1 in the
Name textbox (as shown above).
Now click the OK button. Once the new project is opened—this
might take a few seconds—right-click on the Start Page tab and select the
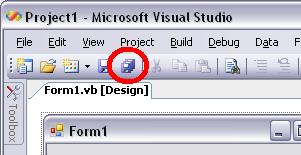
Close item on the context menu to close it. Now save the project by clicking on the
Save All button on the standard
toolbar, as shown below:
This displays the Save Project
dialog box, as shown:
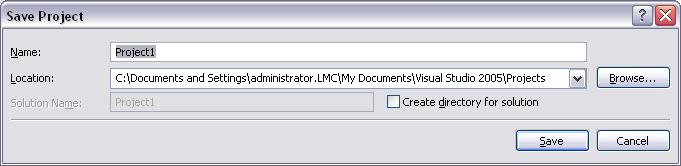
Do not change the
default Location path—Note:
The illustration above is from version 2005. Be sure to uncheck the
Create directory for solution
option, as show above, before clicking on the
Save button.
This creates a new folder inside the
My Documents\Visual Studio 2010\Projects\ folder named
Project1:
My
Documents\Visual Studio 2010\Projects\Project1
Note: When class
is over, be sure to follow the instructions at the end of each project that
tell you how to copy your project to your floppy diskette or pen-drive so you can take it
home with you.
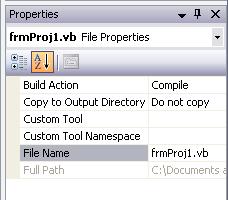
Rename the Form
file
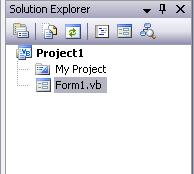
With the form file (Form1.vb)
selected in the Solution Explorer window (as
shown above), the Properties
window directly below it displays it's File properties. Click on
the File Name property and type
frmProj1.vb (don't forget to
include the .vb extension, as shown
in the illustration below):
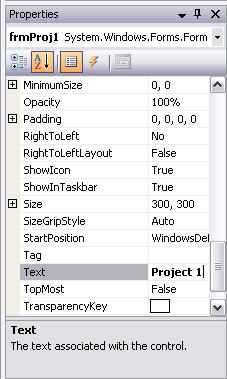
Change the
Name
and
Text
properties of the Form
To display the
properties of the form in the Properties
window, click once on the blank
Form, which should be displayed on
the left side of the screen in the
Design window.
Make sure the Name property—which is in
parentheses (Name) at the top of the
property list so that it's easy to find—is
frmProj1. It should have been
set to that automatically when we named the form file. Then scroll the
properties windows down—the properties are listed alphabetically—and change the Text
property to Project 1
as shown below:
Note: Spaces are allowed in the
Text property,
but do not put spaces in the Name
property of forms, controls,
or variables. Also, be "case conscious" while naming forms, controls,
and variables in Visual Basic. While Visual Basic ignores the case of the letters used in
names, you should not. Other programming languages such as C, and C++ are case sensitive
languages. By practicing case sensitivity now, your transition to programming in C or C++
at a later date (If you so desire), will be greatly simplified.
Before going on, click on the Save All
button on the toolbar to save your project:
Using the
Control Toolbox
to add a
Button
to the form
For
this project, you will create
a program
that displays a sizable window with a single button displayed exactly in the center of it.
The button’s caption will read, On. When the user
clicks on the button, its caption will change to Off. When you start a new project in Visual Basic you begin with a blank
form (which will be the main window of
your program). To add controls (i.e. Buttons, Textboxes, List boxes, etc.) we use the
Control Toolbox. To the left of the blank form
in design view is the
Toolbox tab (circled below):
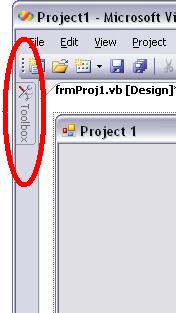
Hold your mouse pointer over the Toolbox
tab to make Control
Toolbox fly out:
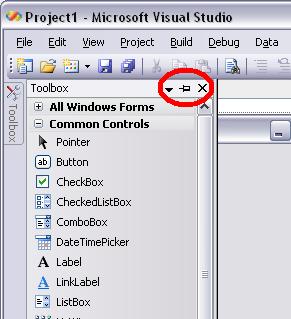
You can keep the
Control Toolbox open by clicking the thumb tack at the top
right corner
of it (circled in the above illustration). Or just let it close again on it's own when you click on the
surface of the form.
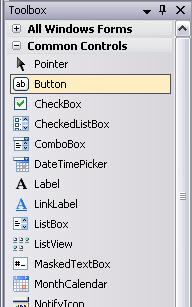
In the Common Controls section of the
Control
Toolbox, click once on the
Button control item (shown below):
Move your mouse pointer over the surface of the
form, it should change to a small plus sign (+) with a tiny button icon attached to it.
Click and Drag the mouse on the blank form to draw a button. Once the button
is drawn, you can grab it in the middle with the mouse to drag it to the
center of the form. The white dots that appear around the button are
sizer-handles that you can use to stretch the button and resize it.
Put your button on the center of the form, as shown in the following
illustration:

With the button selected—the white sizer-handles are shown around it
when it is selected—you will see it's properties displayed in the
Properties window:
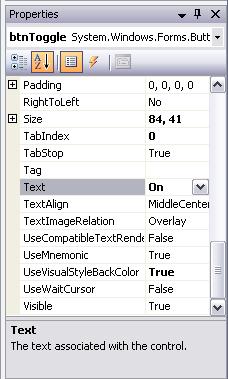
- Change the Name
property of Button1 to btnToggle
- Change the Text
property to On
Now you need to add some Code to the Click
event procedure of the new btnToggle
button. Double click on the btnToggle
button. This pops open the Code Window
and puts your cursor inside the btnToggle
button's Click event procedure, like
this:
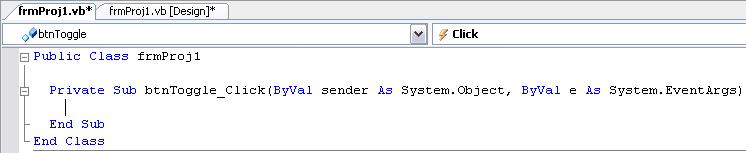
Note: Notice how the name of
your new
Button control btnToggle
is connected by an underscore to the procedure name
Click, like this:
btnToggle_Click. That is
how all event procedure declarations for controls appear. The Private designator
indicates that this Sub procedure is
accessible only to other procedures in the module (form) where it exists. End Sub designates the
end of the event procedure.
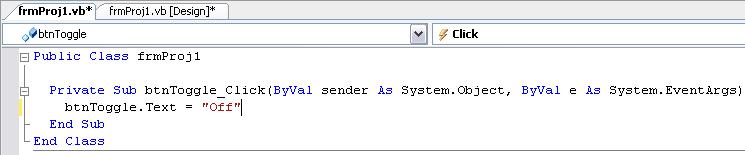
When a user clicks on the
btnToggle button they will trigger its
Click event, and any code in the
btnToggle_Click event procedure is executed automatically. To
change the text on the button from On to Off we must change its
Text property. Enter the following line of code on the blank line
between the Private Sub btnToggle_Click and End Sub lines:
btnToggle.Text
=
"Off"
Your code window should look like this:
By adding .Text to the end of
the button's name we can reference its
Text property in
your code (as apposed to setting the Text property's value manually in
the properties window at design-time). This is also
how you reference all the other properties of a control in
your code. For example, we
could change the vertical location of a button by changing its Top property like this: btnToggle.Top = 100 (don't type this line!).
Once executed, this line of code would change the button's vertical position
so that it was 100 pixels (more on pixels later) from the top
edge of the form.
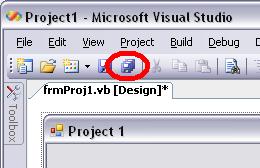
Save the project by clicking on the Save All
button now.
Testing the program so far
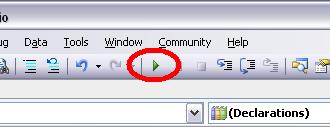
Let's test run the program and see what happens.
Click on the Start Debugging button on the
toolbar:
Once the program runs, click on the
btnToggle button. Did the text on the
button change from On to
Off? Stop the program by
clicking on the close button in the upper right corner of the form:

Adding code to the
Resize
event procedure
of the form
Recall
that the original description of this program was to create, "a
program that displays a sizable window with a single button displayed exactly
in the center of it." A Sizable window means that you can grab the
borders of the window with the mouse and stretch it or shrink it, thus changing its size.
Run your program again. Click on the border of the
window in the lower right corner and drag to stretch the window bigger
and smaller. Does the
btnToggle button remain in the
center of the window? Nope. Our next goal is to make sure that when the window is
resized, the btnToggle button moves to remain exactly in the center of it.
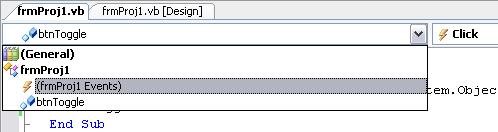
Like all controls, the form itself also
has its own set of built-in event procedures (we used them in project1a). To access the Event
Procedures of the frmProj1 form, drop down the
Class Name list at the top left side of the code window and
choose (frmProj1 Events) as shown
below:
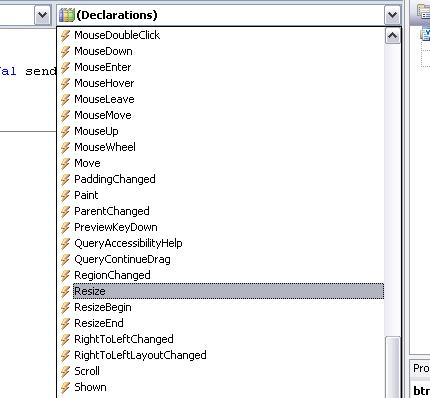
Now drop down the Method Name
list at the top right of the code window and choose the
Resize event procedure (as shown below):
A form’s Resize
event procedure is executed automatically whenever the size of the form is changed (Note: What is called a form when
you’re creating a program is your program’s window when it runs). Since the form’s
Resize
event procedure is executed when the size of the form is changed, this is the logical
place to put code that repositions the btnToggle button so that it remains centered in the
form.
Type the following code in the
frmProj1_Resize event procedure:
btnToggle.Left
= (Me.Width / 2) -
(btnToggle.Width / 2)
btnToggle.Top
= (Me.Height / 2) -
btnToggle.Height
By using the form’s Width
and Height properties,
we can calculate the location of the center of the form. For example, by dividing the
Me.Width property in half, you get
the exact center of the form horizontally (Note: Me
is how you reference the form in code). To position the
btnToggle button in the
center horizontally, you need to take into consideration the fact
that the Left property of the
btnToggle button refers to the left
edge of the button. By subtracting half the width of the
btnToggle button from the
horizontal half-way point on the form, we place it exactly centered horizontally. Setting
the vertical position of the button with the Top property is done almost the same
way. Note: The caption bar at the top of the form is
not included in the Me.Height value, so in the code above we
subtract the entire Height of the
btnToggle button to
compensate.
Run your
program with the Start Debugging button and resize the window with the mouse to see if the
btnToggle button changes position
and stays centered. Note: If it doesn’t, check for syntax
errors in your code. Make sure the two lines of code above are in the
frmProj1_Resize event procedure.
That completes the basic assignment.
Required
Enhancements
- Make it so the btnToggle button's Text
toggles back and forth from On to Off each time you press it (Hint: Get help on the If
Then Else logic structure).
- Add another button which Hides the
btnToggle button
when pressed, and then unhides it when pressed again. Name this new button
btnHide
(Hint: Buttons have a Visible property. You'll also need to use the If Then Else logic structure).
- Make sure that Resizing the Form also keeps the
btnHide
button centered-but not on top of the
btnToggle button.
Properties/Procedures Table
Properties
| Control |
Property |
Setting |
| Form |
Name |
frmProj1 |
| |
Text |
Project 1 |
| Button |
Name |
btnToggle |
| |
Text |
On |
Event Procedures
| Control |
Procedure |
Code |
| Form |
frmProj1_Resize |
btnToggle.Left = (Me.Width / 2) -
(btnToggle.Width / 2)
btnToggle.Top = (Me.Height / 2) - btnToggle.Height |
| btnToggle |
btnToggle_Click |
btnToggle.Text =
"Off" |
| (Alternate—Makes the
Caption of btnToggle cycle between On and Off) |
| btnToggle |
btnToggle_Click |
If btnToggle.Text = "On"
Then
btnToggle.Text = "Off"
Else
btnToggle.Text = "On"
End If |
To copy a
Project folder from
your Projects
folder
on the Hard Drive
to a floppy diskette
or pen-drive
follow these steps:
- Exit Visual Studio 2010 and insert the floppy
diskette or pen-drive, that you want to copy the
Project1 folder to:
- Select the My Documents item on the
Start Menu to open the My
Documents folder.
- In the My Documents folder,
double-click the
Visual Studio 2010 folder to open it.
- Double-click on your
Projects folder to open it.
- Open the Project1 folder by double-clicking on it. Inside the
Project1 folder, delete the
Obj and Bin
folders—these folders are created automatically when you open a project.
You do not need to copy them, or their
contents, to your floppy diskette or pen-drive.
Important: Be sure not to
delete the My Project folder.
- Once you have deleted the Obj and
Bin
folders, hit the Backspace
key once—or click the Back button on the toolbar. This moves
you from inside the Project1 folder to back inside your
Projects folder.
- Right-click on the Project1 folder and
selected: 31/2" Floppy A: or your
pen-drive on the
Send To fly-out menu. This copies
the Project1 folder to your floppy diskette
or pen-drive.