Adding
Tooltip Support
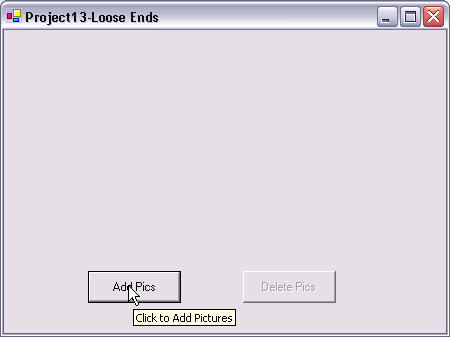
Tooltips are short popup messages
that appear when you hold the mouse pointer still over a control for 1 second.
See the illustration below:
When you add Tooltip support to a
control, you can specify how long the delay will be in milliseconds before the
Tooltip originally appears with the
InitialDelay property of the
Tooltip control. We must also assign
values to the AutoPopDelay,
ReshowDelay, and
ShowAlways properties of the Tooltip
control. Here is what those 4 properties do:
- InitialDelay — Determines the
initial delay (in milliseconds) before the
Tooltip message appears when the user first holds the
mouse pointer over the control.
- ReshowDelay — Determines the
length of time (in milliseconds) that it takes subsequent
ToolTip messages to appear over a control
where the initial display of a Tooltip
message has already occurred.
- AutoPopDelay — Determines
the length of time that must pass before subsequent
ToolTip messages appear as the mouse
pointer moves from one control to another.
- ShowAlways — Determines if
Tooltip messages are displayed whether
the form is active or not.
Add the following code to the Form's Load
event procedure to initialize the Tooltip1
control and assign Tooltip messages to
the Add Pics and
Delete Pics buttons:
'Configure the behavior of Tooltips. The user must
' hold the mouse pointer still over the control for
' 1 second
before initially displaying a Tooltip.
ToolTip1.InitialDelay
= 1000
'Reduce the delay to just half a second before
' redisplaying a Tooltip over a control where
' a Tooltip has
already been displayed.
ToolTip1.ReshowDelay
= 500
'So that Tooltip messages don't overlap, increase
' the delay to 3 seconds when displaying Tooltips
' while
moving from one control to another.
ToolTip1.AutoPopDelay
= 3000
'Force the ToolTip messages to be displayed
' whether the form is active or not.
ToolTip1.ShowAlways
= True
We can then use the SetToolTip
method of the Tooltip1 control to assign a
Tooltip message to the different
controls on our form. Add the following code to the Form's
Load event procedure, below the above code:
'Add ToolTip messages to the Add
' and Delete buttons.
ToolTip1.SetToolTip(
_
btnAddPics,
"Click to Add Pictures")
ToolTip1.SetToolTip(
_
btnDelPics,
"Click to Delete Pictures")
Note: As another option for
assigning tooltips to design-time installed
controls—like the btnAddPics and
btnDelPics buttons—we could
have typed the tooltip text into their
Tooltip on Tooltip1 properties in
the Properties window. But doing it with code, as we did above,
is the only way you can do it if the controls are created at run-time.
Now add the follow code at the end of the Form's
Load event procedure to set the enabled
state of the btnAddPics
and
btnDelPics buttons:
'Begin with the Add
button enabled
'
and
the Delete button disabled.
btnAddPics.Enabled
=
True
btnDelPics.Enabled
=
False
Testing the program so far
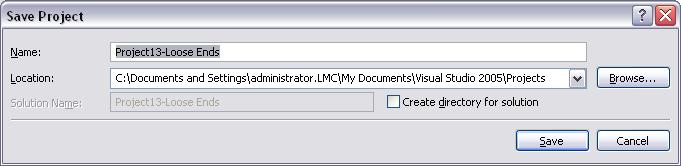
Save the project now. Run the program. What happens when you
hold the mouse pointer over the
Add Pics
and
Delete Pics
buttons?
Dynamically
Creating Controls
To dynamically create controls at run-time requires you to do these 5 steps,
in
this order:
- Dimension reference variables for the controls you plan on dynamically
constructing, like this (don't type this example code):
Dim
MyPicBox As
PictureBox
- Declare delegate procedures for
the Event Procedures of the
dynamically constructed controls that require code—Note: You
don't have direct access at design-time to the Event Procedures of
controls created at run-time.
- Add the code to construct the controls, like this:
MyPicBox = New
PictureBox()
- Add the code to add the newly constructed controls to the Form's
Control collection, like this:
Me.Controls.Add(MyPicBox)
- Add the code to link the Event Procedures
of the newly created controls to the corresponding
delegate procedures you previously
created for them, like this:
AddHandler
MyPicBox.Click, AddressOf
MyPicBox_Click
Now let's do these steps:
1) Dimension
Reference variables for
the controls you plan on dynamically constructing
Add the following code to the Declarations
section:
'Create an array of PictureBox reference
' variables for the five PictureBoxes we
' will dynamically
create.
Dim
MyPicBox(5)
As PictureBox
'Create a generic control reference
' variable (for use later).
Dim
DeleteControl
As Control
2) Declare
delegate
procedures for the Event Procedures
of the dynamically
constructed
controls that require code
One problem with dynamically constructing controls is that you do not have
access to their Event Procedures at
design-time (since the controls do not exist at design-time).
Important: In order to use the
Event Procedures of dynamically created
controls, you must declare delegate
procedures and assign them at run-time with the
AddHandler command to those Event
Procedures of the dynamically created controls that you want to
use.
We will be dynamically constructing five
PictureBoxes. In order to use their
Click and
MouseDown event procedures, we need to declare two
delegate event procedures; One for
Click and one for
MouseDown. Type the following two
delegate procedure declarations into the code window. Start on a blank line above the
End Class statement at the bottom of the
code window:
Save the project now. Run the program.
What happens when you click the Add Pics button?
Once the PictureBoxes are created, do you
see a different Tooltip message when you
hold the mouse pointer over each picturebox?
Dynamically Destroying Controls
While dynamically creating controls
requires 5 distinct steps, dynamically destroying
them is much easier.
Add the following code to the Click
event procedure of the Del Pics button (btnDelPics_Click):
Dim
i As Integer
'Before deleting anything, display the
' number of controls on the Form in
' the immediate window.
Debug.WriteLine(
_
"Controls on Me before deletion: "
_
& Me.Controls.Count)
'Technique #1 - Removes just PictureBoxes
'Construct a temporary picturebox so that we
' can
compare it to the controls on the form
' to
find the other pictureboxes.
Dim
PicBox
As New
PictureBox()
'When
deleting items from a collection, you
' must remove them from the end of the
' collect and work your way to the beginning.
' This is required because when you remove
' an item from a collection, the items below
'
it move up to fill the gap left by the deleted
' item, i.e. if you delete item 2, item 3 becomes
' item 2, item 4 becomes item 3, etc.
For
i = Me.Controls.Count
- 1 To
0
Step
-1
'Write to the immediate window
' describing each control type.
Debug.WriteLine("Control #"
& i
& _
" = "
& _
Me.Controls.Item(i).GetType.ToString)
'The Object.ReferenceEquals method lets us
'
compare two
controls to see if they are equal.
If Object.ReferenceEquals(
_
Me.Controls.Item(i).GetType, _
PicBox.GetType)
Then
'If the control is a PictureBox, remove
' it from the Form.
Me.Controls.Item(i).Dispose()
End If
Next i
'After
removing the PictureBoxes, display
' the number of controls on the Form in
' the immediate window.
Debug.WriteLine(
_
"Controls on Me after deletion: "
_
& Me.Controls.Count)
'Once the
PictureBoxes are deleted,
' enable the Add Pics and disable
' the Del Pics button.
btnAddPics.Enabled
= True
btnDelPics.Enabled
= False
The following two code examples are not being used but are
shown as alternate techniques for dynamically deleting the picturebox controls
(Do Not type the following code):
'Technique #2 -
Removes ALL the
' controls from the Form
For
i = 0 To Me.Controls.Count - 1
'The index
value of the Item collection
' remains 0 because
when element 0
' is removed the next
element in the
' collection moves up to fill the gap.
Me.Controls.Item(0).Dispose()
Next
i
'Technique #3 - Removes just the
' MyPicBox controls.
For
i = 0 To MyPicBox.Length - 1
'Be sure the control exists before trying
' to deleting it.
If
Not MyPicBox(i) Is
Nothing Then
MyPicBox(i).Dispose()
End If
Next
i
Testing the program so far
Save the project now. Run the program.
What happens when you click the Add Pics button to
create the PictureBoxes, and then click the Del Pics
button?
Creating a
Context Menu
Set the ContextMenuStrip property of the form to
ContextMenuStrip1, if you haven't already done so. Use the following menu table
and illustration. Add these menu items to
ContextMenuStrip1:
|
Context Menu Table |
Level 1
Text |
Level 2
Text |
Name |
|
NA |
|
|
| |
Delete this Control |
cmnuDelControl |
| |
(Insert Separator) |
|
| |
Cancel |
cmnuCancel |
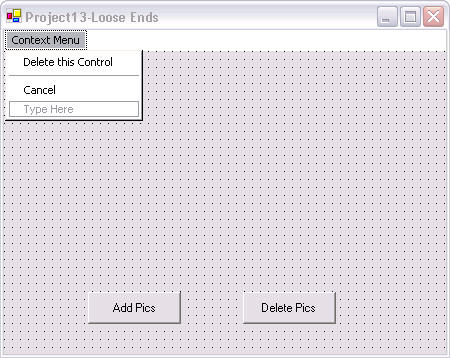
At run-time a ContextMenuStrip does not appear at the top
of a form like a regular MenuStrip does.
We must use the Show method of the
ContextMenuStrip to display it manually.
To enable the Delete
this Control
menu item, add the following code to the cmnuDelControl_Click
event procedure:
'Delete the control
referenced by
' the DeleteControl variable.
DeleteControl.Dispose()
Add the following code to the Click
event procedure of the Cancel menu item
(cmnuCancel_Click):
'Clear any reference from the
' DeleteControl variable.
DeleteControl =
Nothing
Testing the program so far
Save the project now. Run the program.
Click the Add Pics button to create the
PictureBoxes,
and then right-click on one of the PictureBoxes. This executes
the code in the
MyPicBox_MouseDown
delegate
event procedure—This sets the
DeleteControl control reference variable so
that it references the picturebox that was right-clicked, i.e.
DeleteControl =
sender. When you select the Delete
this Control menu item on
ContextMenuStrip1, the picturebox should be deleted.
Adding the ability to
dynamically delete
any
controls
Now that we have our ContextMenuStrip
configured, we can add code to the MouseDown
event procedures of any controls on our form (including the form itself) to
allow the user to delete those controls.
Add the following code to the MouseDown
event procedure of the Add Pics button (btnAddPics_MouseDown)—this
code will allow the user to delete the Add Pics button:
'Display the context
menu only if
' the user right-clicked.
If e.Button
= _
Windows.Forms.MouseButtons.Right
Then
DeleteControl =
btnAddPics
'Create a point to designate where
' the context menu will popup.
Dim p
As New
System.Drawing.Point(e.X, e.Y)
'Popup the ContextMenuStrip
ContextMenuStrip1.Show(btnAddPics,
p)
End If
Add the following code to the MouseDown
event procedure of the Del Pics button (btnDelPics_MouseDown)—this
code will allow the user to delete the Del Pics button:
'Display the context
menu only if
' the user right-clicked.
If e.Button
= _
Windows.Forms.MouseButtons.Right
Then
DeleteControl =
btnDelPics
'Create a point to designate where
' the context menu will popup.
Dim p
As New
System.Drawing.Point(e.X, e.Y)
'Popup the ContextMenuStrip
ContextMenuStrip1.Show(btnDelPics,
p)
End If
Add the following code to the MouseDown
event procedure of the Form (frmProject13_MouseDown)—this
code will allow the user to delete the Form, which will terminate the
program:
'Display the context
menu only if
' the user right-clicked.
If e.Button
= _
Windows.Forms.MouseButtons.Right
Then
DeleteControl =
Me
'Create a point to designate where
' the context menu will popup.
Dim p
As New
System.Drawing.Point(e.X, e.Y)
'Popup the ContextMenuStrip.
ContextMenuStrip1.Show(Me,
p)
End If
Testing the program so far
Save the project now. Run the program.
What happens when you right-click the Add Pics
button and select the Delete this Control
item on the ContextMenuStrip? Try
right-clicking on the Del Pics button,
and the Form itself. Also try clicking
the Add Pics button and right-clicking
on any of the dynamically created PictureBoxes.
Important Note: If you right-click on a button that
is disabled, the MouseDown event of the
form behind it is raised. The user cannot raise the events of a control that
is disabled.
Adding the ability to
Print
We will now use a
PrintDocument control to let the user print
text files. Add a
PrintDocument control
(in the Printing section of the
control toolbox)
and an OpenFileDialog
control to the form. Do not change their default names. They will show up in the component tray, like
this:

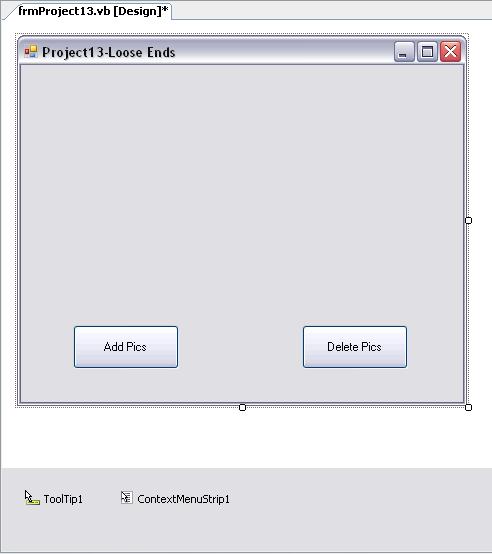
Adjust the locations of the Add Pics
and Del Pics buttons and add a new
button to the form, as shown in the illustration below:
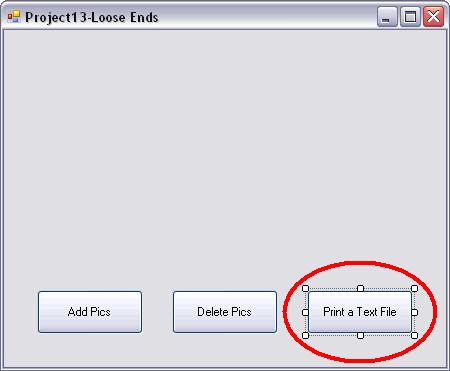
Set the Name
property of the new button to btnPrintTextFile,
and the Text property to
Print a Text File.
Add the following code to the Declarations
section:
'Declare a Font reference variable so that
' we can specify the what font the text
' document is
printed in.
Dim
PrintFont
As System.Drawing.Font
'Declare a StreamReader reference variable
' so that we can construct a StreamReader
' to read
the text file for printing.
Dim
StreamToPrint
As System.IO.StreamReader
We will use the OpenFileDialog
control to let the user browse for a text file they want to print. Add
the following code to the Click event
procedure of the Print
a Text File button (btnPrintTextFile_Click):
Dim
iResult
As
DialogResult
'Set several properties of the
OpenFileDialog
' before Showing it.
OpenFileDialog1.Title
= _
"Select
a Document to Print"
'List files with a .txt extension only
OpenFileDialog1.Filter
= _
"Text
Files (*.txt) | *.txt"
'If the user types a filename the .txt extension is
'
added automatically if they don't include
it.
OpenFileDialog1.AddExtension
= True
'Clear the
FileName property of OpenFileDialog1,
' so any previously selected file is not
displayed.
OpenFileDialog1.FileName
= ""
'Show the OpenFileDialog
iResult
= OpenFileDialog1.ShowDialog()
'Make sure the
user did not click the Cancel
' button And specified a file name
for the
' file to be created.
If
iResult
<>
_
Windows.Forms.DialogResult.Cancel
And
_
OpenFileDialog1.FileName.Length
<> 0 Then
Try
'Create the Font we will use to print the text file
PrintFont
= _
New
System.Drawing.Font("Arial",
10)
'Create the StreamReader we will use to
' read the text file.
StreamToPrint
= New _
System.IO.StreamReader(
_
OpenFileDialog1.FileName)
'Initiate the printing process. This raises the
' PrintPage event
procedure of the
' PrintDocument1 object, which is where
' we actually read the text file and write
' it out to the printer, line by line.
PrintDocument1.Print()
'Close the FileStream and destroy it
' once printing is complete.
StreamToPrint.Close()
StreamToPrint
= Nothing
Catch
ex
As
Exception
MessageBox.Show(
_
"Error
printing the file - "
& ex.Message)
End Try
End If
Using the
PrintPage
event procedure of the
PrintDocument object to
print the file
To actually print the text file, we need to add code to the
PrintPage event procedure of
PrintDocument1. This event is raised
when we executed the PrintDocument1.Print
method in the code above. Add the following code to the
PrintPage event procedure of
PrintDocument1 (PrintDocument1_PrintPage):
Dim
LinesPerPage
As Single = 0
Dim
LinePosition
As Single = 0
Dim
LineCount
As Integer = 0
Dim
sLine
As String
'To
calculate the number of lines per page use
' e.MarginBounds divided by the
PrintFont
'
height.
LinesPerPage = _
e.MarginBounds.Height
/ _
PrintFont.GetHeight(e.Graphics)
'Now read a line from the file and print it. Keep
' going until a full page is printed. If there are
' still
more lines to print, set the e.HasMorePages
' property to
True, and this PrintPage event will
' be raised again. Keep going until
the file is
' completely printed.
sLine
= StreamToPrint.ReadLine()
'Keep
printing lines until the end of a page is
' reached or there are no more lines to print,
' whichever
comes first.
While (LineCount
<
LinesPerPage _
And
sLine <>
Nothing)
'Determine the line position on the printed page
LinePosition
= e.MarginBounds.Top
+ _
(LineCount
* PrintFont.GetHeight(e.Graphics))
'Print the line to the default printer and
' increment the LineCount.
e.Graphics.DrawString(
_
sLine,
PrintFont,
Brushes.Black, _
e.MarginBounds.Left,
LinePosition,
_
New StringFormat)
LineCount
+= 1
'If we're not finished printing a page, read the
' next line from the file.
If (LineCount
< LinesPerPage)
Then
sLine
= StreamToPrint.ReadLine()
End If
End While
'Once we are
finished printing a page, if we have more
' lines
to print, then set the e.HasMorePages property
'
to True, which will force this PrintPage event to be
' raised again.
If (sLine
<> Nothing)
Then
e.HasMorePages
= True
Else
e.HasMorePages
= False
End If
Testing the program so far
Save the project now. Run the program.
Use the Print a Text File button and
print a small text file.
Printing other types of
Documents
The above code works fine for printing text files. But what if you
wanted to print Word documents, or
Excel spreadsheets from within your Visual
Basic 2010
applications? We
can use Microsoft Word to print Word documents for us. For example, to
print Microsoft Word documents instead of text files, the code in the
Click event procedure of the
Print
a Text File button would be replaced
with the following code. Note:
You need to set a reference to the
Microsoft Word 11.0 Object Library—like we did back in the
MyEditor project—before using the following code: