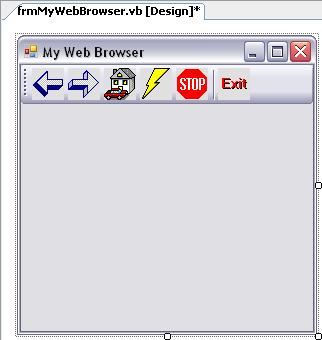
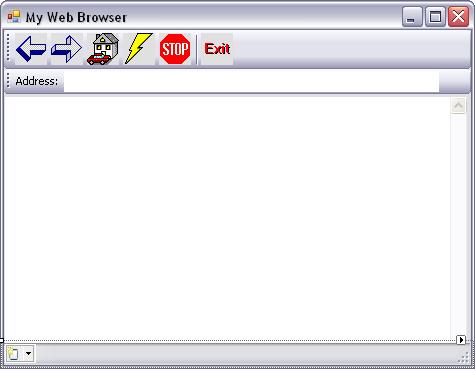
In this project we will use the Microsoft Web Browser control to create a simple Web Browser.
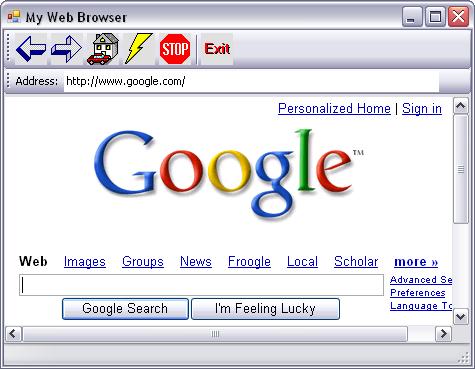
In the above illustration of the finished Web Browser project, buttons on a Toolbar are used to access different functions that the Web Browser can perform. These buttons include (from left to right):
- Go Back
- Go Forward
- Go Home
- Refresh
- Stop
- Exit the Browser
Another Toolbar labeled Address (below the top Toolbar) lets the user type the Web Address of an website they would like to visit. As you can see in the above illustration, the Microsoft Web Browser control displays web pages just like Microsoft Internet Explorer or Netscape Navigator.
Creating the MyWebBrowser application
Launch Microsoft Visual Studio 2010. Drop down the File menu and select New Project...
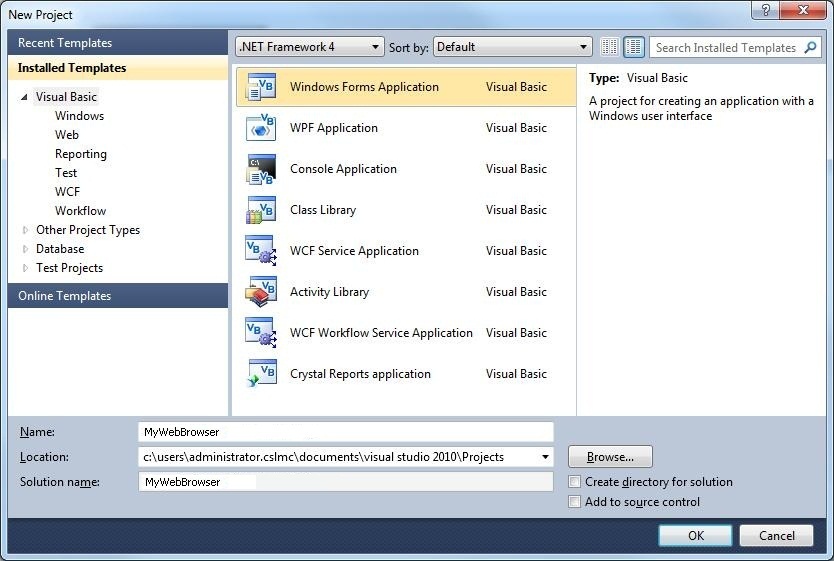
Be sure the Windows Forms Application template in the New Project dialog is selected in the Templates pane on the right side, then type MyWebBrowser in the Name textbox (as shown below):
Now click the OK button.
Save the project by clicking on the Save All button on the toolbar. This displays the Save Project dialog box, as shown:
Do not change the default Location path. Be sure to uncheck the Create directory for solution option, as show above, before clicking on the Save button.
This creates a new folder inside the My Documents\Visual Studio 2010\Projects\ folder named MyWebBrowser:
My Documents\Visual Studio 2010\Projects\MyWebBrowser
Rename the Form file
With the form file (Form1.vb) selected in the Solution Explorer window (as shown above), the Properties window directly below it displays it's File properties. Click on the File Name property and type frmMyWebBrowser.vb and press the enter key (don't forget to include the .vb extension).
Change the Name and Text properties of the Form
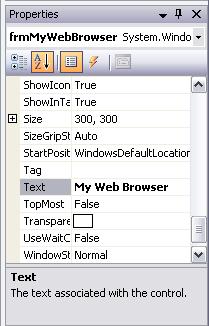
To display the properties of the form in the Properties window, click once on the blank Form, which should be displayed on the left side of the screen in the Design window. Make sure the Name property—which is in parentheses (Name) at the top of the property list so that it's easy to find—is frmMyWebBrowser. It should have been set to that automatically when we named the form file. Then scroll the properties windows down—the properties are listed alphabetically—and change the Text property to My Web Browser as shown below:
Adding a ToolStrip control to the form
Find the ToolStrip control in the Menus & Toolbars section of the control toolbox and double-click it once to add a ToolStrip to the form:
The new ToolStrip appears in the component tray, like this:
The images for the buttons on the toolstrip are 32x32 pixels. Click on it once to select it, and set these properties:
| ToolStrip1 | |
| Property | Value |
| ImageScalingSize.Width | 32 |
| ImageScalingSize.Height | 32 |
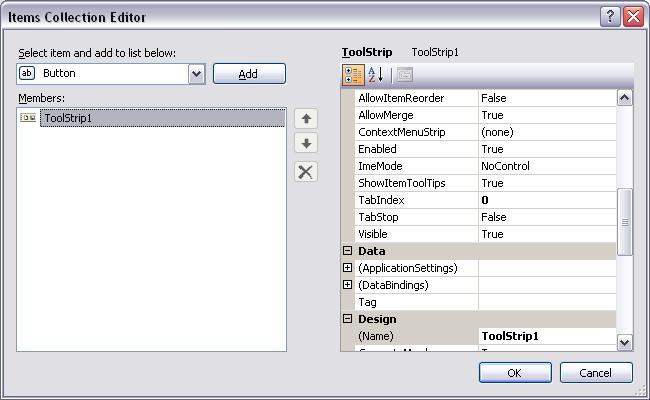
Now click on the ellipses button of ToolStrip1's Items property collection to display the Items Collection Editor dialog:
Adding ToolStripButtons to ToolStrip1
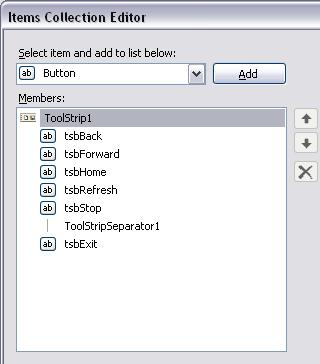
Add six ToolStripButtons and one separate to ToolStrip1. Use the following table to guide you. Look inside the c:\Shared\Bitmaps folder for the bitmap files (Note: You may download an archive file containing this files by clicking on this link):
| ToolStripButton1 | |
| Property | Value |
| Name | tsbBack |
| Image | BackArrow.bmp |
| Text | (blank) |
| ToolTipText | Move Back |
| ToolStripButton2 | |
| Property | Value |
| Name | tsbForward |
| Image | ForwardArrow.bmp |
| Text | (blank) |
| ToolTipText | Move Forward |
| ToolStripButton3 | |
| Property | Value |
| Name | tsbHome |
| Image | Home.bmp |
| Text | (blank) |
| ToolTipText | Go Home |
| ToolStripButton4 | |
| Property | Value |
| Name | tsbRefresh |
| Image | Refresh.bmp |
| Text | (blank) |
| ToolTipText | Refresh the Page |
| ToolStripButton5 | |
| Property | Value |
| Name | tsbStop |
| Image | Stop.bmp |
| Text | (blank) |
| ToolTipText | Stop Loading Page |
| ToolStripSeperator1 | |
| Property | Value |
| Name | (default name) |
| ToolStripButton6 | |
| Property | Value |
| Name | tsbExit |
| Image | Exit.bmp |
| Text | (blank) |
| ToolTipText | Exit My Web Browser |
When you are finished, your Image Collection Editor dialog should look just like this:
Click the OK button to close the Image Collection Editor dialog. The ToolStrip should look like this:
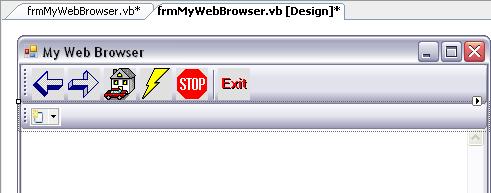
Adding a second ToolStrip to display a URL Address Bar
Important: Before doing this next step change the Size.Width property of the form to 475. Double-click on the ToolStrip control in the control toolbox to add another one to the form. It's name will be ToolStrip2. It should appear underneath the previous one, like this:
Click on the ellipses button of ToolStrip2's Items property collection to display the Items Collection Editor dialog. Add a Label and Textbox, like this:
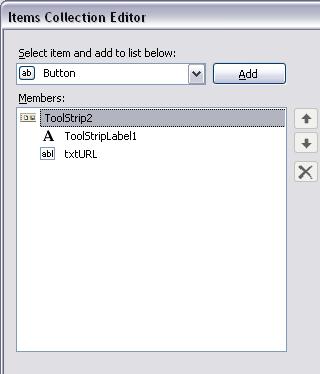
Use the following table to set these properties:
| Label | |
| Property | Value |
| Text | Address: |
| TextAlign | MiddleRight |
| TextBox | |
| Property | Value |
| Name | txtURL |
| AutoSize | False |
| Size.Width | 375 |
| Text | (blank) |
The txtURL textbox will display the URL (Universal Resource Locator) of the website the user is visiting—See the first illustration at the beginning of the project. They will also be able to type a website URL into txtURL and press enter to go to that website:
Adding the WebBrowser control to the form
Select the WebBrowser control at the bottom of the Common Controls section of the control toolbox, and draw one on the form that fills it up, like this (the big white box):
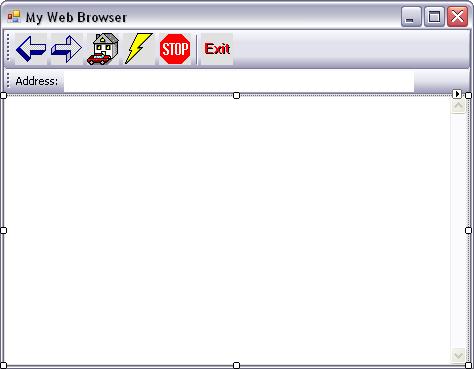
The default name of the WebBrowser control will be WebBrowser1. Leave this default name and all the other properties of the control unchanged.
Configuring the WebBrowser to display the default Homepage at start up
The WebBrowser control has several useful methods for navigating web pages. The GoHome method takes us to the user's default homepage. The default homepage information is stored in the registry when the user specifies a homepage in their normal web browser. The GoHome method reads this registry entry and navigates there. Note: If the user's computer is not already connected to the internet, executing the GoHome method will automatically initiate an internet connection.
To have our browser navigate to the user's homepage at launch, add the following line of code to the frmMyWebBrowser_Load event procedure:
'Navigate to the user's homepage at startup
WebBrowser1.GoHome()
Navigating to any webpage with the Microsoft Web Browser control raises several event procedures that are built into it. For example the Navigating event procedure is triggered when a change of webpage is initiated. Note: If you didn't already know it, any webpage you visit with your browser requires you to download the webpage—which includes all of the graphic files it contains—before it appears in your browser window. The ProgressChanged event procedure is not raised until the website is actually found, and the download process starts.
There are also two event procedures that are raised when the navigation process completes. These include Navigated and DocumentCompleted. We will use the DocumentCompleted event procedure to update our txtURL textbox so that it displays the webpage URL of the page currently being viewed. Add the following code to the WebBrowser1_DocumentCompleted event procedure:
'Display the URL of the current webpage
txtURL.Text = WebBrowser1.Url.ToString
The Url property of the WebBrowser control contains the URL of the currently displayed webpage.
Implementing the Address textbox
To allow the user to type a URL into the Address textbox, and then navigate to that webpage, add the following code to the txtURL_KeyPress event procedure:
'When the user presses enter, Navigate to
' the URL specified in the txtURL textbox.
If e.KeyChar = Chr(Keys.Return) Then
'Add "http://" to the beginning of the URL
If Not txtURL.Text.StartsWith("http://") Then
txtURL.Text = "http://" & txtURL.Text
End If
WebBrowser1.Navigate(txtURL.Text)
End If
The Navigate method of the WebBrowser control takes a URL string as an argument.
Testing the program so far
Save the project now. Run the program. You should see the default homepage displayed in the browser control. Try typing a new URL address into the txtURL textbox (for example http://www.google.com), and press the enter key. Is that website displayed?
Adding a download ProgressBar control to the form
If you are an Internet user—who isn't—you are well aware of how long it can take for some web pages to download. A progress bar is traditionally used to display the progress of a web page being downloaded to your computer—actually, it just gives the user something to look at so they don’t go nuts!
Add a StatusStrip to the form
Double-click on the StatusStrip control in the Menus & Toolbars section of the control toolbox to add one to the form. Its name will be StatusStrip1. It should appear at the bottom of the form, like this:
Click on the ellipses button of StatusStrip1's Items property collection to display the Items Collection Editor dialog. Add a StatusLabel and ProgressBar to the items collection, like this:
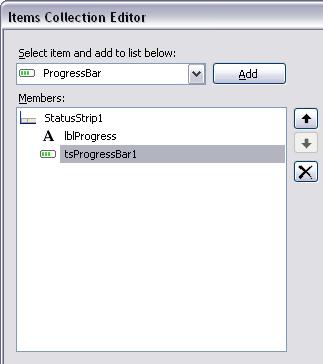
Use the following table to set these properties:
| StatusLabel | |
| Property | Value |
| Name | lblProgress |
| Text | 100% |
| ProgressBar | |
| Property | Value |
| Name | tsProgressBar1 |
| Maximum | 100 |
| Size.Width | 375 |
Resizing the WebBrowser to fit the form
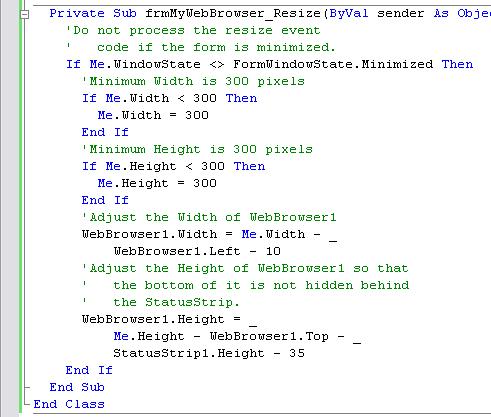
To make sure the WebBrowser control stretches to fit the form when it is resized, add the following code to the frmMyWebBrowser_Resize event procedure:
'Do not process the resize event
' code if the form is minimized.
If Me.WindowState <> _
FormWindowState.Minimized Then
The above If-Then test uses the form's WindowState property to determine if the form is minimized. The code we are about to add to the Resize event procedure should not be executed if the form is minimized. So all of the following code goes inside the above If-Then structure. The first thing we need to do is set a minimum width and height for the form. I've chosen 300 pixels for the minimum Width and Height. Add the following code to the frmMyWebBrowser_Resize event procedure so that the user cannot shrink the form smaller than this minimum:
'Minimum Width is 300 pixels
If Me.Width < 300 Then
Me.Width = 300
End If
'Minimum Height is 300 pixels
If Me.Height < 300 Then
Me.Height = 300
End If
Set the Width property of WebBrowser1 equal to the Width of the form minus it's Left property value. Then subtract an extra 10 pixels to account for the form border (add this code):
'Adjust the Width of WebBrowser1
WebBrowser1.Width = Me.Width - _
WebBrowser1.Left - 10
To make sure the bottom of WebBrowser1 isn't hidden behind StatusStrip1. Set the Height of WebBrowser1 equal to Height of the form minus the Top property of WebBrowser1, minus the Height of StatusStrip1 minus an extra 35 pixel (which is the height of the caption bar at the top of a form):
'Adjust the Height of WebBrowser1 so
' that the bottom of it is not hidden
' behind the StatusStrip.
WebBrowser1.Height = _
Me.Height - WebBrowser1.Top - _
StatusStrip1.Height - 35
The completed code for the frmMyWebBrowser_Resize event procedure should look like this:
Last but not least, to make sure the txtURL textbox resizes to fit ToolStrip2, add the following line of code to the ToolStrip2_Resize event procedure:
txtURL.Width = ToolStrip2.Width - 75
Testing the program so far
Save the project now. Run the program. Resize the form. Is the the WebBrowser control resized to fix the screen? Does the txtURL textbox resize to fit ToolStrip2?
Getting the ProgressBar to work
Our goal is to display the percentage downloaded of a webpage while it is downloading as a number in the lblProgress label, and graphically display the download progress in the tsProgressBar1 control. You can use the following event procedures of the WebBrowser control to do it:
- Navigating — Raised once when a new web page is first accessed and downloading of the webpage begins. This is were we need to initialize the values in lblProgress and tsProgressBar1 and make them both visible.
- ProgressChanged — Raised repeatedly as every new byte of the webpage being downloaded arrives. This is where we we will calculate and update the percentage number displayed in lblProgress, and increase the length of the bar in tsProgressBar1.
- DocumentCompleted — Raised once when the downloading of a new webpage has completed. This is were we need to hide lblProgress and tsProgressBar1.
Enter the following code into the WebBrowser1_Navigating event procedure:
'Set initial values for tsProgressBar1
' and lblProgress
tsProgressBar1.Value = 0
lblProgress.Text = "0.00%"
'Make tsProgressBar1 and lblProgress visible
tsProgressBar1.Visible = True
lblProgress.Visible = True
The above code sets the initial values of the Value and Text properties of the tsProgressBar1 and lblProgress controls. Then it makes them both visible. Now add the following code to the WebBrowser1_DocumentCompleted event procedure:
'Hide tsProgressBar1 and lblProgress
tsProgressBar1.Visible = False
lblProgress.Visible = False
The above code hides the ProgressBar1 and lblProgress controls after they’ve done their job.
The code that goes into the WebBrowser1_ProgressChanged event procedure is a little more interesting. This is the event procedure that is raised repeatedly as a webpage is being downloaded. Type the following code into the WebBrowser1_ProgressChanged event procedure:
Dim dPBarValue As Double
'Avoid a divide-by-zero error
If e.MaximumProgress > 0 Then
'Calculate the percentage downloaded
dPBarValue = _
(e.CurrentProgress * 100) / _
e.MaximumProgress
'Be sure that dPBarValue is greater
' than zero and less than the Maximum
' property value of tsProgressBar1.
If dPBarValue > 0 And dPBarValue <= _
tsProgressBar1.Maximum Then
'Set the Value property of tsProgressBar1
' to dPBarValue.
tsProgressBar1.Value = dPBarValue
'Display the percentage downloaded
' in lblProgress.
lblProgress.Text = _
Format(dPBarValue, "0.00") & "%"
End If
End If
The MaximumProgress property of e is the total size in bytes of the current webpage being download. The CurrentProgress property of e is the number of MaximumProgress bytes that have been downloaded. We need to make sure that MaximumProgress is greater than zero before using it as a divisor to calculate the percentage downloaded value (dPBarValue).
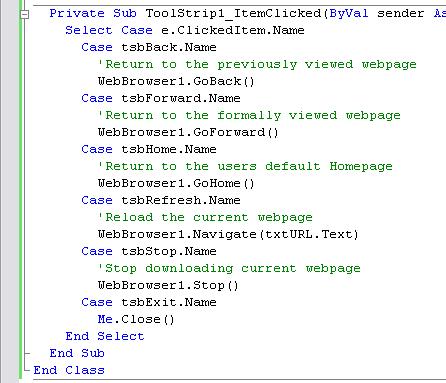
Getting the ToolStrip buttons working
Within the ToolStrip1_ItemClicked event procedure, add the following line of code and press enter:
'Use the button Name to determine which was clicked.
Select Case e.ClickedItem.Name
Add the following Cases inside the Select Case statement:
Case tsbBack.Name
Case tsbForward.Name
Case tsbHome.Name
Case tsbRefresh.Name
Case tsbStop.Name
Case tsbExit.Name
The code in the ToolStrip1_ItemClicked event procedure should now look like this:
Select Case e.ClickedItem.Name
Case tsbBack.Name
Case tsbForward.Name
Case tsbHome.Name
Case tsbRefresh.Name
Case tsbStop.Name
Case tsbExit.NameEnd Select
Now we need to add the code to each Case section to implement the corresponding button. Let's start at the top and work our way down. The WebBrowser control comes with a set of Go methods that include GoBack, GoForward, GoHome. We can use these Go methods to implement the first three buttons on the toolbar. Add the following italicized lines of code to the Select Case structure in the ToolStrip1_ItemClicked event procedure:
Select Case e.ClickedItem.Name
Case tsbBack.Name
'Return to the previously viewed webpage
WebBrowser1.GoBack()
Case tsbForward.Name
'Return to the formally viewed webpage
WebBrowser1.GoForward()
Case tsbHome.Name
'Return to the users default Homepage
WebBrowser1.GoHome()
Case tsbRefresh.Name
Case tsbStop.Name
Case tsbExit.NameEnd Select
The Refresh option needs to reload the current webpage, so add the following code to the Case tsbRefresh.Name section:
WebBrowser1.Navigate(txtURL.Text)
The Stop button must immediately cease downloading the current webpage. The Microsoft Web Browser control comes with a Stop method just for that purpose. Add the following code to the Case tsbStop.Name section:
WebBrowser1.Stop()
And finally, the Exit button needs to close the application. Add the following code to the Case tsbExit.Name section:
Me.Close()
The completed code for the ToolStrip1_ItemClicked event procedure should look like this:
Testing the program
Save the project now. Run the program. And give it a thorough test.
Required Enhancements
You need to enable and disable the Forward and Back depending upon whether or not they will do anything. For example, the Back button is useless until the user starts navigating to different websites. The Forward button can only be used if the user has just used the Back button.
Hints: Disable and enable the Forward and Back buttons so that they can only be selected when it is legitimate to do so.
- Use the CanGoBack and CanGoForward methods of WebBrowser1 to help you determine when to disable and enable the Back and Forward buttons.