Launch Microsoft Visual Studio 2010. Drop down the File menu and select New Project...
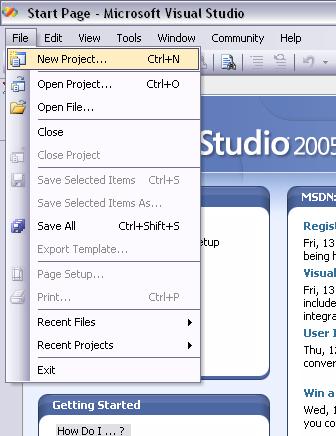
The New Project dialog will appear:
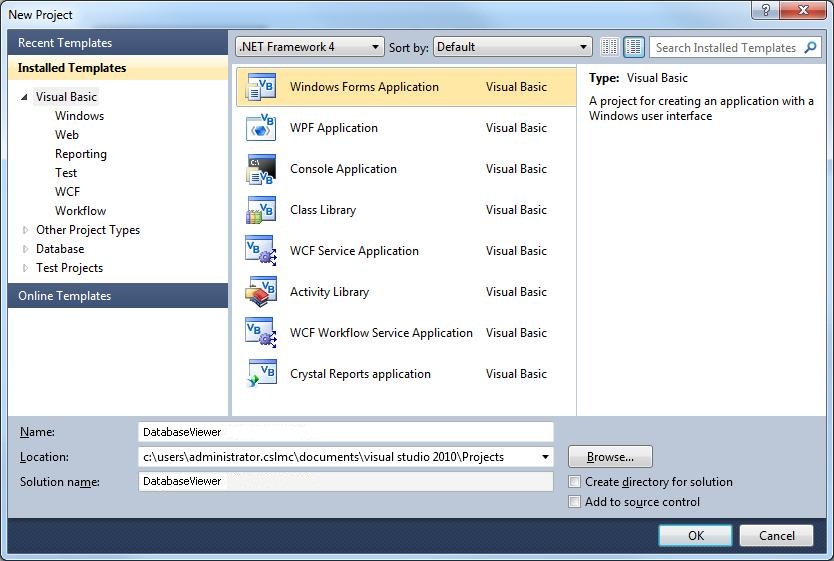
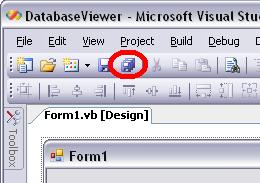
Be sure the Windows Forms Application template is selected in the Templates pane on the right side, then type DatabaseViewer in the Name textbox (as shown above). Now click the OK button. Now save the project by clicking on the Save All button on the standard toolbar:
This displays the Save Project dialog box, as shown:
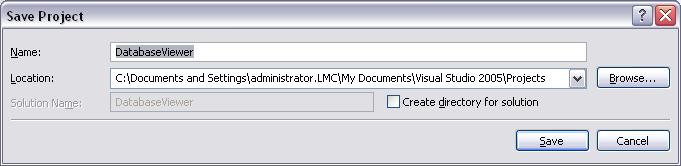
Do not change the default Location path—yours will be different from the above illustration, but the last three folders in the path should be:
My Documents\Visual Studio 2010\Projects.
Be sure to uncheck the Create directory for solution option, as show above, before clicking on the Save button.
This creates a new folder inside the My Documents\Visual Studio 2010\Projects\ folder named DatabaseViewer:
My Documents\Visual Studio 2010\Projects\DatabaseViewer
Note: When class is over, be sure to follow the instructions at the end of each project that tell you how to copy your project to your floppy diskette or pen-drive so you can take it home with you.
Rename the Form file
Make sure the form is selected in the Solution Explorer window:
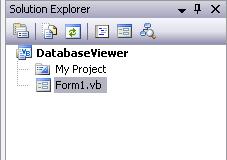
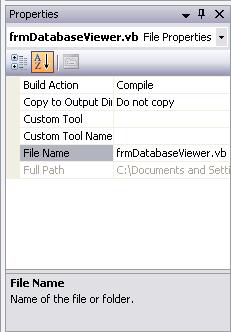
With the form file (Form1.vb) selected in the Solution Explorer window (as shown above), the Properties window directly below it displays it's File properties. Click on the File Name property and type frmDatabaseViewer.vb and press the enter key (don't forget to include the .vb extension, as shown in the illustration below):
Change the Name and Text properties of the Form
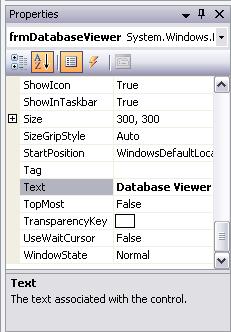
To display the properties of the form in the Properties window, click once on the blank Form, which should be displayed on the left side of the screen in the Design window. Make sure the Name property—which is in parentheses (Name) at the top of the property list so that it's easy to find—is frmDatabaseViewer. It should have been set to that automatically when we named the form file. Then scroll the properties windows down—the properties are listed alphabetically—and change the Text property to Database Viewer as shown below:
Creating a Database Connection with a BindingSource control
Locate the BindingSource control in the Data section of the Control Toolbox:
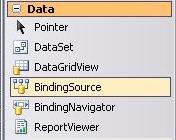
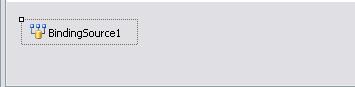
Double-click on the BindingSource control to add one to your project, it should appear in the Component Tray, like this:
Setting the DataSource property of the BindingSource control
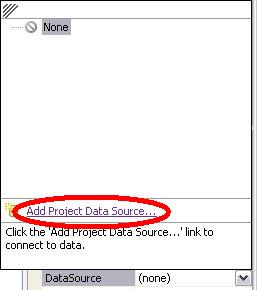
Select the BindingSource control in the Component Tray to view its properties in the Properties Window. Click on the drop-down arrow button of the DataSource property, as shown:

Since we have no databases connected to this project, the DataSource list is empty. Click on the Add Project Data Source... hyperlink text, as shown:
This launches the Data Source Configuration Wizard. The first dialog lets us Choose a Data Source Type. Currently supported data source types include databases, Web services, and objects. If you click on each icon, a short description is displayed in the banner below them. We will be using the Database option, which enables our application to connect to and manipulate data from database applications like Microsoft SQL Server, Access, Oracle, etc.:
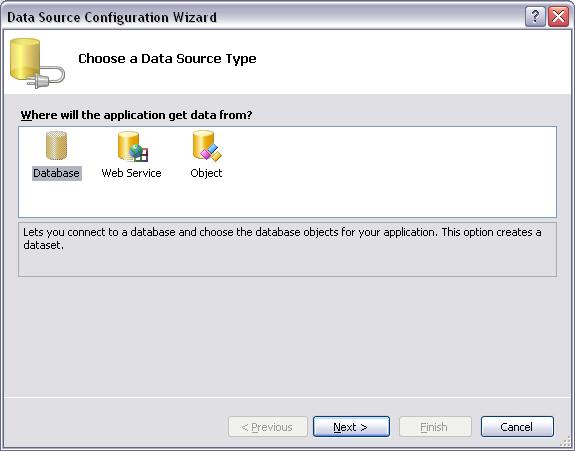
Make sure the Database item is selected and click the Next button. Now we need to Choose a Data Connection:
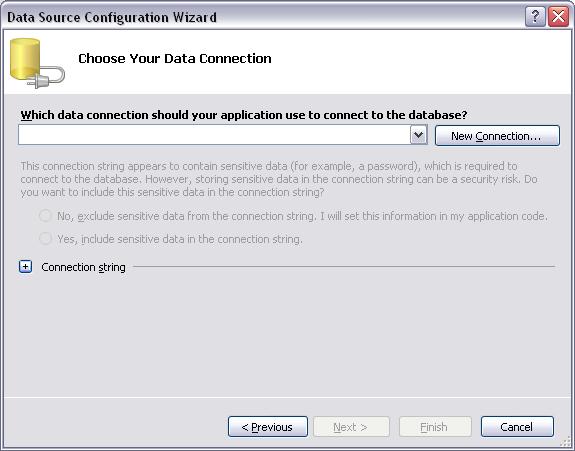
Click on the New Connection... button to display the Choose Data Source dialog:
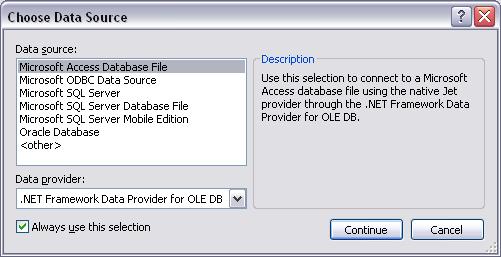
For this exercise we will be using a Microsoft Access database—which requires an OLE DB provider. Select the Microsoft Access Database File item in the Data source list (as shown above), and click the Continue button to display the Add Connection dialog:
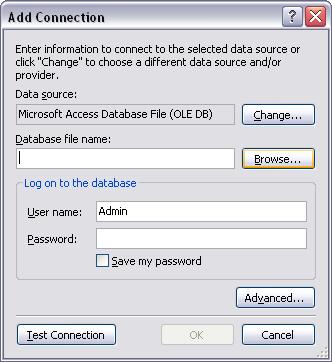
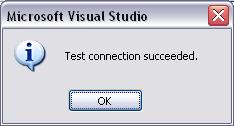
Here is where we actually specify the database file that we want to establish a connect with. Click on the Browse... button at the right end of the Database file name textbox. Browse to the location of the provided prj1data.mdb file, and select it. Note: This file is located in the \Shared\Databases folder on drive C: in the classroom—You may also download the prj1data.mdb file here if you are working on this project from home. Once you've selected the prj1data.mdb file, and its name appears in the Database file name textbox, click on the Test Connection button to make sure that our connection to the database is working. This message box, confirming the connection, should appear:
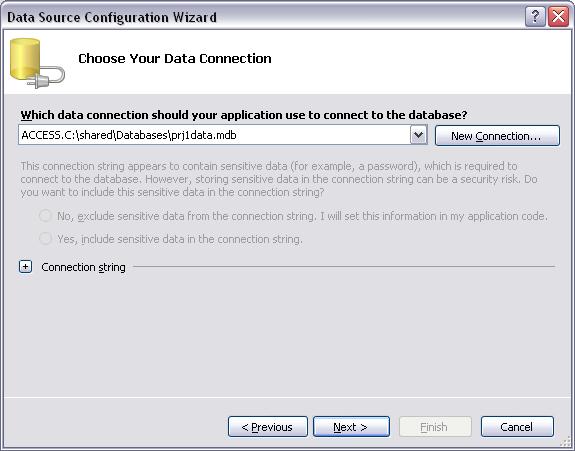
Click the OK buttons on the message box and on the Add Connection dialog to close them both. The Choose Your Data Connection dialog should now look like the following illustration. Notice that the file name and path to the prj1data.mdb file is set as the new connection:
Now click the Next button. If the following messagebox appears click the No button. We don't need to copy the database file to our project and modify the connection:

The Save the Connection String to the Application Configuration File dialog should display, as shown:
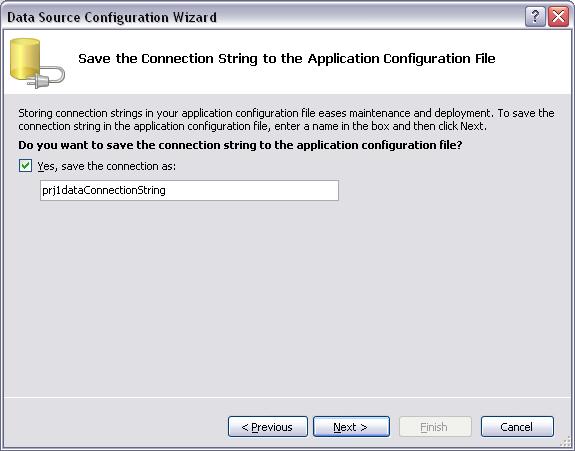
With the Yes, save the connection as checkbox checked—use the default name prj1dataConnectionString—click on the Next button to display the Choose Your Database Objects dialog. This dialog lets us view and select the Tables—and the Columns (fields) they contain—from the prj1Data.mdb database. A Dataset will be created from these choices:
Datasets store the data from the database file in a disconnected cache on your local computer. By using a Dataset we can modify the data; add and delete records, even make changes to the structure of the table, without actually changing the database file. We then have the option to update the database with the changes or abandon all the changes. The structure of a Dataset is similar to that of a relational database; it exposes a hierarchical object model of tables, records (rows), and fields (columns). In addition, it contains constraints and relationships defined for the Dataset when it is created.
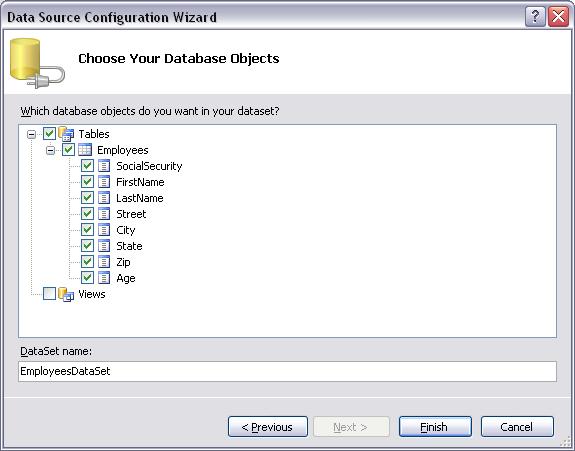
We will now use the Choose Your Database Objects dialog, shown above, to designate the Tables, and which Columns (Fields) from those tables, to include in our Dataset object.
Check mark the Tables item and click on the tiny + button in front of it to expand the list of the tables contained in the prj1Data.mdb database—It contains a single table, Employees. Now click on the tiny + button in front of Employees to expand and display the Columns (fields) in the Employees table. We have the option to deselect columns so that they will not be included. Since we want access to all the columns in the Employees table, be sure they are all check marked—see the illustration above. Now change the DataSet name to EmployeesDataSet, as shown above, before clicking on the Finish button to create the Dataset.
Creating Datasets, pass and future
To create the same Dataset in past versions of Visual Studio .NET we had to create an SQL select statement—SQL stands for Simple Query Language—to specify the Employees table and which columns to include from it. That SQL select statement looked like this:
SELECT Employees.* FROM Employees
In Visual Studio 2010 experience with SQL commands is no longer required to create a dataset. Instead we used the simpler, graphical-hierarchical representation of the Tables and Columns that the Choose Your Database Objects dialog provides.
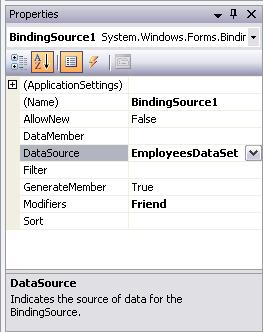
Click once on the BindingSource1 object in the component tray so that its properties are displayed in the property window. The DataSource property should now say EmployeesDataSet, which is the name of our newly created dataset, as shown:
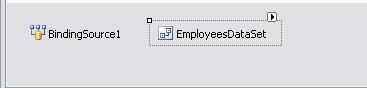
Notice on the Component Tray, at the bottom of your form designer screen, the addition of the new EmployeesDataSet dataset object:
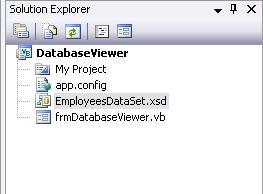
And a quick glance at the solution explorer window shows that the dataset file EmployeesDataSet.xsd is now part of our project:
Naming the BindingSource and setting its DataMember property to create a TableAdapter
Now that we have generated our project dataset, EmployeesDataSet. We are ready to name the BindingSource and set its DataMember property so that we can bind controls (textboxes specifically) to it. Click once on the BindingSource1 object in the component tray so that its properties are displayed in the property window:

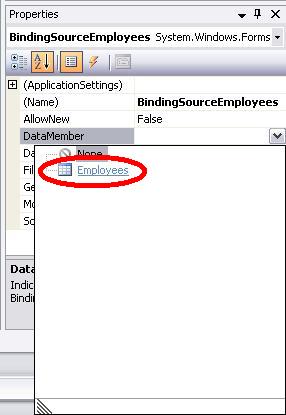
Change the Name property to BindingSourceEmployees. Then set the DataMember property to the Employees table of the EmployeesDataSet, as shown:
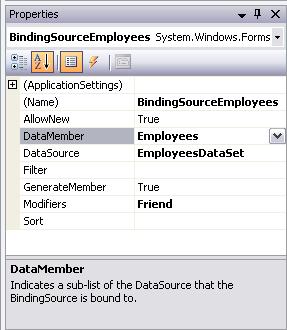
The properties window for your BindingSource object should now look like this:
There is also something new in your Component Tray. A TableAdapter was created named, EmployeesTableAdapter:

TableAdapters provide communication between our project and a database. More specifically, this EmployeesTableAdapter control connects to the Employees table in the prjData1.mdb database, executes queries or stored procedures, and fills our EmployeesDataSet with the data returned from those queries or procedures. This EmployeesTableAdapter control will also be used to send updated data from the EmployeesDataSet back to the database.
Taking a quick look at the data
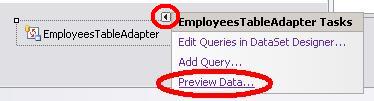
Click the little task button of EmployeesTableAdapter in the component tray and select the Preview Data... item on the pop-up menu, as shown.
This displays the Preview Data dialog. Click on the Preview button to populate the Results panel of the dialog with the row values of the Employees table—These are the records that the table contains:
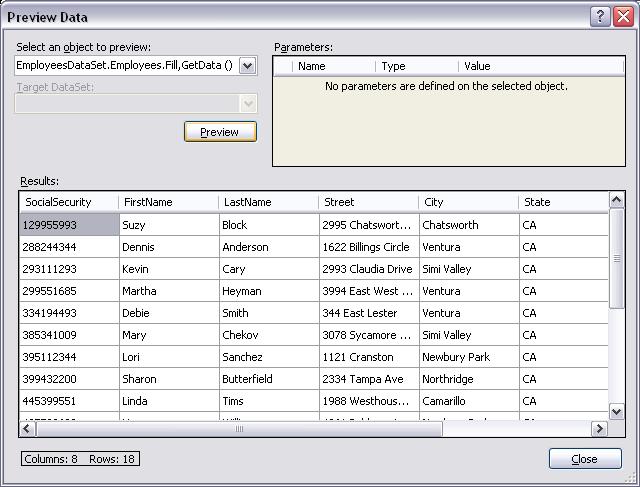
You cannot edit records from here. This is just a quick way to view the records in the table and make sure the EmployeesTableAdapter control is properly connected to it. Click the Close button to close the Preview Data dialog.
Database access, a summary
This completes the addition of controls necessary to allow our program to access the tables in a database. In summary, this is what we did:
- Add a
BindingSource
control to the project
Setting the DataSource property of a BindingSource object launches the Data Source Configuration Wizard, which let us:- Choose a DataSource
Type
- Database - A database file located on the local computer or a network server.
- Web service - An Internet based data source. Because Web services can return many different types of objects, the resulting data source is determined by the objects returned from the Web service.
- Object - Data from existing objects. If the object is not located in the project, you must add a reference to the selected object for it to appear in the wizard.
- Browse to and select the database file—if we chose the Database datasource type.
- Test the connection to the database file.
- Choose the database objects to include in a Dataset.
- Creates the Dataset control (EmployeesDataSet).
- Choose a DataSource
Type
- Dataset
(EmployeesDataSet)
This dataset (EmployeesDataSet) created through the Data Source Configuration Wizard, stores the records from tables we designate in a disconnected cache. For easy and safe manipulation. We will be binding textboxes and other controls to the fields (columns) exposed by the Dataset so that we can view and modify the records (rows). - Create a
TableAdapter
(EmployeesTableAdapter)
Setting the DataMember of the BindingSource control to the Employees table creates a TableAdapter. This EmployeesTableAdapter control connects to the Employees table in the prj1Data.mdb database, executes queries or stored procedures, and fills our EmployeesDataSet with the data returned from those queries or procedures. This EmployeesTableAdapter control will also be used to send updated data from the EmployeesDataSet back to the database.
Adding Controls to the Form and then Binding them to the Dataset
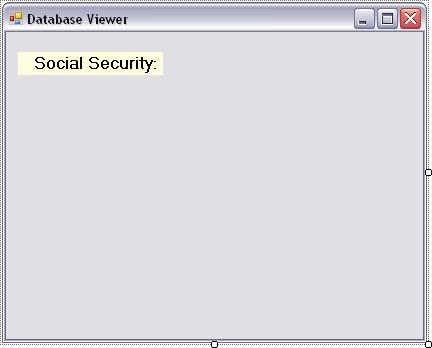
Place
a Label control on the form, as shown above. Be sure the label is selected so that
it's properties are displayed in the Properties
window. Set these properties:
| Property | Value |
| AutoSize | False |
| BackColor | Light Yellow |
| Font.Size | 12 |
| Font.Bold | True |
| Size.Width | 145 |
| Text | Social Security |
| TextAlign | MiddleRight |
Once you've set the above property values of the Label (leave it's default name unchanged), right-click on the label, and select Copy from the context pop-up menu. Now, right-click on the form and select Paste from the context pop-up menu. Paste 7 copies of the label. Arrange them in a single column and change their Text properties to match the following illustration:
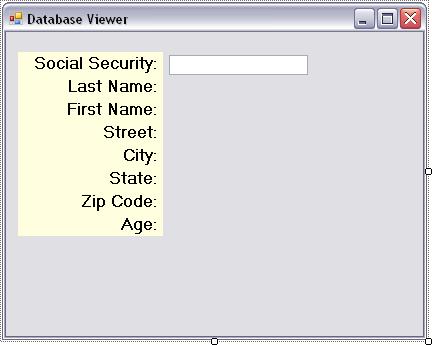
Place
a Textbox control on the form
where shown above. Be sure the Textbox is selected so that
it's properties are displayed in the Properties
windows. Set these properties (leave the default name unchanged):
| Property | Value |
| ReadOnly | True |
| Font.Size | 10 |
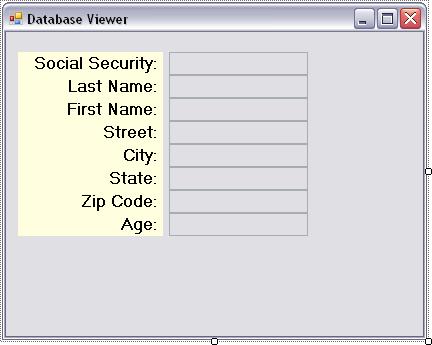
We're setting the ReadOnly property to True so that records from the table cannot be edited by mistake. Once you've set these properties, right-click on the Textbox and select Copy from the context pop-up menu. Right-click on the form and select Paste. Paste 7 copies of the textbox, arrange them in a single column to match the following illustration:
Setting the Tab Order for the Textbox controls
With the form selected in design view, drop down the View menu and select the Tab Order item. Click on the textboxes to set their tab order values. Set their tab order values so that they match the following illustration. You can ignore the tab order values for the labels. We could also set this order by manually setting the TabIndex property of each textbox. Note: The control with the TabIndex of 0 starts off with the focus when the program launches.

Drop down the View menu and select the Tab Order item again to hide the tab order numbers.
Naming the Textbox controls
Select
each textbox one by one, from the top down, and change their
Name properties, like so:
| Property | Value |
| Name | txtSS |
| Name | txtLast |
| Name | txtFirst |
| Name | txtStreet |
| Name | txtCity |
| Name | txtState |
| Name | txtZip |
| Name | txtAge |
Binding the Textbox controls to the Dataset
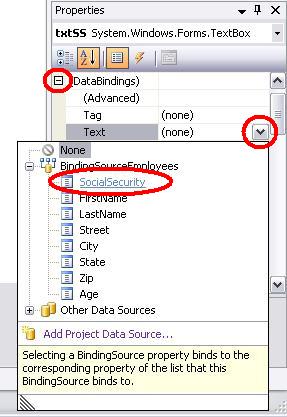
Let's begin by binding the SocialSecurity column (field) from the Employees table to the txtSS textbox. With the txtSS textbox selected, so that its properties are displayed in the properties window, click on the tiny + button in front of the (DataBindings) property to expose the Text sub-properties inside. Click the down-arrow on the Text property pop open the BindingSource list. Click on the tiny + button in front of the BindingSourceEmployees item to expand and display the columns from the Employees table. Click on the SocialSecurity item to bind it to the Text property of the txtSS textbox, as shown:
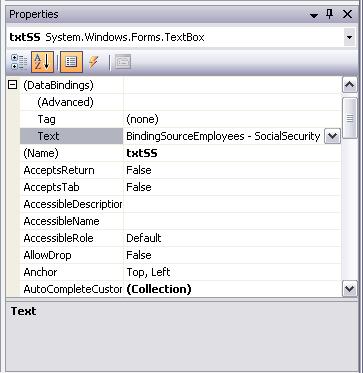
The DataBindings.Text property of the txtSS textbox should now look like this:
Select each textbox one by one from the top down and use the method above to bind their DataBindings.Text properties to these fields from the Employees table:
| Textbox | Bind to Column |
| txtSS | SocialSecurity |
| txtLast | LastName |
| txtFirst | FirstName |
| txtStreet | Street |
| txtCity | City |
| txtState | State |
| txtZip | Zip |
| txtAge | Age |
Displaying record values in our bound controls
Before we can see the actual values of records in our bound textboxes, we need to Fill our dataset. We do this by adding some code to the Load event procedure of the form. Double-click on the form to bring up the Code View window, and add this code to the frmDatabaseViewer_Load event procedure. Note: This code may have been added automatically when you created the EmployeesTableAdapter control:
'The Fill method of the Table Adapter fills
' the data sets that are connected to it.
Me.EmployeesTableAdapter.Fill( _
EmployeesDataSet.Employees)
The Fill method of the EmployeesTableAdapter control requires one parameter: The table from the EmployeesDataSet. In this case, the EmployeesDataSet contains only the Employees table.
Testing the program so far
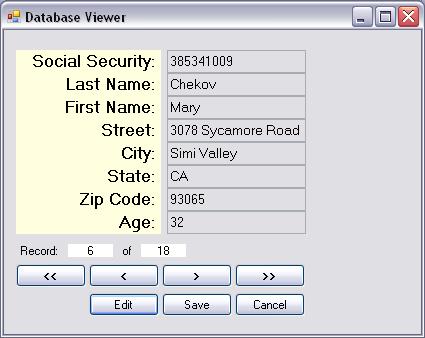
Let's test run the program and see what happens. Click on the Start Debugging button on the toolbar. The form should appear similar to the following illustration:
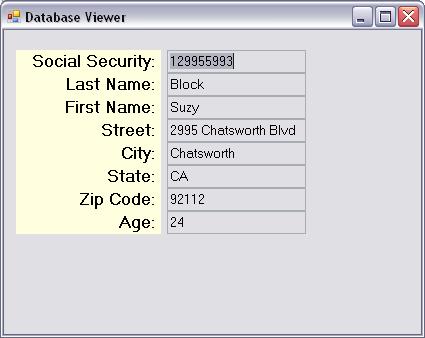
The values displayed are from the first record (row) in the Employees table.
Navigating the table: Adding a move Next button
Because a dataset is a fully disconnected container for data, datasets (unlike ADO recordsets—from Visual Studio 6) do not need or support the concept of a current record. Instead, all records in the dataset are available. Because there is no current record, there is no specific property that points to a current record and there are no methods or properties for moving from one record to another. (In contrast, ADO recordsets support an absolute record position and methods to move from one record to the next.) You access individual tables in the dataset as objects; each table exposes a collection of rows (records). You treat this like any collection, accessing the records via the collection's index or using collection-specific statements in your programming language.
Let's begin by adding a move Next button:
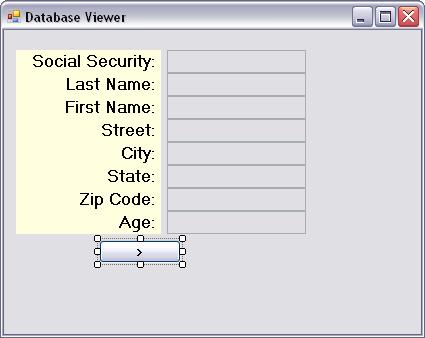
Place
a Button control on the form
where shown above. Be sure the Button is selected so that
it's properties are displayed in the Properties
windows. Set these properties:
| Property | Value |
| Name | btnNext |
| Text | > |
| Font.Bold | True |
Now double-click on the btnNext button and add the following code to its Click event procedure:
'Increment the Position property of
' BindingSourceEmployees to move
' forward one record (row). Position
' is equal to 0 (zero) on the first record.
BindingSourceEmployees.Position += 1
We will be using several properties and methods of the BindingSourceEmployees object to do the following:
- Navigate through the records (rows)—by incrementing and decrementing its Position property.
- Determine the total number of records (rows) in the table—with it's Count property (which is always equal to the number of records-rows-in the table).
- Allows us to add and delete records (rows) from the table with it's AddNew and RemoveAt methods.
- Allows us to modify the contents of existing records with it's EndEdit and CancelEdit methods.
Adding move First, Previous, and Last buttons
Return to Design View
so that you can see the form. Add a move
Previous button by placing another
Button control on the form. Select it, and then set these
properties:
| Property | Value |
| Name | btnPrevious |
| Text | < |
| Font.Bold | True |
Now double-click on the btnPrevious button and add the following code to its Click event procedure:
'Decrement the Position property of
' BindingSourceEmployees to move
' backward one record (row).
BindingSourceEmployees.Position -= 1
Now you can add move First and
Last
buttons. Return to
Design View so that you can see the form. Add a move
First button to the form and set its properties like so:
| Property | Value |
| Name | btnFirst |
| Text | << |
| Font.Bold | True |
Double-click on the btnFirst button and add the following code to its Click event procedure:
'Setting the Position property of
' BindingSourceEmployees to 0
' moves to the first record (row).
BindingSourceEmployees.Position = 0
Return to Design View
and add a move Last button to the form and set its properties
like so:
| Property | Value |
| Name | btnLast |
| Text | >> |
| Font.Bold | True |
Double-click on the btnLast button and add the following code to its Click event procedure:
'The Count property of BindingSourceEmployees
' is equal to the number of records in the table.
' Setting the Position property to Count - 1 puts
' us on the last record (row).
BindingSourceEmployees.Position = _
BindingSourceEmployees.Count - 1
Here is how your form should look after all four move buttons have been added:
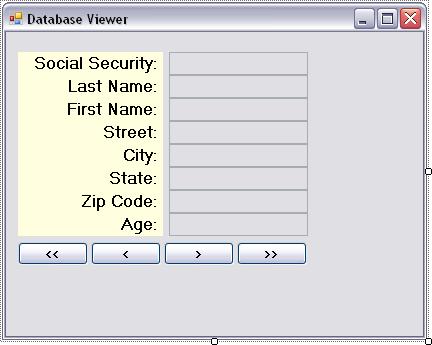
Testing the program so far
Save and run the program. Test your move First, Next, Previous, and Last buttons. Make sure they are working properly before continuing.
Enabling and disabling the buttons to guide user interaction
We can't have the user trying to click on the move Next button if they are already on the last record, or the move First button if they have already reached the first record. To guide user interaction, we should enable and disable the First, Next, Previous, and Last buttons when appropriate. The following code will do that for the Next and Last buttons (don't type this code yet):
'When the Position property is equal to the Count
' property minus one, we have reached the last
' record (row) in the table, so disable the Next
' and Last buttons.
If BindingSourceEmployees.Position = _
BindingSourceEmployees.Count - 1 Then
btnNext.Enabled = False
btnLast.Enabled = False
Else 'Else enable the Next and Last buttons.
btnNext.Enabled = True
btnLast.Enabled = True
End If
And this code will enable and disable the Previous and First buttons when appropriate (don't type this code yet):
'When the Position property is equal to 0 we
' have reached the first record (row) in
' the table, so disable the Previous and
' First buttons.
If BindingSourceEmployees.Position = 0 Then
btnPrevious.Enabled = False
btnFirst.Enabled = False
Else 'Else enable the Previous and First buttons.
btnPrevious.Enabled = True
btnFirst.Enabled = True
End If
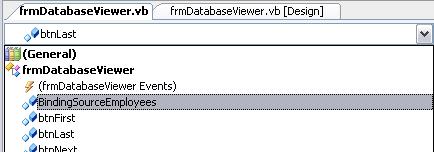
Where do we put this code? When do we want this code executed? The last question is the easiest one to answer: The above code needs to be executed whenever the current record changes. To change to a different record, we modify the value in the Position property of BindingSourceEmployees. Lucky for us, BindingSource controls come with a PositionChanged event procedure that is raised whenever their Position property is changed. In code view, drop down the Class List and select the BindingSourceEmployees control, like this:
Now drop down the Method List and click its PositionChanged event procedure, as shown:
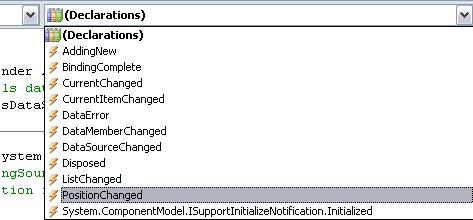
Type the following code into the PositionChanged event procedure of the BindingSourceEmployees control:
'When the Position property is equal to the Count
' property minus one, we have reached the last
' record (row) in the table, so disable the Next
' and Last buttons.
If BindingSourceEmployees.Position = _
BindingSourceEmployees.Count - 1 Then
btnNext.Enabled = False
btnLast.Enabled = False
Else 'Else enable the Next and Last buttons.
btnNext.Enabled = True
btnLast.Enabled = True
End If
'When the Position property is equal to 0 we
' have reached the first record (row) in
' the table, so disable the Previous and
' First buttons.
If BindingSourceEmployees.Position = 0 Then
btnPrevious.Enabled = False
btnFirst.Enabled = False
Else 'Else enable the Previous and First buttons.
btnPrevious.Enabled = True
btnFirst.Enabled = True
End If
Testing the program so far
Save and run the program. Test your move First, Next, Previous, and Last buttons. Make sure that they are disabled and enabled when they should be.
Displaying the Total number of records and the Current record (row) number
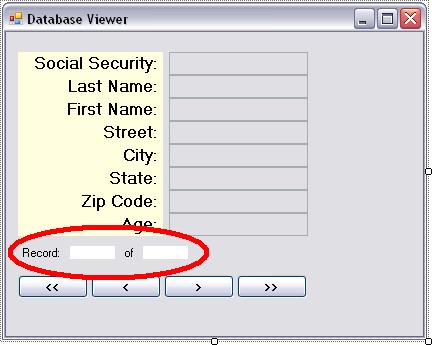
Add four label controls to the form as shown in the above illustration (the BackColor properties of two of the labels are set to white). Set their properties—from left to right—like this:
| First Label | Second Label | ||
| Property | Value | Property | Value |
| Text | Record: | Name | lblCurrRow |
| AutoSize | False | ||
| BackColor | White | ||
| TextAlign | MiddleCenter | ||
| Third Label | Fourth Label | ||
| Property | Value | Property | Value |
| Text | of | Name | lblTotRows |
| AutoSize | False | ||
| BackColor | White | ||
| TextAlign | MiddleCenter | ||
To set the initial number values for the current record (lblCurrRow) and total records (lblTotRows) labels, add the following code to the PositionChanged event procedure of the BindingSourceEmployees control:
'Since the Position property is the record
' (row) index value--which is 0 on record
' 1--be sure to add 1 to it to display the
' actual record number.
lblCurrRow.Text = _
BindingSourceEmployees.Position + 1
'The Count property of BindingSourceEmployees
' is always equal to the total number of records
' (rows).
lblTotRows.Text = _
BindingSourceEmployees.Count
Testing the program so far
Save and run the program. Test your move First, Next, Previous, and Last buttons. Make sure the labels displaying the current record and total records numbers are working.
Allowing the user to edit records
Adding Edit and Save buttons
Add the Edit button first. Add a new
button control to the form, select it, and then set these
properties:
| Property | Value |
| Name | btnEdit |
| Text | Edit |
Now double-click on the btnEdit button and add the following code to its Click event procedure:
'Disable the navigation buttons to force
' the user to complete the edit process
' on the current record .
btnFirst.Enabled = False
btnPrevious.Enabled = False
btnNext.Enabled = False
btnLast.Enabled = False
btnEdit.Enabled = False
'Set the ReadOnly properties of the
' textboxes to False so that their
' contents can be modified.
txtSS.ReadOnly = False
txtLast.ReadOnly = False
txtFirst.ReadOnly = False
txtStreet.ReadOnly = False
txtCity.ReadOnly = False
txtState.ReadOnly = False
txtZip.ReadOnly = False
txtAge.ReadOnly = False
'Set the Focus on the Social
' Security textbox.
txtSS.Focus()
The above code sets the ReadOnly property of the textboxes to False so that their contents can be edited. To make sure that the user completes the edit procedure by either clicking the Save or Cancel buttons only, the above code also disables the navigation buttons and the edit button until the edit process is completed.
Now add the Save button. Add a new
button
control to the form, select it, and then set these
properties:
| Property | Value |
| Name | btnSave |
| Text | Save |
Now double-click on the btnSave button and add the following code to its Click event procedure:
'Dim an iCurrentRecord variable to store the
' current record position.
Dim iCurrentRecord As Integer
'The EndEdit method of BindingSourceEmployees
' applies the changes to the EmployeesDataSet,
' but does not commit the changes.
BindingSourceEmployees.EndEdit()
'Store the current record position in iCurrentRecord
iCurrentRecord = BindingSourceEmployees.Position
'Use the HasChanges method of EmployeesDataSet
' to be sure the record was modified before wasting
' resources doing an Update to the DataSource.
If EmployeesDataSet.HasChanges() = True Then
'To Commit the modifications of the record to
' the DataSource, use the Update method of
' EmployeesTableAdapter.
EmployeesTableAdapter.Update(EmployeesDataSet)
'After updating the DataSource we need to re-fill
' the EmployeesDataSet.
EmployeesTableAdapter.Fill( _
EmployeesDataSet.Employees)
End If
'Disable further editing by changing the ReadOnly
' property of the textboxes back to True. Enable
' the Edit button.
txtSS.ReadOnly = True
txtLast.ReadOnly = True
txtFirst.ReadOnly = True
txtStreet.ReadOnly = True
txtCity.ReadOnly = True
txtState.ReadOnly = True
txtZip.ReadOnly = True
txtAge.ReadOnly = True
btnEdit.Enabled = True
'Refilling the EmployeesDataSet positions us
' back at the first record. Set the Position
' property to iCurrentRecord to put us back
' at the record that was just edited.
BindingSourceEmployees.Position _
= iCurrentRecord
The above code uses the EndEdit method of the Binding Source (BindingSourceEmployees.EndEdit) to update the Dataset (EmployeesDataSet) with the modifications made to the record. A call to the HasChanges method of the Dataset (EmployeesDataSet.HasChanges) tells us whether or not the user actually modified the record before we waste valuable resources updating the DataSource. If HasChanges returns True, then a call to the Update method of the Table Adapter (EmployeesTableAdapter.Update) commits the modifications to the DataSource (the database). In summary, these are the four steps to editing a record:
- Use the EndEdit method of the Binding Source to update the Dataset with the modifications.
- Use the HasChanges method of the Dataset to see if modifications were actually made to the data.
- Use the Update method of the Table Adapter to commit the changes in the Dataset to the Data Source—a database file in this case.
- Use the Fill method of the Data Table to refill the Dataset with the updated records from the Data Source.
Until we executed the Update method of the Table Adapter (EmployeesTableAdapter.Update) we had the option to back out any changes we had made. Next we will add a Cancel button to allow the user to change their mind and undo changes while editing a record.
Testing the program so far
Save and run the program. Navigate to any record and click on the Edit button. Modify one or two of the fields (i.e. Change the First and Last name fields to your name). Click on the Save button. Did it work?
Adding a Cancel button
We need to add a Cancel
button so that if the user changes their mind after they start editing a
record—before clicking on the Save button—they can cancel any changes
they have made. Add a new button control to the form, select it, and set these
properties:
| Property | Value |
| Name | btnCancel |
| Text | Cancel |
Now double-click on the btnCancel button and add the following code to its Click event procedure:
'The CancelEdit method of BindingSourceEmployees
' cancels any changes made prior to an Update.
BindingSourceEmployees.CancelEdit()
'Change the ReadOnly property of the textboxes
' back to True.
txtSS.ReadOnly = True
txtLast.ReadOnly = True
txtFirst.ReadOnly = True
txtStreet.ReadOnly = True
txtCity.ReadOnly = True
txtState.ReadOnly = True
txtZip.ReadOnly = True
txtAge.ReadOnly = True
'Since the Position property is not modified when
' we cancel an edit, we must manually call
' PositionChanged event procedure of
' BindingSourceEmployees to enable the
' navigation buttons.
BindingSourceEmployees_PositionChanged( _
Nothing, Nothing)
The above code uses the CancelEdit method of BindingSourceEmployees to restore the state of any modified fields prior to the last Update.
Testing the program so far
Save and run the program. Navigate to any record and click on the Edit button. Modify one or two of the fields. Click on the Cancel button. Did the fields that you modified revert back to the values they had before you clicked the edit button?
Including an Add button
The user may need to add new records to the table.
Add a new button control to the form, select it, and then set these
properties:
| Property | Value |
| Name | btnAdd |
| Text | Add |
Now double-click on the btnAdd button and add the following code to its Click event procedure:
'Set the ReadOnly properties of the textboxes to
' False so that their contents can be modified.
txtSS.ReadOnly = False
txtLast.ReadOnly = False
txtFirst.ReadOnly = False
txtStreet.ReadOnly = False
txtCity.ReadOnly = False
txtState.ReadOnly = False
txtZip.ReadOnly = False
txtAge.ReadOnly = False
'Set the Focus to the Social Security textbox
txtSS.Focus()
'Store the current record position, so that if
' the user cancels the add they are returned
' to the record position that they started on.
iStartRec = BindingSourceEmployees.Position
'The AddNew method of BindingSourceEmployees
' adds a new record (row) to the table.
BindingSourceEmployees.AddNew()
In the event that the user changes their mind after they start the add record process, we have added a line of code above that stores the current record position value (in an iStartRec variable) prior the AddNew call at the bottom of the code. So that if the user clicks on the Cancel button we can return them to the record they were on when they started the add record process. The iStartRec variable needs to be dimensioned in the Declarations section at the top of the code window, like so:
Dim iStartRec As Integer
Now, when the user clicks on the Cancel button, we need to return them to the record they were on before they clicked the Add button. To do this, add the following line of code to the btnCancel_Click event procedure—be sure to place this code at the bottom of the procedure, below the code that's already there:
'Move the user back to the record they were
' on before the Add or Edit began.
BindingSourceEmployees.Position _
= iStartRec
Since both the Add and Edit processes can be canceled with the Cancel button, we also need to assign a value to the iStartRec variable in the Click event procedure of the Edit button. If we don't, when the user cancels out of an edit process, they will be moved to whatever record index that iStartRec was last set to. Add the following line of code at the bottom of the btnEdit_Click event procedure:
'This line of code is required to be compatible
' with the code in the Cancel button's Click
' event procedure.
iStartRec = BindingSourceEmployees.Position
Testing the program so far
Save and run the program. Click on the new Add button. Notice that all the textboxes are cleared so that you can enter the values for a new record. Make up some values and fill in all the fields, then click on the Save button. Did it work? At what position was the new record (row) added in the table?
Adding a Delete button

The final option to be added is a
Delete button (as shown in the
illustration above). Add a new button control to the form, select
it, and then set these properties:
| Property | Value |
| Name | btnDelete |
| Text | Delete |
Now double-click on the btnDelete button and add the following code to its Click event procedure:
Dim iResponse As DialogResult
'Always confirm the deletion of a record (row) from
' a table, because it is permanent.
iResponse = MessageBox.Show( _
"Are you sure you want to delete this record?", _
"Confirm Delete", MessageBoxButtons.YesNo, _
MessageBoxIcon.Question)
If iResponse = Windows.Forms.DialogResult.Yes Then
'Use the RemoveAt method of BindingSourceEmployees
' to delete a record (row).
BindingSourceEmployees.RemoveAt( _
BindingSourceEmployees.Position)
End If
It is always a good idea to ask the user for confirmation before doing something as permanent as deleting a record (row). In the code above we use a message box to ask their permission before actually deleting the record with the RemoveAt method of BindingSourceEmployees. The RemoveAt method is passed the index value of the record to be removed—in this case, the Position property of BindingSourceEmployees is used.
Testing the program so far
Save and run the program. Try deleting a record. After deleting a record, stop the program and re-run it. Is the record you deleted gone? If not, why not?
That completes this project. We will use this project to create project 2.
Recommended Enhancements
Disabling buttons to guide user interaction
We spent some time in this project adding code to disable and enable the navigation buttons, to guide user interaction. The basic rule is: Options that are not available should not be selectable; buttons, menu items, etc. should be enabled and disabled to guide user interaction within your programs.
If you test this program thoroughly, you'll discover some serious problems with our edit buttons, for example:
- The Cancel and Save buttons should not be enabled until the Edit or Add buttons are selected
- The Delete button should not be enabled while in the process of editing or adding a record
Test the program and enable and disable the editing option buttons where appropriate.
Do the Add and Delete options work the way they should? After adding a new record or editing an existing record and clicking the Save button, which record is displayed? Is the program user friendly?