Removing your old project and creating a new one
Run Visual Basis .NET and open your Solution (<your name>.sln).
Right-click on the Project11 project in the Solution Explorer window and select Remove from the context menu. Click the OK button when warned that Project11 will be removed from the Solution. Drop down the File menu. Under the Add Project menu item, select New Project. When the Add New Project dialog appears, be sure that the Visual Basic Projects folder is open in the Project Types pane, and that the Windows Application template is selected in the Templates pane. Type Project12 in the Name textbox. Then click the OK button. This creates a new folder inside the \Visual Studio Projects\<Your Name> folder named Project12:
...My Documents\Visual Studio Projects\<Your Name>\Project12.
Note: When class is over, be sure to follow the instructions at the end of this project that tell you how to copy your project to your floppy diskette so you can take it home with you.
Rename the Form file and change it's Name and Text properties
With the form file (Form1.vb) selected in the Solution Explorer window, so that it's File properties are displayed in the Properties window, change the File Name property to frmProj12.vb (don't forget to include the .vb extension).
Now click on the form in the Designer window to display it's properties:
- Change the Name property to frmProj12 (Remember: No spaces are allowed in the name property of any control).
- Change the Text property to Concentration International
Setting the Startup Object
Right-click on the Project12 project in your Solution Explorer window, click on the Properties item at the bottom of the context-menu. In the Project12 Property Pages dialog drop down the Startup object list and choose frmProj12 and click the OK button.
Before going on, click on the Save All button on the toolbar to save your project.
The Concentration International game
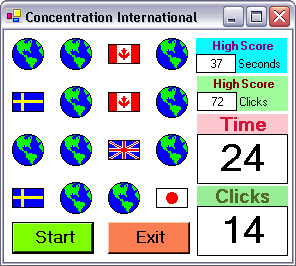
In this project we will create a game called Concentration International. The object of the game is to match up pairs of different flags hidden on a 4 by 4 grid of 16 pictureboxes. The user can only view 2 of the flags at a time, so they need to concentrate to remember where the flags were in order to select them and match them up. All flag pairs that are matched remain showing. Eight pairs of flag pictures are required to fill a 4 by 4 tile grid. These 8 flag pictures must be stored somewhere so that you can copy them to the different pictureboxes of the grid as they are needed.
Adding an ImageList control to the form
An ImageList control is ideal for storing multiple images within a project. Once the images are stored inside an ImageList control, you have easy access to them at run-time. Accessing the images in an ImageList is fast and easy, as compared to reading the images from image files--bitmaps, jpegs, etc.-- which is much slower. You can populate an ImageList dynamically at run-time by filling it with images from image files, or you can populate it at design time.
Double-click on the ImageList icon on the control toolbox (as shown below) to add an ImageList control to the Component Tray:
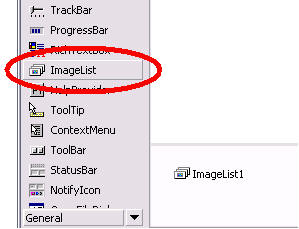
It's default name is ImageList1, you don't need to change this.
Adding Images to the ImageList control
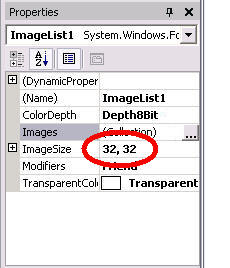
With ImageList1 selected in the Component Tray, change the ImageSize property to 32, 32, as shown below:
Now click on the ellipses button of it's Images property, in the properties window, as shown below:

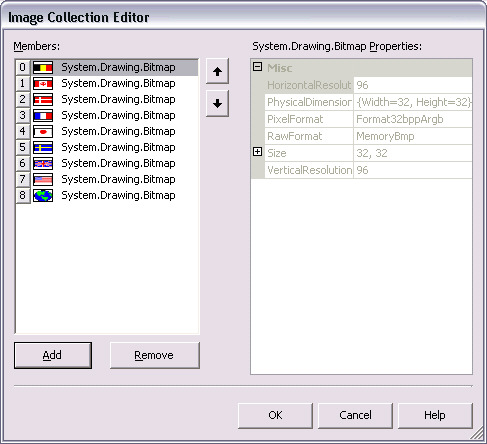
This opens the Image Collection Editor dialog. Use the table below and add the following bitmap files to ImageList1. Use the Add button to add each image. Look inside the \Shared\Bitmaps folder on drive C: for the bitmap files (Note: In some labs, the \Shared\Bitmaps folder may be on drive D: You can also download a self-extracting archive containing the bitmap files you need to do this exercise by clicking on this link.):
|
Add these Images to ImageList1 |
|
| Position | File Name |
| 0 | FLGBELG.BMP |
| 1 | FLGCAN.BMP |
| 2 | FLGDEN.BMP |
| 3 | FLGFRAN.BMP |
| 4 | FLGJAPAN.BMP |
| 5 | FLGSWED.BMP |
| 6 | FLGUK.BMP |
| 7 | FLGUSA02.BMP |
| 8 | EARTH.BMP |
If you place a bitmap in the wrong position, just select it in the list and use the up/down arrow buttons to move it up and down in the list. It's really not important what order the first 8 flag images are in, but you must make sure that the Earth.bmp image is the last one in position 8. When you are finished, your Image Collection Editor dialog should look something like this:
Once these bitmaps are added to ImageList1, the individual files are no longer required, since the bitmaps are actually embedded inside the ImageList1 control.
Adding sixteen PictureBoxes to the form
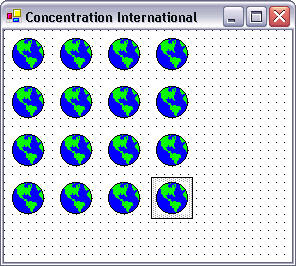
Add sixteen PictureBox controls to the form in a 4 by 4 grid pattern (as shown above) and use the following table to set their properties:
| PictureBox Properties | |||||||
| PictureBox 1 | PictureBox 2 | PictureBox 3 | PictureBox 4 | ||||
| Property | Value | Property | Value | Property | Value | Property | Value |
| Name | picTile0 | Name | picTile1 | Name | picTile2 | Name | picTile3 |
| Image | earth.bmp | Image | earth.bmp | Image | earth.bmp | Image | earth.bmp |
| SizeMode | AutoSize | SizeMode | AutoSize | SizeMode | AutoSize | SizeMode | AutoSize |
| Tag | 0 | Tag | 1 | Tag | 2 | Tag | 3 |
| PictureBox 5 | PictureBox 6 | PictureBox 7 | PictureBox 8 | ||||
| Property | Value | Property | Value | Property | Value | Property | Value |
| Name | picTile4 | Name | picTile5 | Name | picTile6 | Name | picTile7 |
| Image | earth.bmp | Image | earth.bmp | Image | earth.bmp | Image | earth.bmp |
| SizeMode | AutoSize | SizeMode | AutoSize | SizeMode | AutoSize | SizeMode | AutoSize |
| Tag | 4 | Tag | 5 | Tag | 6 | Tag | 7 |
| PictureBox 9 | PictureBox 10 | PictureBox 11 | PictureBox 12 | ||||
| Property | Value | Property | Value | Property | Value | Property | Value |
| Name | picTile8 | Name | picTile9 | Name | picTile10 | Name | picTile11 |
| Image | earth.bmp | Image | earth.bmp | Image | earth.bmp | Image | earth.bmp |
| SizeMode | AutoSize | SizeMode | AutoSize | SizeMode | AutoSize | SizeMode | AutoSize |
| Tag | 8 | Tag | 9 | Tag | 10 | Tag | 11 |
| PictureBox 13 | PictureBox 14 | PictureBox 15 | PictureBox 16 | ||||
| Property | Value | Property | Value | Property | Value | Property | Value |
| Name | picTile12 | Name | picTile13 | Name | picTile14 | Name | picTile15 |
| Image | earth.bmp | Image | earth.bmp | Image | earth.bmp | Image | earth.bmp |
| SizeMode | AutoSize | SizeMode | AutoSize | SizeMode | AutoSize | SizeMode | AutoSize |
| Tag | 12 | Tag | 13 | Tag | 14 | Tag | 15 |
Refer to the illustration at the beginning of the project and add a
Start button (btnStart) and
Exit button (btnExit) to the form.
The items on the right side of the form in that illustration are for
enhancements that we will discuss later.
Using a Structure to store information
A PictureBox has an Image property that can only store one image at a time. When the user starts a new game of Concentration International they will see a grid of PictureBoxes that are all displaying the Earth image. To change the image displayed in a PictureBox to the image of a flag--when they click on it--we will copy a flag image stored in ImageList1 into the PictureBox. For each PictureBox we need to store the Index value of a flag image from ImageList1. Where do we store it? We will also need to know whether a PictureBox is flipped over and showing a Flag image or not. Where do we store that information? We can store these values and other important information inside a Structure.
We can create our own data type by building a Structure. Here is the syntax of a Structure declaration:
Structure <Structure Name>
Dim <Data Member Name> As <Data Type>
Dim <Data Member Name> As <Data Type>
...etc.
Friend Sub <Method Name()>
...code
End Sub
End Structure
Each of the Dim statements above adds a new Data Member to the structure. Structures can also contain Properties and Methods. Declaring a Structure creates a unique data type--what used to be called a User Defined Data Type in Visual Basic 6. Let's use the Structure we are creating for this project as an example. Type the following Structure declaration into the Declarations section (immediately below the Inherits line):
Structure TileStructure
'Stores the index value of a flag image from ImageList1.
Dim FlagIndex As Integer
'True when the Flag is showing, False if not.
Dim Flipped As Boolean
'True if the tile has been matched, False if not.
Dim Matched As Boolean
'A reference to the PictureBox so we can change
' the image in it.
Dim TileRef As PictureBox
'A custom method that resets the above values when
' the player starts a new game.
Public Sub Reset()
FlagIndex = -1
Flipped = False
Matched = False
End Sub
End Structure
The above code creates a new data type named TileStructure. We can then dimension variables of the TileStructure data type, like this (do not type this code):
Dim Tile As TileStructure
After the above dimension statement, we could access and assign values to the data members of this new Tile variable by doing this (do not type this code):
'Set the Flipped data member to False
Tile.Flipped = False
'Test if the FlagIndex data member is equal to -1
If Tile.FlagIndex = -1 Then'Set TileRef so that it references picTile5
Tile.TileRef = picTile5
'Now change the image displayed in picTile5 to the Earth.bmp
Tile.TileRef.Image = ImageList1.Images(8)'Call the Reset method
Tile.Reset()
We need to create a TileStructure data type variable for each PictureBox. This means 16 of them altogether. We will do this by dimensioning an Array of variables of type TileStructure. Add the following line of code to the Declarations section immediately below the End Structure line:
Dim Tile(16) As TileStructure
The above dimension statement creates sixteen different variables. The variables in an array are called the Elements of the array. They are distinguished from one another by a unique index value. The elements of an array always begin at index 0 (zero). So the Tile array we just created above has elements numbered: 0, 1, 2, 3, 4, 5, 6, 7, 8, 9, 10, 11, 12, 13, 14, and 15. This makes sixteen elements. Please Note: There is no element number 16, because the first element is at index number 0.
Accessing the elements of an array in code is done by appending the index value of the element in parentheses after the name, like this (do not type this code):
'Set the Flipped data member of the 5th
' element of the Tile array to False.
Tile(4).Flipped = False
Referencing the PictureBoxes with Object Reference variables
By creating 16 TileStructure variables, we have one for each PictureBox. It's not a coincidence that we named the PictureBoxes, picTile0, picTile1, picTile2, etc. The number at the end of each name not only indicates where in the 4 by 4 grid that the PictureBox appears, but also specifies the index number of the TileStructure array element that corresponds to it.
To actually connect each element of the Tile array to it's corresponding PictureBox, we created a TileRef data member within the TileStructure structure. TileRef is an object reference variable, designed to reference PictureBoxes only. Recall that the declaration of TileRef within the TileStructure structure looks like this:
'An object reference to the PictureBox so we
' can change the image in it.
Dim TileRef As PictureBox
A reference variable is similar to a pointer in the C programming language. The value we will assign to each of the TileRef data members is actually the address in memory of where each of the PictureBoxes are located. So it's like giving the same object two different names. This means that after executing a line of code like this:
'Set a reference to the picTile0 picturebox
Tile(0).TileRef = picTile0
Now either one of the following two lines of code will do the exact same thing:
'Assign an Image to the picTile0 picturebox
picTile0.Image = <Some Image>
'Assign an Image to the picTile0 picturebox
Tile(0).TileRef.Image = <Some Image>
You can only reference an existing control with an object reference variable, so when we added the following dimension statement to the TileStructure structure declaration:
Dim TileRef As PictureBox
We were not actually creating a new PictureBox, but just an unassigned object reference variable to a PictureBox control. When an object reference variable is referencing a control, you can use the object reference variable name instead of the control name to affect the Properties and Methods of that control.
To connect each element of the Tile array's TileRef object reference variable to it's corresponding PictureBox when the program starts, add the following code to the frmProj12_Load event procedure:
'Set TileRef object reference variables
' to each picturebox.
Tile(0).TileRef = picTile0
Tile(1).TileRef = picTile1
Tile(2).TileRef = picTile2
Tile(3).TileRef = picTile3
Tile(4).TileRef = picTile4
Tile(5).TileRef = picTile5
Tile(6).TileRef = picTile6
Tile(7).TileRef = picTile7
Tile(8).TileRef = picTile8
Tile(9).TileRef = picTile9
Tile(10).TileRef = picTile10
Tile(11).TileRef = picTile11
Tile(12).TileRef = picTile12
Tile(13).TileRef = picTile13
Tile(14).TileRef = picTile14
Tile(15).TileRef = picTile15
'Seed the random number generator with
' the current time.
Randomize()
Now we will be able to change the images displayed in the PictureBoxes by using the TileRef object reference variables of the Tile array. This has many advantages over using the PictureBox controls themselves. For example, when the user wants to start a new game of Concentration International we need to reset all the images in the PictureBoxes to the earth.bmp image. To do that in code with the PictureBoxes, the code would look like this (do not type this code):
picTile0.Image = ImageList1.Images(8)
picTile1.Image = ImageList1.Images(8)
picTile2.Image = ImageList1.Images(8)
picTile3.Image = ImageList1.Images(8)
picTile4.Image = ImageList1.Images(8)
picTile5.Image = ImageList1.Images(8)
etc...
This would take sixteen lines of code altogether. But now that we are referencing each PictureBox with the TileRef object reference variable of each element of the Tile array, we can reset all the images to the earth.bmp image with a For-Next loop and three lines of code, like this (do not type this code):
For i = 0 to 15
Tile(i).TileRef.Image = ImageList1.Images(8)
Next i
So remember this important fact: When an object reference variable is referencing a control, you can use the object reference variable name instead of the control name to affect the Properties and Methods of that control--It's like giving a control two different names.
Coding the Click event procedure of the Start button
When the user clicks the Start button, we need do the following steps:
- Flip over all the tiles so that only earth images are showing.
- Reset the data members of each Tile array element to the starting values for a new game, i.e. Flipped = False, Matched = False, etc.
- Shuffle the flags, by picking two tiles at random and assign the same flag index value to both of them, for all eight flag index values.
Before we begin, add the following dimension statements to the Declarations section at the top of the code window (below the Dim Tile(16) statement):
'The value of an unassigned flag index is -1
Const UNASSIGNED = -1
'The Earth image is at index 8 in ImageList1
Const EARTH = 8
'Stores the flag index value of the last flipped Tile
Dim iLastFlipped As Integer
'Stores the number of tiles that are flipped over
Dim iNumFlipped As Integer
The first two constants above will be used to make our code easier to read. The last two variables will be used at run-time to keep track of important information about the game in progress.
Now add the following dimension statements at the top of the btnStart_Click event procedure: We will need these variables for the code that follows:
Dim i, iPos, iFlag As Integer
Dim bLooking As Boolean
We will do steps 1 and 2 above in the same For-Next loop. Add the following code to the btnStart_Click event procedure:
'Set initial values for starting a new game
For i = 0 To 15
'Reset the images of all the tiles to the Earth image
Tile(i).TileRef.Image = ImageList1.Images(EARTH)
'Reset the Flipped, Matched and FlagIndex variables
Tile(i).Reset()
Next i
iLastFlipped = UNASSIGNED
iNumFlipped = 0
The above For-Next loop initializes all the Tiles so that the Earth image is displayed, and resets the Flipped, Matched and FlagIndex data members to starting game values.
Now we need to shuffle the flags. We must take each of the eight flag index values and place them twice in random locations in the grid. Since we know how many flags there are, we can use a For-Next loop, like this (do not type this code yet):
'Iterate through the flag index values
For iFlag = 0 To 7
The variable iFlag will store the index values of the flags stored in ImageList1, 0 through 7.
As we step through the loop we need to pick two random locations in the Tile array to store the flag index values. We also need to make sure that once a flag index value has been stored in a Tile, we don't try to overwrite that flag index value with another one. As we pick random tile locations, we may discover that a tile has already been assigned a flag index and we need to pick another tile. This means that when we are generating random Tile index values, we won't know ahead of time how many index values we need to generate before we find an unassigned Tile. The best looping structure, when you don't know ahead how many times the loop may need to loop, is a Do-Loop. This is the format of Do-Loop:
Do
...
...Code goes here
...
Loop Until <Test is True>
In a Do-Loop we make a test at the end of the loop to see if the loop should keep going. The first thing we want to do inside our Do-Loop is select a Tile index value at random. Then we will test if the FlagIndex data member of that Tile is unassigned. If it is unassigned, we can assign the iFlag flag index value to it, otherwise we need to generate another random Tile index value and try again. The code to do all that looks like this (do not type this code yet):
'Set the bLooking looping flag to True when
' the Do-Loop begins.
bLooking = True
Do
'Generate a random Tile index value (0 to 15)
iPos = Int(Rnd() * 16)
'Check if the FlagIndex data member of
' Tile(iPos) is unassigned.
If Tile(iPos).FlagIndex = UNASSIGNED Then
'If FlagIndex is unassigned, assign iFlag to it
Tile(iPos).FlagIndex = iFlag
'Set the bLooking looping flag to False to stop looping
bLooking = False
End If
'The bLooking looping flag will still be True if the FlagIndex
' data member of Tile(iPos) was already assigned.
Loop Until bLooking = False
The above Do-Loop places a flag index value into a single randomly selected Tile element. But we need to place the same flag index value into two different locations within the Tile array. So we will need to repeat the above code twice. Type all of the following code into the btnStart_Click event procedure, below the iNumFlipped = 0 line:
'Iterate through the flag index values
For iFlag = 0 To 7
'Set the bLooking looping flag to True when
' the Do-Loop begins.
bLooking = True
Do
'Generate a random Tile index value
iPos = Int(Rnd() * 16)
'Check if the FlagIndex data member of
' Tile(iPos) is unassigned.
If Tile(iPos).FlagIndex = UNASSIGNED Then
'If FlagIndex is unassigned, assign iFlag to it
Tile(iPos).FlagIndex = iFlag
'Set the bLooking looping flag to False to stop looping
bLooking = False
End If
'The bLooking looping flag will still be True if the FlagIndex
' data member of Tile(iPos) was already assigned.
Loop Until bLooking = False
Next iFlag
The above code is a For-Next loop, with two identical Do-Loops nested inside it (the shaded and italicized lines above are the first Do-Loop). We will go through this code in more detail during class. Those with previous programming experience may see the inherent flaw in the above code when dealing with a range of numbers much larger than our 16 Tiles. If our tile grid contained 1000 tiles, the above code would not work at all because as most of the Tiles are assigned flag index values, the chances of randomly generating a tile index that is not yet assigned goes down quickly. Until, when there are only a couple of Tiles left unassigned, the Do-Loops may go on for minutes before generating their index values purely by chance. A more efficient version of the above code is included at the end of the project. It was not used here, because it is more complicated.
Creating a Custom Event Handler
Once the user has started a game, they will begin clicking on tiles to see the flags underneath them. Where should we put the code that flips the tiles over to reveal the flags underneath them? The Click event procedure of each PictureBox seems like the obvious place, but that would require us to put almost identical code into sixteen different event procedures!
In previous versions of Visual Basic, we had the option to create an array of controls that could then share the same set of event procedures (The controls had to be of the same type, and they had to have the same name). The shared event procedures of an array of controls automatically included an Index parameter that was equal to the index value of the element from the control array that received the event. It was a very useful feature of previous versions of Visual Basic.
Quoted from the Visual Basic .NET help system: In Visual Basic .NET, control arrays are no longer supported. Changes to the event model make control arrays unnecessary. Just as control arrays in Visual Basic 6.0 could share events, the event model in Visual Basic .NET allows any event handler to handle events from multiple controls. In effect, this allows you to create groups of controls of disparate types that share the same events.
We don't have the VB6 option of using an array of controls that share the same event procedures. But with VB.NET we have the option to create a custom Click event procedure that all the PictureBoxes can use. It's called a Custom Event Handler procedure. To create a custom event handler procedure, we need to familiarize ourselves with the syntax of regular event procedure declarations. Here is the syntax of an event procedure (broken onto three lines for readability):
Private Sub <Object_Event>(ByVal sender As System.Object, _
ByVal e As System.EventArgs) _
Handles <Object.Event>
The really important part of the above code is what follows the Handles specification at the end. This is where you specify the object names and their event procedures that will cause this event procedure to be executed. We can create a custom event handler procedure by following the above syntax with a few additions to the Handles specification that include the Click event procedures of all our PictureBoxes, like this (also on multiple lines for readability). Do not type this code yet:
Private Sub TileClicked(ByVal sender As System.Object, _
ByVal e As System.EventArgs) _
Handles picTile0.Click, _
picTile1.Click, _
picTile2.Click, _
picTile3.Click, _
picTile4.Click, _
picTile5.Click, _
picTile6.Click, _
picTile7.Click, _
picTile8.Click, _
picTile9.Click, _
picTile10.Click, _
picTile11.Click, _
picTile12.Click, _
picTile13.Click, _
picTile14.Click, _
picTile15.Click
So to create an event handler procedure, just create a procedure that includes the special sender System.Object and e System.EventArgs parameters (required in all event procedures), then make as many additions as you need to the Handles specification for each object.event that we want to raise it. The above TileClicked event handler procedure does not replace the existing Click event procedures of the PictureBoxes--In fact, if you had code in them, they would still be executed. But any code in the custom TileClicked event handler procedure is also executed automatically whenever the Click event procedure of a PictureBox--specified in the Handles section--is triggered.
Insert a blank line above the End Class statement at the bottom of the code window, and type the above custom TileClicked event handler procedure there. You do not need to type it onto multiple lines, as shown above. You can type it onto one long line if you wish.
Coding the TileClicked event handler procedure
The first thing we need to determine inside our custom TileClicked event handler procedure is, which PictureBox triggered it? When you have multiple Object.Event specifications in the Handles section of an event handler, any one of those objects could have raised the event. Recall that when we added the PictureBoxes to the form, we set the Tag property of each picturebox to a number value that represented it's position in the grid. Those numbers also represent the index value of the Tile array element that each picturebox corresponds to. So we could check the Tag property of the control that raised the event to determine which picturebox was clicked. Fortunately, the sender parameter of the procedure is the object that raised the event. But the sender is declared as System.Object, not System.Windows.Forms.PictureBox. To access the Tag property of sender, we will need to create a picturebox object reference variable and reference sender with it, like this (do not type this code):
Dim picBox As PictureBox
picBox = sender
Now we could access the Tag property, like this:
Index = CInt(picBox.Tag)
Once we have the index value of the Tile array element that corresponds to the picturebox that was clicked, we can flip it over so that the flag image is displayed with this line of code:
Tile(Index).TileRef.Image = _
ImageList1.Images(Tile(Index).FlagIndex)
Add the following code to your custom TileClicked event handler procedure:
Dim picBox As PictureBox
Dim i, Index As Integer
'Reference sender with a PictureBox object reference
' variable so we can access the Tag property of the
' PictureBox that raised the event.
picBox = sender
Index = CInt(picBox.Tag)
'Don't process clicks if the tile is already flipped
If Tile(Index).Flipped = False Then
'Flip the tile over so that the flag is showing
Tile(Index).TileRef.Image = _
ImageList1.Images(Tile(Index).FlagIndex)
'Set the Flipped data member to True
Tile(Index).Flipped = True
'Increment the iNumFlipped counter
iNumFlipped += 1
End If
The If-Then test above makes sure we don't process clicks when the user clicks on a tile that is already flipped over. Then we flip the tile over (show the flag underneath), set the Flipped data member to True, and increment our iNumFlipped counter.
Using the iNumFlipped counter to determine what to do next
Depending upon the value of iNumFlipped, there are three different things we need to do next. And they are:
- iNumFlipped = 1: Store the index value of the tile that was just flipped over in iLastFlipped.
- iNumFlipped = 2: Compare the FlagIndex value of the tile that was just flipped over with the FlagIndex value of the the iLastFlipped tile to see if they match. Set the Matched data member of both tiles to True if they match.
- iNumFlipped = 3: Store the index value of the tile that was just flipped over in iLastFlipped. Set iNumFlipped to 1. Use a For-Next loop to scan through all the tiles and flip them back over again to show the earth if their Matched data member is False, and set their Flipped data member to False.
Because we need to test iNumFlipped for one of three possible values, a Select-Case testing structure would be ideal. Add the following code to the TileClicked event handler procedure, by inserting a blank line directly above End If--inside the If-Then structure:
Select Case iNumFlipped
Case 1
'Store the flag index of the just flipped tile
iLastFlipped = Index
Case 2
'Look for a match by comparing the FlagIndex values of the tile
' that was just flipped (Index) with the iLastFlipped tile.
If Tile(Index).FlagIndex = Tile(iLastFlipped).FlagIndex Then
'When a match is found, set the Matched data
' member of both tiles to True.
Tile(Index).Matched = True
Tile(iLastFlipped).Matched = True
'Clear the tile index value stored in iLastFlipped
iLastFlipped = UNASSIGNED
End If
Case 3
'Store the flag index of the just flipped tile and
' set iNumFlipped to 1.
iLastFlipped = Index
iNumFlipped = 1
'Scan through all the tiles and flip back over the ones
' that were not matched--except the just flipped tile.
For i = 0 To 15
If Tile(i).Matched = False And i <> Index Then
Tile(i).Flipped = False
Tile(i).TileRef.Image = ImageList1.Images(EARTH)
End If
Next i
End Select
By creating a custom event handler (TileClicked), we were able to use the code in one procedure to process the Click events of all 16 picturebox controls. Here is a summary of the code in the TileClicked event handler procedure. Make sure your code matches this code:
Dim picBox As PictureBox
Dim i, Index As Integer
'Reference sender with a PictureBox object reference
' variable so we can access the Tag property of the
' PictureBox that raised the event.
picBox = sender
Index = CInt(picBox.Tag)
'Don't process clicks if the tile is already flipped
If Tile(Index).Flipped = False Then
'Flip the tile over so that the flag is showing
Tile(Index).TileRef.Image = _
ImageList1.Images(Tile(Index).FlagIndex)
'Set the Flipped data member to True
Tile(Index).Flipped = True
'Increment the iNumFlipped counter
iNumFlipped += 1
Select Case iNumFlipped
Case 1
'Store the flag index of the just flipped tile
iLastFlipped = Index
Case 2
'Look for a match by comparing the FlagIndex values of the tile
' that was just flipped (Index) with the iLastFlipped tile.
If Tile(Index).FlagIndex = Tile(iLastFlipped).FlagIndex Then
'When a match is found, set the Matched data
' member of both tiles to True.
Tile(Index).Matched = True
Tile(iLastFlipped).Matched = True
'Clear the tile index value stored in iLastFlipped
iLastFlipped = UNASSIGNED
End If
Case 3
'Store the flag index of the just flipped tile and
' set iNumFlipped to 1.
iLastFlipped = Index
iNumFlipped = 1
'Scan through all the tiles and flip back over the ones
' that were not matched--except the just flipped tile.
For i = 0 To 15
If Tile(i).Matched = False And i <> Index Then
Tile(i).Flipped = False
Tile(i).TileRef.Image = ImageList1.Images(EARTH)
End If
Next i
End Select
End If
The above code will be explained in more detail during class.
Testing the program so far
Click on the Save All button on the toolbar to save your project. Now run the project. Click the Start button once and begin clicking on the tiles. Does it work?
Required Enhancements
Not so hard
- Fix any anomalies or bugs in the original code (they exist).
- Tell the User when they have won.
- Add a Timer control to count off the seconds (set the TimerÆs Interval property to 1000). Remember, the fastest time wins.
- Add a label that displays the number of clicks during a game. Remember, the lowest number of clicks wins.
- Add any other features you can think of.
Harder (not required)
- Make the game harder by adding another row/column of images to the playing grid (and more flags to go with them).
- Enable different levels of difficulty.
A Better Way
Let's take a look in the btnStart_Click event procedure and examine the code we use to randomize the locations of the flags when we start a new game. This code is fine, and fast, if we are using an array of Images with only 16 elements in it. However, if we increase the number to 100 images, this code will become almost unbearably slow. The reason this code works efficiently with 16 elements and unacceptably slow with 100 or more elements has to do with this part of the code (large italic font line below):
bLooking
= True
Do
iPos = Int(Rnd()
* 16)
If
Tile(iPos).FlagIndex
= UNASSIGNED
Then
Tile(iPos).FlagIndex
= iFlag
bLooking = False
End If
Loop Until
bLooking
= False
The italicized line of code above is where our problems with this code begin. Our method of randomly picking an unused Tile element out of an array of 16 Tile's depends upon the random numbers that we generate (iPos = Int(Rnd() * 16)) to eventually include all of the numbers between 0 and 15. The Do-Loop above will keep going until a Tile(?).FlagIndex data member is found that has not already been assigned a flag index. This is easy the first few times this loop is executed because the FlagIndex data members of all of the Tile array elements are unassigned to begin with. Early on, the random numbers that are generated are more likely to represent the index value of a Tile with an unassigned FlagIndex data member than not. But what happens at the end of this process, when there are only a couple of Tile array elements with FlagIndex data members that are unassigned? Since we are still generating random numbers that include all the numbers between 0 and 15, the odds go way down that we will randomly generate the index value of an unassigned Tile. With a range of only 0 to 15, our random numbers do eventually pop up for those last remaining unassigned Tile elements. Even in the most unusual situations, the last couple of random numbers we need will pop up within a couple of tenths of a second. But what if we increased the number of images to 100, and the range of random numbers goes from 0 to 99? Instead of causing a delay of just a couple tenths of a second, the delay might be several seconds long when trying to randomly generate the index value of the last few unassigned Tiles. What do you think would happen if we changed the range of random numbers to from 0 to 999, or 0 to 9999? While our Do-Loop goes around and around, we would be generating a random number each time between 0 and 9999 hoping that it will hit the index value of the last remaining unassigned Tile array element; minutes or even hours could go by!
Okay, so the code above is fine for a limited number of images--a concentration game with a difficulty level that uses a hundred tiles is ridiculous (I've seen it!). But how should we change our code to handle a similar situation with over 1000 array elements?
More efficient code for the btnStart_Click event procedure
New lines of code are shaded and/or larger Italicized font:
Dim i, iPos, iFlag As Integer
Dim bLooking As Boolean
'Create an integer array to store Tile index values and create
' a variable that keeps track of remaining unassigned tiles.
Dim iIndex(16), iIndexLimit As Integer
For i = 0 To 15
Tile(i).TileRef.Image = ImageList1.Images(EARTH)
Tile(i).Reset()
'Initialize iIndex() to contain the index value of all the tiles
iIndex(i) = i
Next i
iLastFlipped = UNASSIGNED
iNumFlipped = 0
iIndexLimit = 16
For iFlag = 0 To 7
'Pick a random location for iFlag and use it
iPos = Int(Rnd() * iIndexLimit)
Tile(iIndex(iPos)).FlagIndex = iFlag
'Delete the value in the used iIndex(iPos) element and shrink the array
For i = iPos To iIndexLimit - 2
'Make every element of iIndex equal to the value of the next element
' starting from iIndex(iPos), this deletes the index value value in
' iIndex(iPos) and leaves behind only unused index values.
iIndex(i) = iIndex(i + 1)
Next i
'Reduce the maximum number of available index values by 1
iIndexLimit -= 1
'Pick another random location for iFlag from the iIndex() elements that remain
iPos = Int(Rnd() * iIndexLimit)
Tile(iIndex(iPos)).FlagIndex = iFlag
'Delete the value in the used iIndex(iPos) element and shrink the array
For i = iPos To iIndexLimit - 2
'Make every element of iIndex equal to the value of the next element
' starting from iIndex(iPos), this deletes the index value value in
' iIndex(iPos) and leaves behind only unused index values.
iIndex(i) = iIndex(i + 1)
Next i
'Reduce the maximum number of available index values by 1
iIndexLimit -= 1
Next iFlag
The above code is far superior to our original code. But it is more complicated, so I hesitated to use this version of the code in our original version of this project. By adding a locally dimensioned array of integers (iIndex)--that will store the index values of our Tile array elements--and a single integer (iIndexLimit)--to store the number of Tile indexes that are still unassigned--we can restrict our generation of random numbers to just those numbers that represent the index values of unassigned Tile array elements. We start off by initializing all the elements of the iIndex array to the same number value as its position in the array:
For i = 0 To 15
Tile(i).TileRef.Image = ImageList1.Images(EARTH)
Tile(i).Reset()
'Initialize iIndex() to contain the index value of all the tiles
iIndex(i) = i
Next i
So now the values of the iIndex array elements look like this:
iIndex(0) = 0
iIndex(1) = 1
iIndex(2) = 2
etc...
Now we generate a random number with iIndexLimit as our limit. Then instead of using iPos as the index value for Tile, we use iIndex(iPos), like this:
iPos = Int(Rnd() * iIndexLimit)
Tile(iIndex(iPos)).FlagIndex = iFlag
To make sure we do not use the value stored in iIndex(iPos) again, we use a For-Next loop to remove it from our iIndex array, like this:
For i = iPos To iIndexLimit - 2
'Make every element of iIndex equal to the value of the next element
' starting from iIndex(iPos), this deletes the original index value in
' iIndex(iPos) and leaves behind only unused index values.
iIndex(i) = iIndex(i + 1)
Next i
And then we reduce the range of random numbers we can generate by decrementing iIndexLimit, like this: