Advanced Visual Basic - Project 13
Creating an Add-In OLE Control for VB
What’s a Visual Basic Add-In?
An Add-in is an extension to the Visual Basic development environment provided by a 3rd party vendor, or created by you. Quite simply, it’s a utility program you write that makes creating Visual Basic applications easier. Visual Basic has, built into it, the option to add items to its Add-In menu, Tools menu, or any of its drop down menus. You can then execute these utility programs, and reap their benefits, while working in the Visual Basic environment.
In this project, you have been provided with a stand alone application called Message Box Wizard (MsgBoxWiz.vbp)—Download a self-extracting archive containing this project by clicking on this link. This simple utility makes creating custom Message Boxes very easy. With the Message Box Wizard you’ll never get frustrated again trying to picture in your mind what the message box will look like while you’re creating it.
The Messagebox Wizard consists of these 3 files: MsgBoxWiz.vbp, frmMsgBoxWiz.frm, and frmMsgBoxWiz.frx. After you've acquired these files, let’s take Message Box Wizard for a test spin to see how it works:
- Run Visual Basic and load the project MsgBoxWiz.vbp.
- Launch the NotePad application and minimize it (you’ll need this later to test the Message Box Wizard).
- Now run the Message Box Wizard by clicking the Start button in Visual Basic.
Using the Message Box Wizard to create a MsgBox is easy, here’s how (refer to the illustration above while reading these steps):
- Type the Message Box Title in the Title Textbox at the top.
- Enter the message in the Message Textbox.
- Choose an Icon to display in the MsgBox.
- Choose whether the MsgBox will have System or Application Modality.
- Select the Button set to display.
- Choose the Default button for the set.
- Use the Test button to make sure it looks the way you want it to.
- When it’s ready click the Save to Clipboard button to copy the actual code for creating the MsgBox to the Clipboard.
- Now you can paste the code for creating the MsgBox into your VB code window.
Test the Message Box Wizard by using it to create a Message Box. Press the Test button to see how it looks. When you’re happy with it, click the Save to Clipboard button.
Restore the Notepad application (which you had minimized earlier—run NotePad now if you forgot to start it before) and choose Paste from Notepad’s Edit menu. The code to create the message box should appear. Normally you would paste this code directing into your Visual Basic code window. You can see how the Message Box Wizard saves a lot of time when it comes to creating Message boxes. Close the Notepad program when you’re done.
Message Box Wizard is currently a stand alone application (Standard EXE). To use it with Visual Basic would require you to find and run it manually each time you wanted to use it. By making the Message Box Wizard application a Visual Basic Add-In, you can launch it quickly, right from within Visual Basic (As an Add-In, you’ll be able to make a Message Box Wizard menu item available on Visual Basic’s Tools drop down menu).
Creating an Add-In Project
Drop down the File menu and choose New Project. If Visual Basic asks if you want to save the MessageBox Wizard project just select No.
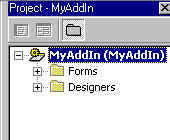
On the New Project dialog box double-click on the AddIn icon. Your Project Window should now look like this:
Open the Forms folder and select the frmAddIn form inside it. Click on the Code View button at the top of the Project Window to view the code for the frmAddIn form:
- Public VBInstance As VBIDE.VBE
- Public Connect As Connect
Option Explicit
Private Sub CancelButton_Click()- Connect.Hide
End Sub
Private Sub OKButton_Click()
MsgBox "AddIn operation on: " & VBInstance.FullName
End Sub
Line 1 above sets a Reference to the Visual Basic Extensibility object. The Extensibility object can be described as an empty sock into which you can plug custom applications to extend the functionality of Visual Basic. Actually, it's a control (with no user interface), that allows you to access the AddIns collection (this is maintained by the Add-In Manager which is a utility that is built into Visual Basic). By setting a reference to the Visual Basic Extensibility object, we can then get our Message Box Wizard application to show up in the Add-In Manager's list of AddIn-able applications (so that it can be added to the Add-Ins drop down menu in Visual Basic). I hope this doesn't sound too confusing yet.
Line 2 above is necessary to so that Line 3 can be executed. The Connect object module is located inside the Designer fold in the Project Explorer window. The Connect object module is new in VB 6 and contains all the references, event procedures, and code that we used to have to enter manually in VB 5 to create an Add-In.
Adding our Message Box Wizard form to the Add-In project
There is no reason why you couldn't just build your Add-In project now using the frmAddIn form that comes with a new Add-In project. But since we've already created the form for our add-in project (the frmMsgBoxWiz form I've provided), we'll use it instead.
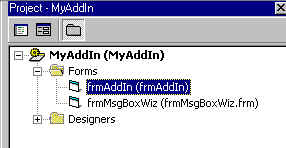
Drop down the Project menu and choose Add Form. Click on the Existing tab, then use the Look In drop-down list box to find the folder where the frmMsgBoxWiz.frm file is located. Click on the frmMsgBoxWiz.frm file then click the Open button:
Copy the following two lines from the General Declarations Section of the frmAddIn form and paste them into the General Declarations Section of the frmMsgBoxWiz form:
Public VBInstance As VBIDE.VBE
Public Connect As Connect
Also, copy the following line of code from the CancelButton_Click event procedure of the frmAddIn form and replace the Unload Me line of code of cmdClose_Click event procedure of the frmMsgBoxWiz form with it.
Connect.Hide
At this point, we don't need the frmAddIn form anymore. Right-click on the frmAddIn form in the Project Explorer window, and select Remove frmAddIn from the context menu to delete it (if you're asked if you want to save it first, say No).
Just a couple of small changes remain
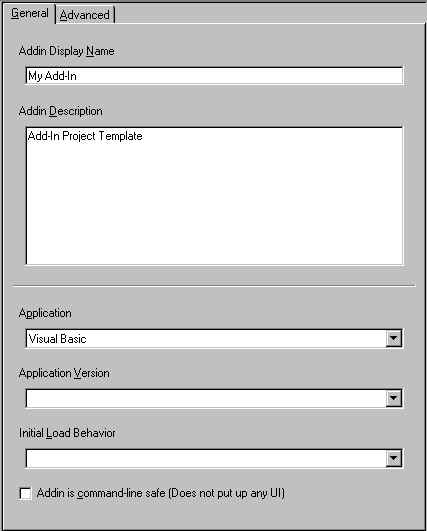
We are so close to being finished with this project that we can taste it. All we need to do now is change a couple of references in the Connect module inside the Designer folder of the Project Explorer window. Open the Designer folder and select the Connect module inside it. Click on the Object View button to display the Designer Interface window:
Change the entry in the AddIn Display Name textbox to Message Box Wizard. Change the entry in the AddIn Description textbox to Makes Creating Message Boxes Easy!
Click the Code View button at the top of the Project Explorer window to view the code from the Connect module. There are three lines of code that we must modify. We've got to change the code references to the original frmAddIn form to our new frmMsgBoxWiz form. Change the reference to frmMyAddIn in the following line of code from the General Declarations Section:
Dim mfrmAddIn As New frmAddIn
To this:Dim mfrmAddIn As New frmMsgBoxWiz
Now change this line of code from the Show sub procedure:
Set mfrmAddIn = New frmAddIn
To this:Set mfrmAddIn = New frmMsgBoxWiz
And lastly, change this line of code from the AddinInstance_OnConnection event procedure:
Set mcbMenuCommandBar = AddToAddInCommandBar("My AddIn")
To This:Set mcbMenuCommandBar = AddToAddInCommandBar("Message Box Wizard")
There's only one more change to make. Drop down the Project menu and choose My AddIn Properties. Change the Project Name entry on the Project dialog box to MsgBoxWizard and click the Ok button.
Time to save the Project
Click the Save Project button on the toolbar. When the Save dialog box appears, use the Save In drop-down list box and change to the folder where you frmMsgBoxWiz.frm file is located (if you're not already there). When prompted to save the Connect module as Connect.Dsr, click the OK button (the Dsr extension stands for Designer module). Save the modified frmMsgBoxWiz.frm file over the original file.
Creating the MsgBoxWizard.dll file
To create the MsgBoxWizard.dll file, drop down the File menu and choose Make MsgBoxWizard.dll. Click OK on the Make Project dialog to create the DLL file. If you receive any error messages, do the steps above again, and make sure you didn't miss anything.
Testing the MsgBoxWizard Add-In
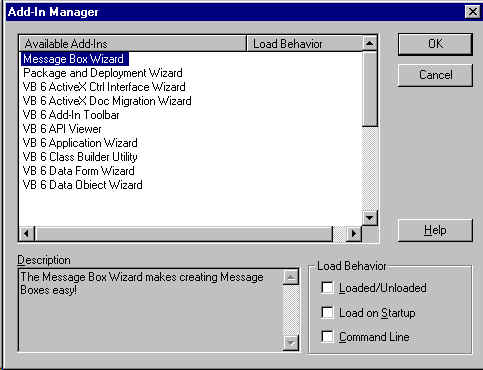
Drop down Visual Basic's Add-Ins menu and choose Add-In Manager:
You should see the Message Box Wizard as an item in the Available Add-Ins list. Look at the text in the Description window at the bottom of the dialog. Does it look familiar?
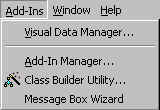
In the Load Behavior frame, put a checkmark in front of the Loaded/Unloaded item and click the OK button. Now drop down the Add-Ins menu again:
Your Add-Ins menu should look like the image above, with a new Message Box Wizard item at the bottom of the list. You can select it to see if it works. If you want your Message Box Wizard addin to be loaded automatically each time you run Visual Basic, you can put a checkmark in front of the Load on Startup option in the Load Behavior frame of the Add-In Manager dialog box.
A final word on Add-Ins
By creating Add-Ins, you can add your own support utilities to Visual Basic. Customization is what it's all about. There are a wide variety of Visual Basic Add-In applications available for free on the Internet.