


USB on the Iyonix
Matt Thompson
Universal Serial Bus - or USB for short, is an interface standard which allows the communication between a computer and external devices over a cable using bi-serial transmission. USB was designed in an attempt to standardise the connection of devices to computers, replacing the serial port, parallel port and any other interfaces with just the one type of connection - the USB connection.
This article is about using USB devices purely on the Iyonix. How well USB devices work on other RISC OS machines I don't know as I don't have access to any other RISC OS machines with USB, maybe someone else would like to take up that challenge?
The recent updates to the USB drivers from Castle have improved USB a great deal. Many devices which previously failed now work, and if you have a device that does not work then let Castle know about it. As in the case of my MP3 player. I lent it to them to test it with an Iyonix and they got it working, a very good way of getting it to work.
Using USB devices with the Iyonix is very easy. Simply plug it in to one of the USB ports on the Iyonix and an icon will now appear on the icon bar, as shown in the screenshot below :

Now double click on this new icon and its filer window will open, just like a normal RISC OS filer window. The devices are like portable hard discs, plug them in, save files onto them then unplug them and store them elsewhere, very good for hard disc back-up and for keeping important files secure.
There is a known bug in the SCSI drivers/SCSI-FS which with some pen drives, when you click on the drive icon you will see the error message "The disc drive is empty" - if your pen drive gives this error just click 'OK' and ignore it, click on your drive icon again and the filer window will now appear. Castle are aware of this problem, and it is on the 'to do' list, so will hopefully be fixed at some point in the future.
I currently have two USB devices, an MP3 player and a Pen drive, both operate in the same way. Plug them in and then move the files to and from the hard disc and the USB device, simply by dragging them and dropping them into the relevant filer window.
The Iyonix has 4 USB ports as standard, two at the front and two at the back. This is OK to start with but the more devices you obtain, the more ports you will need. Two of them are used by the Keyboard and Mouse , so that is two gone already, and if you add a printer that leaves jus one spare USB port, not a lot of use really, so this is where you will need a USB hub.
A USB hub is a device which plugs into any USB port and contains a number of additional USB ports. The one I have has 4 additional ports, so with this plugged in I have 7 available USB ports. Make sure that if you have USB2 that you have a USB2 hub and a USB1 hub if you are still using USB1. This might sound obvious, but it never occurred to me to that I was using a USB1 hub. So when I upgraded from USB1 to USB2 the speed increase was lost, so make sure you have the right one!
One of the programs supplied with the Iyonix is !USBinfo. This application does exactly what it says in the filename! It gives information on USB! It will look at the USB system in your Iyonix, and can give information on the USB devices currently installed, and can display them in a graphical diagram. When new devices are plugged in !USBinfo will notice this and add them to the diagram. The screenshot below shows the USB devices currently connected to my Iyonix.
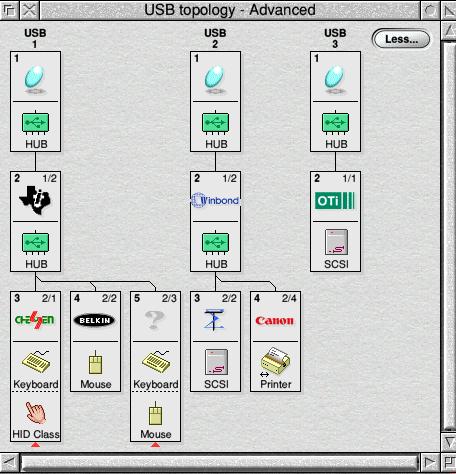
From this diagram you can see that in USB port 1 is my KVM switch, this has the mouse and keyboard connected to it. In USB port 2 there is my USB hub which has attached to it my printer, and MP3 player. Finally in USB port 3 there is my pen drive, USB port 4 is empty and is not shown.
If you will be transferring a lot of files to and from USB devices, it is worth considering the USB 2 upgrade if your Iyonix does not have it already. It is standard now but early machines did not have it. The upgrade is available from Castle for £29.95 and is the first chargeable upgrade they have made.
The average data transfer rate of USB2 is usually about 480Mb/s whereas before with USB1 it was about 12Mb/s - so it is a significant increase. The upgrade to USB 2 is highly recommended and the speed of file transfer is instantly noticeable. (It's very rare for any USB device to reach the maximum rate of 480Mb/s - ED).
Making MP3s For Your MP3 Player
So now we have an MP3 player to use with RISC OS, but how do you get make these MP3s in the first place ? I use two programs !Musicman from RComp Interactive and !ID3TagEd to give the MP3 an identity.
Making an MP3 using !Musicman is a straight forward procedure, place the CD in the drive, then click on 'Scan CD' the contents of the CD will now be displayed as shown below :
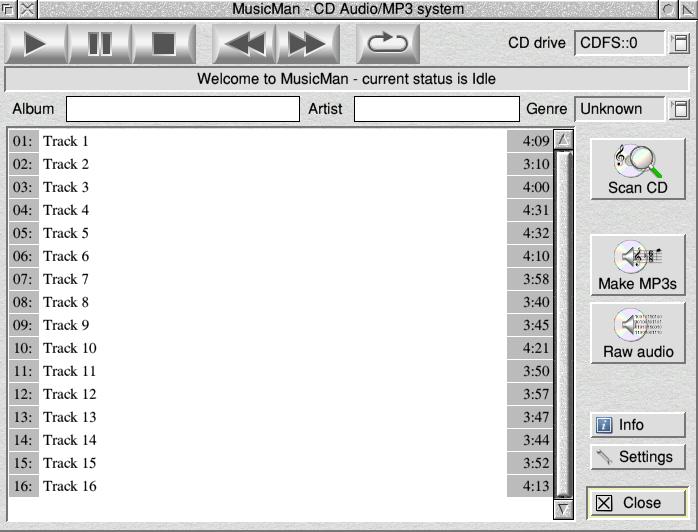
This is the contents of CD2 of the New Order singles collection, a very good album indeed!
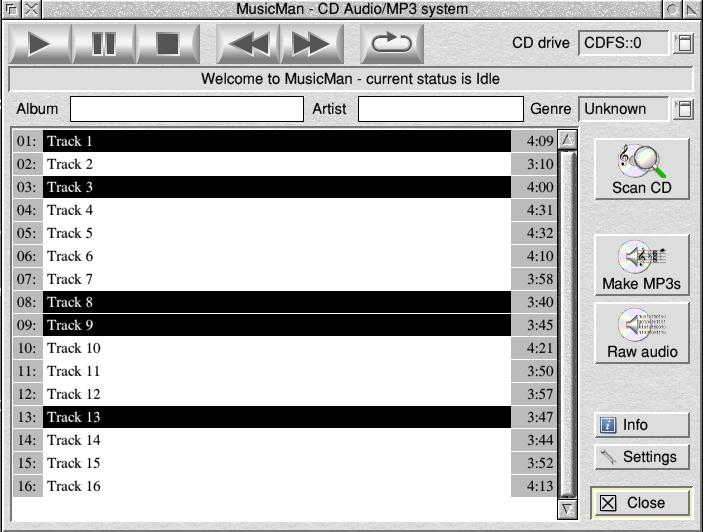
The next stage is to select which tracks you want to make into MP3s. So using the mouse click on the required track number using Select, if you want to make MP3s of multiple tracks then use the Adjust button, this is shown in the screenshot below, in which I have chosen 5 tracks to make into MP3s.
Now click on "Make MP3s" and sit back and wait for the machine to make the MP3s. This can take some time but is not a long job, Musicman can be set to do the MP3 encoding in either multitasking mode or single tasking mode, either works fine, but the single task mode gets the job done quicker. When the MP3s have been created they will be in a directory, which will look something like this :
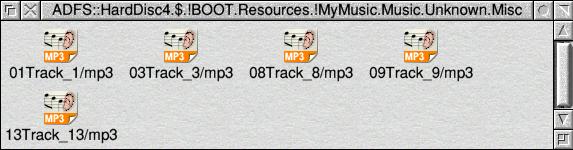
Next thing to do is to move them into the directory you want to keep them in and it is also recommended (although not vital) to give them their proper name to avoid confusion, but you must make sure that the MP3 always has /mp3 in the filename otherwise the MP3 player will not be able to recognise what the file is - I'm speaking from experience here!! The next stage is to give the MP3s an ID tag as otherwise when you play them in MP3 players they will be called something like 'Track8', and this is where the program !ID3TagED comes in.
!ID3TagED is a newly released program which allows ID3 tags for MP3 files to be created, these ID tags contain information about the MP3 - you can download the latest version from www.chris-johnson.org/software/index.html.
On loading up the program you will see the main program screen, now drag into it one of the newly created MP3s. You can now enter the relevant details for that particular MP3, when you have entered all the required details, click on the 'Write Tag' option and the job is done, the screen display below shows one that I made earlier !
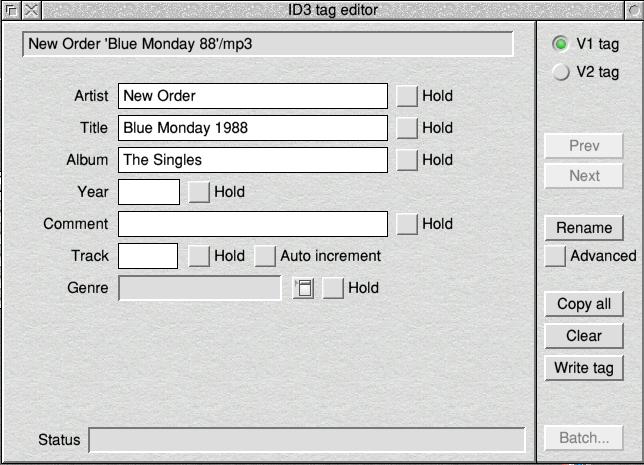
There are two different types of MP3 ID tags, V1 tags are what we have looked at here, the simple basic ID tags. With V2 tags you can fit in much more information including longer song titles, all the ID tags both V1 and V2 that I have created using !ID3TagED displayed correctly on my MP3 player.
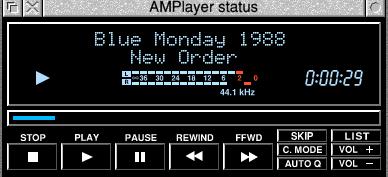
Now with the finished MP3, load up a suitable MP3 player, such as !AMplayer, and you will see that when it plays the tune the MP3s ID tag will be displayed.
It also possible on the Iyonix to make MP3s from vinyl recordings, using the program !AudioIn, the track will be sampled and a WAV file will be created, then using !MusicMan you can convert it from a WAV file into an MP3 file.
This article was purely intended as quick guide to making an MP3 under RISC OS, and hopefully that aim has been achieved. If you get stuck or want some assistance with the subjects covered then drop me an email at iyonix@riscos.org and I will help out if I can.
Matt Thompson