


Improving RISC PC Video
Stephen Morton makes a suggestion
Improving RiscPC video
I read the improving RiscPC video in the previous issue of RISC World and although I found it most interesting there was one aspect which I expected to see covered and that is the subject of cooling. Dave Holden's suggestions allow you to remove the Acorn designed filtering from the video circuit of a RiscPC and hence to improve the clarity of image that can be obtained on a quality monitor, whether it be TFT or CRT. There is another modification that I have thus far carried out on a number of RiscPC machines, both my own and those belonging to friends and acquaintances. This modification can be carried out very cost effectively in a few minutes and allows one to improve the video output of a RiscPC by "overclocking" the VIDC in software. Of course one can do this quite easily using the Acorn MakeModes program, but you may well discover, as I have done in the past, that the VIDC will simply give up and not be able to produce a clean and clear picture when you can't help feeling that it should. The reason for this is quite simple and is caused because unlike the vast majority of the components inside a RiscPC the VIDC chip can actually get hot, especially when driven harder than intended by Acorn. The answer therefore is to provide some cooling for the chip.
VIDC cooling
This is a very simple alteration to the RiscPC and involves nothing more than attaching a heatsink to the top of the VIDC chip. In order to achieve this you will need the following:
- A heatsink that can be cut down to the correct size
- A tube of thermopaste as used when mounting the heatsinks on PC processors
- A tube of superglue
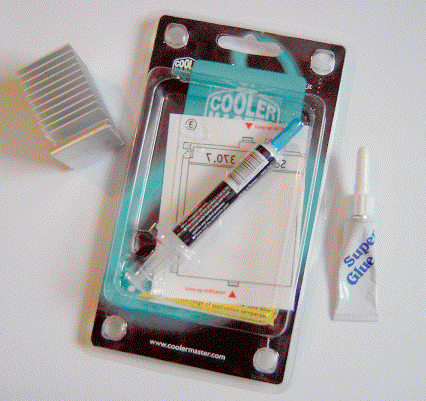
The full kit of parts
I usually use whatever old heatsinks I find, although you can easily go and buy a new from any computer parts supplier. Indeed I believe that you can even purchase stand alone heatsinks from the likes of PCWorld (Yes you can - ED). The thermopaste creates a joint between the heatsink and the top of the VIDC chip so that the heat is transferred easily and efficiently away from the chip. Finally the super glue is used to provide a firm mounting for the heatsink. Thermopaste is designed to transfer heat, not to attach components, and although it does have some adhesive quality this is not its primary purpose and so the superglue is used to provide extra adhesion to the top surface of the VIDC chip. I must stress at this point that under no circumstances do you want a large aluminium heatsink coming lose inside your computer and therefore causing damage which could be very expensive to repair, the super glue ensures that this eventuality will not occur.
Fitting a VIDC heatsink
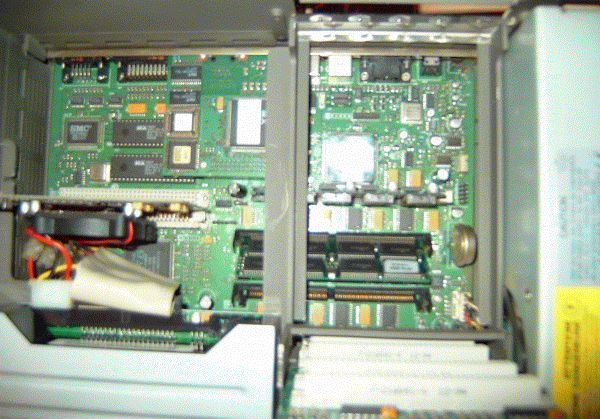
The first challenge that needs to be attempted is to remove the top of the RiscPC and then remove any podules that are attached to the backplane. These podules must be removed as the VIDC sits under them. Of course you should never do this with the computer turned on or plugged into the mains. You will now clearly see the VIDC chip. As you will be able to see it is quite small and I have no doubt that your heat sink will be far too large to sit cleanly on top of the chip. One therefore needs to cut the heatsink down to size using a small hacksaw. This can be time consuming but it will be worthwhile.
Having cut the heatsink down to the correct size, which should be roughly 1 inch square, you also need to take note of the height of the cooling fins. The gap between the top of the VIDC chip and the bottom of the lowest podule is not that great and you will need to ensure that any podule that is fitted in the bottom slot clears the heatsink by a safe margin. Provided you have now prepared the heatsink and it is of a suitable size and height it can be fitted. You will need to spread a thin even layer of thermopaste over the top surface of the chip, whilst doing this you must make sure that you leave the four corners of the chip clear of paste. To provide the required adhesion place four small drops of superglue, one at each corner, on the chip.
The VIDC chip covered with thermopaste
Now place the heatsink over the chip and apply discrete and careful pressure for 10 seconds while the superglue grips. Under no circumstances should you press hard as you then could well run the risk of damaging your computer, instead you need to apply just enough pressure for the paste to spread evenly and for the superglue to take hold.
Completing the work
I now advise leaving the computer for a couple of hours, or perhaps even overnight. Having done this re-assemble the computer and check its operation in the normal way. It is highly unlikely that you will notice much change in the way the computer behaves, that is unless you were already driving the VIDC chip at its limit, in which case you may find the display improves by a noticeable margin. For those that are interested in the efficiency of the heatsink then you can try running the machine for a couple of hours whilst fully assembled and then turning it off, removing the cover and any podules and feeling the heatsink with your fingers, you may well be surprised at how warm it is (actually I was amazed at how warm it becomes - ED).

The completed heatsink
Since this improvement only has an effect when the VIDC is being driven harder than normal you may need to alter the boot sequence on your computer and indeed make some new monitor definition files to exploit the improved performance. This is beyond the scope of this article but I have been asked to write a further article that covers some of these matters and I will be delighted to do so, I understand that this will be featured in the next issue.
(A quick note here I have now made this mod to my own machine, without doing this I could run 1600x1200 at 60Hz, with the heatsink I can run the same mode at 68Hz, I think that shows how useful a heatsink is - ED)
Stephen Morton