


Burrowing into WebFX3D
Nobilangelo Ceramalus digs deeper into WebFX3D
Once you have got over the perfectly valid objection to WebFX3D's look-and-feel, which although superficially flash is way outside the RISC OS norm, and burrowed into its innards and learnt to get the best out of it, you realise that it is a pretty nifty, and a very useful piece of software, even if the results are not always very predictable. It has long had a permanent place on my icon-bar.
The program is badly named, because although it is undoubtedly useful for making 3D images for Web pages, in my view it has a general applicability.
The worst aspect of the non-standard user-interface is the Colour Picker
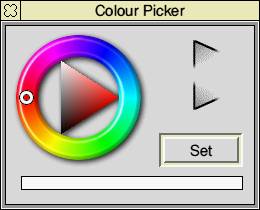
Figure 1
However there is an undocumented way by which it can easily be replaced by the RISC OS standard picker.
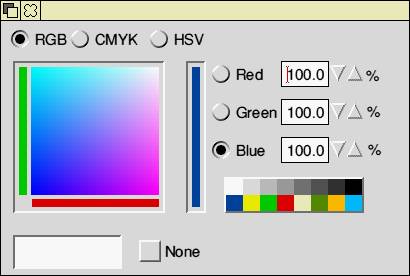
Figure 2
All you need do is create a text file inside !WebFX3D (using Edit) called CFG that contains one line:
Acorn_Picker:TRUE
If you change your mind and yearn for the horrid little picker, either delete the CFG file or change TRUE to FALSE. But getting rid of the horrid little picker is more than just an aesthetic objection, or a desire to have the RISC OS standard adhered to. There is a very practical reason, because the standard picker has a CMYK aspect, and that provides a very useful way of manipulating the lights.
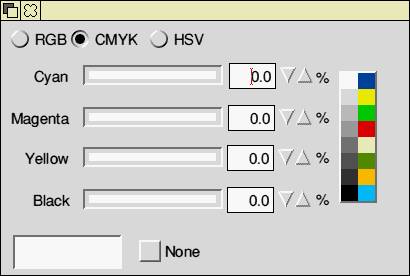
Figure 3
Placing lights with accuracy in WebFX3D is not the easiest, because the the lighting screen is divided into four chunks , which makes the lights small and the available movements rather coarse, so a small movement can make a significant difference. That coupled with the lack of an Undo feature, and the ability to place lights by entering co-ordinates (they can only be dragged about), means that making or altering a `gallery' setting (the combination of lights, background and fog-effects) takes a lot of time-consuming trial and error. It would therefore be very helpful to have some system, once you have found what looks like a promising position and setting for a light, to be able to switch it off and thus play about with other ones without moving it.
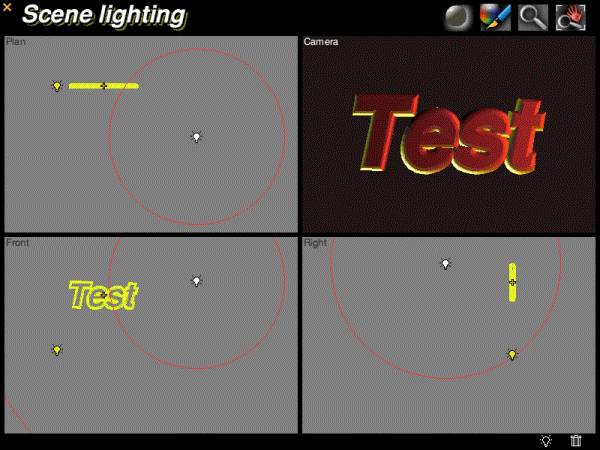
Figure 4
The CMYK sliders provide a simple way of doing that. Just move the black slider to 100%. The slider thus becomes a dimmer. It is not ideal, because some of the other sliders may alter their values when you mess about with the black one, so you should make a note of them; otherwise you may not be able to get back to exactly the colour that you had before you switched the light `off' or dimmed it. But having that level of control--being able to set colours with such numeric accuracy is a far cry from what you can do with the horrid little picker.
The CMYK/Black Slider technique makes experimentation with the lights much easier. Start with a good gallery--typically one of the ones supplied with the program--and tweak it by dimming existing lights and adding new ones. You can then see virtually instantly the effects of your changes.
Another undocumented technique in WebFX3D is particularly useful, and that is its ability to save as a Drawfile exactly what you see on screen. That representation (to save processing-time) is not full WYSIWYG, but the consequent chunky, plate-like effect is nevertheless very interesting. The only small drawback is that you cannot take the Drawfile into Artworks, not because it will not go, but because Artworks will in the process create hundreds or thousands new colours in the palette, which makes the percentage-counter under the hourglass gets slower and slower. Handling the result is also slow, so it is best to keep the thing in Draw, but that also has obvious drawbacks.
The answer is to use Artworks if you have to for some manipulations, but to take the image back into Draw afterwards. There is a bug in that Draw-Export facility, in that it does not work unless you have done at least one bitmapped rendering in the session first, so you have at least to do a dummy one, otherwise the Drawfile will be invalid. And on the subject of bitmapped renderings, the best quality comes from setting the number of pixel-size to 3 and the width of the output image to a goodish number, such as 640 or more.
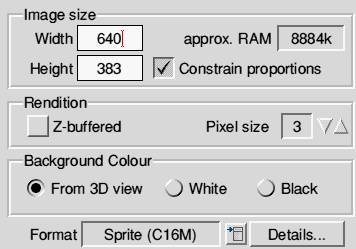
Figure 5
The images here all used 640. To me, WebFX3D is most useful for its ability to make 3D fonts, which is perhaps the most obvious, and, far less obvious, its ability to manipulate basic 3D shapes into a vast range of other things.
The basics that I find most useful are the sphere and the torus (ring), which are made by WebFX3D in conjunction with two of its add-ons, Spheroid and Torus. They have, like the whole package, deficiencies in the user-interface which are a constant irritation (such as not remembering settings, and having no key-entry, just up/down pointers, which makes entering `64' a long process). But they provide excellent raw materials for input to the main program, where they can be varied infinitely, and when you add in the infinite possibilities possible with lighting, you get double infinity, which is quite a lot.
The input panels of the two add-ons can be seen in Figures 6 and 7.
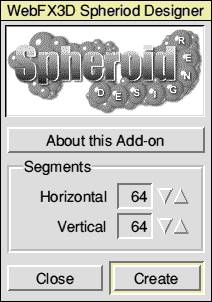
Figure 6
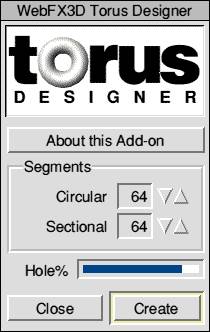
Figure 7
A sphere, you may, say is just a sphere (Drawfile, Figure 8), and a torus just a torus (Drawfile, Figure 9, tilted forward a bit so that its shape can be seen).
Figure 8
Figure 9
The sphere was created with the maximum number of horizontal and vertical segments (64), which makes the smoothest curves. Indeed, they should be the defaults instead of the minimums (20). Ditto for the maximum number of circular and sectional segments in the torus (64), again far better than the minimum of 20, which is the default. The torus shown here also had a largish setting for the size of the whole, as you can see from the position of the slider in Figure 7, because that makes more of a ring than an obese doughnut.
Both Figure 8 and 9 are lit with the same gallery, one I have called Gold Frontlit, for obvious reasons. The result in the "plated" look referred to above is, as you can see, very pleasing. The bit-mapped renderings of the same images are beautifully smooth, as you can see in Figures 10 and 11.
Figure 10
Figure 11
From this point I shall concentrate on the sphere--the drawfile version of it--and some of what can be made with it. First it will be flattened the sphere in the Y-axis (from above) using the Scale plugin. Figure 12 shows the Plugins Sub-Menu; Figure 13 shows the Scale Control Panel, set to do the flattening. Figure 14 shows the result.
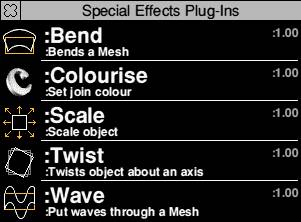
Figure 12
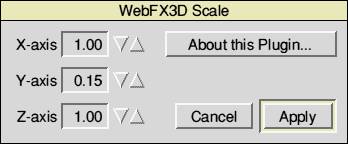
Figure 13
Figure 14
That is then curved upward, using the Bend plugin, shown in Figure 15, set as it was used. Figure 16 is the result.
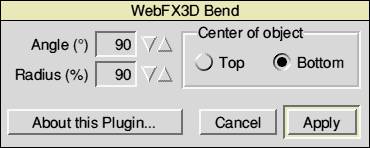
Figure 15
Figure 16
That was then rotated exactly 90� round the Y-axis, taking care not to tilt it in the X- or Z-axes, and bend again, using the same parameters. The result of that is the bowl in Figure 17.
Figure 17
That short exercise, from sphere to bowl, shows how the basic shapes can be used like so much playdough. Add Twist and Wave to Bend and Scale, and multiple applications of mixtures of some or all of these, and you can produce any number of shapes. Those can then be combined in Draw if Drawfiles, or Photodesk if bitmaps, or either if both. You can then easily build composites. The only limitation, as they say, is your imagination.
Nobilangelo Ceramalus