
The StudioLine Graphical User Interface
Capabilities of the Information and Image Tools Panes
Customizing the User Interface
Audio and Video Clips from Digital Cameras
Using Albums to Organize Images
Viewing a Folders with Subfolder Content
Keyboard Shortcuts for Folder Navigation
Previewing Descriptors Before Loading
Displaying Thumbnail Information
Marking Images for a Specific Task
Marking Images for the Lightbox
Working with the Image Tools Pane
Applying Image Tools to Multiple Images
Editing with Third-Party Applications
Exporting and CD/DVD Recording
Restoring the Entire Image Archive
Reload Images from Offload Discs
Switching to a Different Web Gallery
Exporting Web Galleries to CD or DVD
Accessing or Deleting Print Projects
Emailing and Exporting Print Projects
Working with Text – Using Descriptors
Working with Text – Spell Check
The software covered by this manual is subject to a license agreement, which is included with the software product and defines the terms for authorized use.
Ongoing changes to the StudioLine software are likely to occur from time to time. H&M Systems Software, Inc. does not warrant that this manual will completely or accurately describe the function of the software in every respect.
© 1998 – 2006, H&M Systems Software, Inc. All rights reserved. StudioLine and H&M are registered trademarks of H&M Systems Software, Inc. Other product or service names are trademarks or registered trademarks of their respective owners.
· Microsoft® Windows® XP / 2000 / ME / 98
· Intel® Pentium® III or 4 processor with 800 MHz minimum, faster recommended
· RAM: 256 MB, more recommended
· 150 MB available disk space for programs (allow extra space for data)
· Graphics adapter capable of supporting a screen resolution of 1024 x 768 pixels in Hi-Color (24 bit) mode
For optional CD/DVD recording, StudioLine requires a device capable of one of the following formats: CD-R, CD-RW, DVD-R, DVD+R, DVD-RW, DVD+RW, DVD-RAM.
To support concurrent use on two monitors, a dual-head graphics adapter is required.
StudioLine requires that certain software be installed on your PC. The Setup program will remind you to install the latest versions of any required components from the StudioLine CD-ROM. You may also download these components from the StudioLine web site (http://www.StudioLine.biz/).
Dynamic HTML pages created by StudioLine need to be viewed in a browser compatible with the specifications of the Document Object Model, Level 2, by the World Wide Web Consortium (W3C DOM Lvl. 2). Versions 4 or higher of Netscape® Navigator or Internet Explorer are compatible, as well as Opera Version 5.0 and higher.
MDAC 2.5 and Jet 4.0 - These components, or a later version, are required for the StudioLine database.
Note: For multi-boot systems it is crucial that identical versions of MDAC are installed in each of the operating systems (e.g., Windows 98 and Windows 2000), sharing one and the same “Program Files” folder.
WordPad - StudioLine includes some helpful documents in .RTF format on the CD-ROM and in the program folders on your hard disk. To view these documents, you will need WordPad or a comparable text editor.
This program is included with Windows. If WordPad is missing, you can install it from your Windows CD-ROM:
· open Control Panel and choose Add/Remove Programs
· select Windows Setup, then Accessories
· select WordPad
This manual can be found in PDF file format on the installation CD and on the StudioLine web site. It can be viewed and printed with the Acrobat Reader software. If Acrobat Reader is not already available on your PC, then you have the option to let the StudioLine Setup program install it for you.
Insert the StudioLine CD-ROM in the drive to start Setup. If AutoRun has been disabled for your CD-ROM drive, open Control Panel and choose Add/Remove Programs.
During Setup, StudioLine will adhere to the language settings of the operating system. Once installed, StudioLine offers a number of supported languages. To choose a language, select “Language” from the “Preferences” menu. The final system language will be determined when you enter the product activation code.
StudioLine will prompt for a product activation key during the initial startup. The product activation key can be found on the rear cover of this manual.
When starting StudioLine for the first time, you’ll see the window “Welcome to the StudioLine Image Archive”. It offers links to the online help and this manual, as well as access to the major image management functions. The same functions are also accessible from the QuickStep bar near the bottom of the screen (see the topic “QuickStep Bar” later in this chapter.)

For help with a particular panel, simply make it the active panel. The title bar of the active window will be highlighted in accordance with the chosen Windows color scheme. The StudioLine help system will open to the appropriate reference page. You can also select “Help (F1)” from the “Help” menu. If there is no currently active panel, then the help system will open to the “Introduction” page.
The StudioLine Graphical User Interface

1. Menu bar to access StudioLine functions.
2. Toolbar for quick access to commonly used functions.
3. Drop-down selector to switch between the Image Archive and the Page Editor for web galleries. Adjacent is a display of the current folder path. Click the path selector to access the most recently used folders.
4. Recycle Bin to delete images, filter and tool settings, descriptors and web galleries.
5. Image Archive pane for viewing and working with folders, classifications, image tools, descriptions, tags, etc.
6. Workspace with thumbnail view of folder contents, complete with image captions.
7. Resizing Border. Click and drag the border to change the width of the Image Archive pane.
8. QuickStep Bar, which walks you through the most common tasks.
9. Content selectors to control the content of the Image Archive pane.
10. Information pane or Image Tools pane. The Information pane displays information about the selected folder (e.g., number of images, subfolders, backup status) and the selected image. The Image Tools pane is a container for open image tools so that they don’t overlay the thumbnails.
11. Tabs to switch between Information and Image Tools panes.
The StudioLine Image Archive pane can be switched between different contents. The functions behind each content are covered in depth later in this manual. At this point we’ll briefly introduce some common concepts.
The entire Image Archive pane can be resized by dragging its right border left or right. This could give you more room for thumbnails vs. having more space to view descriptor content.
Sometimes it’s helpful to keep more than one content view open concurrently. For example, you might want to browse through albums and subfolders while viewing image tags in the descriptor view. This is made possible by undocking views from the Image Archive pane.
To undock a content view, choose the view by clicking on the respective button at the bottom of the Image Archive pane. Then, click the “Undock” button in the top right corner of the Image Archive pane.

The current content view becomes a floating window, which can be resized and placed anywhere on the screen. Follow the same procedure to undock any number of content views.

Use the “Close” button in the top right corner of any window to remove it from the screen. StudioLine will remember the last settings for the window. If you choose the same content from the content selectors, it will re-open as a floating window.
To dock a floating window back in the Image Archive pane, click the “Dock” button in the top right of the window.
![]()
Capabilities of the Information and Image Tools Panes
The information and image tools panes can be displayed or hidden by using the “Show Bars” submenu of “View” menu. There is also a “Hide” button in the top corner of the pane.

Both panes can be set to either stay open or to auto-hide when not in use. You control the behavior by clicking the button “Auto-Hide”, or “Remain Visible”, respectively.

Vertical tabs appear, while the panes are automatically hidden. Move your mouse to the appropriate tab to show this particular pane.
A pane that is set to “Remain Visible” can also be undocked from the StudioLine border by clicking on the pane’s title bar. The pane turns into a free-floating window that can be moved about freely. Docking hints will appear in case you want to re-dock the pane to one of the StudioLine borders. Dragging the pane over a docking hint will display a blue rectangle to illustrate where the docked pane would appear (see illustration below).

If you have a multi-head graphics adapter you can connect more than one monitor to your workstation to gain productivity. To support StudioLine, set the display properties so that the Windows desktop extends to all monitors.
Now you can view the Image Archive workspace on one monitor and use the other monitors to directly access frequently used windows, such as image tools and the StudioLine Explorer.

Another option would be to launch multiple instances of StudioLine by choosing “New Instance” from the “File” menu. Move each instance to a different monitor. Now you can work on a web gallery on one monitor and edit images and captions on the other monitor.
Customizing the User Interface
The appearance and function of the content views, the toolbar and many aspects of the user interface can be customized from the Preferences menu. Open the menu "Preferences" and choose "Image Archive".

The preferences panel "Image Archive" allows you to control specific aspects for each of the four content views. Among other things, you can define unique thumbnail sizes and spacing.
For the album view, you can further control the size of and distance between thumbnail images for individual folders. Click the right mouse button on the background of the Image Archive workspace and choose “Display Options” from the context menu.

You could opt for a small thumbnail size for folders with many images vs. a large thumbnail size for folders with fewer images.
Details about the preference settings for the various content views are found in the chapters covering the respective content view.
“Advanced Settings” control additional system details including the size and expiration of cached information, such as thumbnails.
The QuickStep Bar in the Image Archive walks novice users through the basic steps of loading, editing, presenting, sharing and printing images.
![]()
Use the “Show Bars” submenu of “View” menu to hide or display the QuickStep bar.
There is also a QuickStep Bar in the page editor for web galleries, walking novice users though the basic steps of editing, previewing and publishing their photo albums on the web.
Clicking on a task will open an instruction window, as well as any panels that may be relevant for this task.

If the instruction window doesn’t answer all of your questions, then click on the “More information about this subject” button for a greater in-depth description.
After becoming familiar with StudioLine, you can suppress an instruction window by clicking the button “Don’t show this hint again.” To restore all instruction windows, choose “Show All Hints” from the Help menu.
To use StudioLine for your images, they need to be added to the StudioLine Image Archive. StudioLine offers two methods for managing images:
· “Copy” Mode
Original images are copied into the StudioLine Image Archive. We will refer to them as internal images.
Once StudioLine has created a master-copy in the Image Archive, you could decide to delete the original image. A practical example would be the memory chip of your digital camera. After importing photos into StudioLine, the memory chip could be erased and reused for new pictures.
Digital camera users should always operate in “Copy” mode. Some cameras may reuse the same file names each time the memory chip is erased, e.g., DSCF0001.jpg. If you were to copy your picture files to a windows folder that already contains prior images from your camera, Windows may encounter duplicate file names and offer to overwrite the older pictures. This may cause you to accidentally lose irreplaceable memories.
By using the “Copy” mode, you’ll import your pictures directly into StudioLine, which is perfectly capable of managing multiple images with identical file names.
· “Don’t Copy” Mode
Only references to the original images are copied into the Image Archive. We will refer to them as external images. In case the original image is on a removal media or temporarily unavailable for other reasons, StudioLine generates a compact “Proxy Image” for use in the Image Archive. Settings regarding proxy images are found in the “Preferences” menu.
This mode should only be chosen if you prefer not to delete your original images from your hard disk and can’t afford the additional disk space for StudioLine to create its master-copies.
If you chose this mode for CDs, DVDs or other removable media, then you may find it inconvenient to always have to keep these media close at hand. Every time you need to create a high-resolution print or want to export the image, StudioLine would prompt you to insert the disc.
You should never choose this mode for any writable media (e.g., diskettes, re-recordable CDs or DVDs) or memory chips. There would always be the chance that you may accidentally erase or overwrite your original pictures.
It is generally recommended that you use the “Copy” mode as long as you have available disk space. Once disk space gets sparse, StudioLine offers the offload feature for older or less frequently used images.
Your choice of internal vs. external images has no bearing on your ability to manage, edit and process your pictures with StudioLine.
For the different types of media, you can decide how StudioLine will manage your images. Choose “Image Archive Copy Settings” from the Preferences menu. (The preferences window will open automatically the first time you load images.)

In addition to the above mentioned “Copy” and “Don’t Copy” modes, you can also choose the setting “Ask” to be prompted during each import. This is a good choice if you want to be able to copy images from borrowed CDs, but not copy images from any CDs that you own.
You are free to choose different settings at a later time. Of course, this would only affect any new images that are added to the Image Archive. Existing images that are stored internally may be converted to external images at any time. You can also convert external images to internal ones, as long as you still have access to your originals. (For details, please see the section “Internal and External Images” in this chapter.)
To add images to the Image Archive, click “Browse and Load” on the QuickStep Bar.
![]()
This will open a StudioLine Explorer panel for “My Computer” with the appropriate hint panel.
· Disk Drives
Computers and digital cameras store images as files. With Microsoft Windows, files are saved to disk drives. Each disk is labeled with a unique drive letter (followed by a colon) and usually represents a physical device - either internal to your computer or some external unit. Most commonly, drive letters “A:” and “B:” are used for diskette or ZIP drives, “C:” is the hard disk. Other drive letters (“D:”, “E:”,…) may be assigned to additional hard disks or your computer’s CD-ROM or DVD drive.
· Digital Cameras
There are two common interfaces to connect digital cameras to your computer. One method treats your camera like a scanner and uses the TWAIN or WIA interface. Most cameras are treated by Windows as if they were simply another removable disk drive and are assigned an available drive letter (e.g., “E:”) as soon as your camera is connected to the PC. In StudioLine, your camera will appear as a removable disk drive.
· Folders
Managing thousands of images, documents, programs and other files on your computer would quickly become confusing. That’s why you can create folders and sub-folders to organize your files.
The StudioLine Explorer “My Computer” shows a list of all drives connected to your computer. Double-click the drive letter that contains your images, e.g., “Removable Disk (E:)” for your digital camera, or “Compact Disc (D:)” for a photo CD-ROM.

The left pane of the StudioLine Explorer panel lists all folders on the selected drive. The right “content” pane lists folders, images and other files in the top-level “root” folder on the selected drive.
Typically, digital cameras store about 100 images per folder. Several image folders are then grouped together in a parent folder. To locate your first 100 images, you would have to double-click on drive letter, e.g., “E:”, then on the parent folder “DCIM” (Digital Camera Images) and finally on the image folder, e.g., “100abc”. (Of course, you would have to substitute the drive letter and the folder names with the appropriate letters and names applicable to your computer and camera.)
To view the next 100 images, you would first have to return to the parent folder by pressing the button “Up One Level”.
![]()
Then click on the folder containing the next set of images, e.g., "101abc".
When you connect a camera or flash memory card reader to your computer, StudioLine checks for an existing DCIM folder and automatically opens it in the "StudioLine Explorer – My Computer". This way you can quickly locate new images to be loaded.
In addition to handling one image at a time, StudioLine supports the standard methods to select groups of images.
· To select more than one image, hold down the “Ctrl” key on your keyboard while clicking the left mouse button on the desired images. You may also click between images, hold down the mouse button and drag the mouse pointer across the list of desired images to create a selector band around them. The “Ctrl” key can be used to add further images to the selection.
· To select all images in a folder click the “Select All” button in the StudioLine Explorer toolbar. You may also use the “Ctrl+A” keyboard combination (hold down the “Ctrl” key while pressing “A”).
![]()
· To remove an image from a selection, hold down the “Ctrl” key and click on the already selected image.
There are two methods to import the selected images to the Image Archive. (At this point, make sure that the Image Archive pane is switched to album view. If not, use the “Album” button in the Image Archive pane):
·
Click the “Load Images”
button on the “StudioLine Explorer – My Computer” toolbar.
![]()
· The panel “Load Images” will let you choose where in the Image Archive the selected images will be loaded to.

· The option "Match Folder Hierarchy" will look at the subfolders in your source folder and create matching subfolders in the Image Archive. Clear the check box and the images from all subfolders are consolidated into one and the same Image Archive folder.
·
Click on one of the
selected images in the “StudioLine Explore – My Computer” and, while holding
down the mouse button, drag the mouse pointer to the Image Archive content
pane. Then release the mouse button.

Even if you select
multiple images, StudioLine will temporarily display only a single translucent thumbnail image during the process of dragging images to the Image Archive.
Should you import more than 300 pictures to the Image Archive in one step, then StudioLine will offer to split the pictures into multiple subfolders. Doing so will speed up the opening of folders and the viewing of their content. (A very large folder with many pictures could take some time to open, depending on the speed of your computer system.)

You can preview an image before loading it into the Image Archive. A slider in the “StudioLine Explorer” toolbar controls the thumbnail size - up to 160x160 pixels.
![]()
For a large scale view, click the right mouse button on a picture and choose “Image Viewer” from the context menu.

Preview the image in any size, rotate as necessary and click on the button “Add to Image Archive” to import the picture to the current Image Archive folder.
![]()
You can load entire folder trees (a folder with all subfolders). Drag the desired folder from the “StudioLine Explorer – My Computer” to the Image Archive folder pane. StudioLine will create matching subfolders in the Image Archive and load all images to the appropriate locations. Any non-image files are displayed in a list in case they require your attention.
StudioLine accesses scanners via the standard “TWAIN” or “WIA” interfaces. To scan images, select “Import” from the “File” menu. You will see a list of any scanners and other TWAIN or WIA devices available to your PC. Click a scanner to start the scanner software provided by your scanner manufacturer. After images have been scanned, they will appear in the currently open folder of the StudioLine Image Archive.
Audio and Video Clips from Digital Cameras
Most digital cameras are capable of recording voice annotations or show video clips. Such media files can be loaded into StudioLine, as long as they are located in DCIM folders.
A special image status icon appears below images with voice annotation.
![]()
Click the voice annotation icon to play the audio clip.
Video clips will display the following icon:

Double-click the icon to play the clip.
Using Albums to Organize Images
You can create albums and subfolders in the Image Archive to better organize your images. Use the button “New Folder” either in the album view of the Image Archive pane, or in the StudioLine Explorer “Image Archive”. Now type a desired name for the new folder.
![]()
Folders may be renamed, moved or deleted. Simply click the right mouse button on any folder and choose the appropriate function from the context menu.
You can highlight certain albums and folders by color-coding the icons. Click the right mouse button on the folder icon and choose “Colorize” from the context menu.
Viewing a Folders with Subfolder Content
Sometimes it's helpful to view all images contained in a folder tree without having to manually open one subfolder at a time. Select any folder that has subfolders and click the button "Include/Exclude Subfolder Content" at the top of the Image Archive pane.
![]()
The images of all subfolders are displayed inside the current parent folder. If more than 700 images are found, they are split into pages of no more than 700 each. You can scroll between pages using the scrollbar and the pagination controls above and below the scrollbars.

To view the content of the entire Image Archive, simply click on the root folder labeled "Image Archive". To revert to normal tree view, click the button "Include/Exclude Subfolder Content" once again.
![]()
In the preferences panel "Image Archive" (accessed via the item "Image Archive" in the "Preferences Menu"), you can opt to automatically revert to normal tree view the moment a parent folder is clicked. To set that preference, click on "Albums" and then select the option "Hide subfolders after switching folders".
You can also change the default sort order from image name to any other descriptor. From the drop-down list, select your preferred descriptor that will be used for the default sort order.
Keyboard Shortcuts for Folder Navigation
Sometimes, the keyboard buttons can be quicker than mouse operations when navigating in an extensive Image Archive.
· In the folder pane of the album view, click the mouse pointer on the root note, labeled “Image Archive”, or any other folder.
· Type a character on the keyboard and StudioLine will open the first folder with a name that starts with that character.
· Quickly type a character sequence and StudioLine will open the first folder with a name that starts with that character sequence.
· To open subfolders of a folder, press the right-arrow key on the keyboard.
· Press the left-arrow key to return to the parent folder and close the subfolder.
· The “up-arrow” and “down-arrow” buttons will navigate to the previous or next folder.
Once you have imported your images, they’ll appear as thumbnail pictures in the Image Archive content pane. Don’t be alarmed by the small appearance - the images are stored full size and can be edited in thumbnail view or a magnified size. To magnify an image, use the “Zoom” button on the toolbar, or double-click the image to open the StudioLine Image Viewer. Object status icons can be displayed below each thumbnail to convey relevant information about each picture.

To toggle the display of the object status icons, click the right mouse button on the background of the Image Archive workspace and choose “Object Status” from the context menu. You can also use the keyboard shortcut Ctrl+g (press the “g” key, while pressing and holding the “Ctrl” key).
![]()
The image has been offloaded to an external media (e.g., CD or DVD).
![]()
This is an external image.
![]()
This image has been edited using the “Rotate and Crop” preprocessing tool.
![]()
This image has been optimized with the “Red Eye Correction” tool.
![]()
This image has been edited using any of the StudioLine filters or tools.
![]()
This image is in “RAW” format.
![]()
For this image, “RAW” specific settings have been adjusted.
![]()
This image has been assigned keywords or associated with categories.
![]()
This image has been rated.
![]()
This image has been (temporarily) marked for a pending task.
![]()
This image has a voice annotation.
Click on any of the object status icons to view the appropriate panel and adjust settings as necessary.
To convert internal images to external images, or vice versa, select the images and click on one of the images with the right mouse button. Choose “Original” from the context menu and then the option “Store externally” or “Store internally”.
To move an image to external storage, you will need to select a target folder.
To import an image to internal storage, you may be asked to insert the appropriate CD, DVD or other removal media, if that’s where the original picture resides.
A “RAW” image is the physical actual image data captured by a camera’s image sensor before any camera-internal processing (such as compression or white-balance adjustments). A RAW image requires pre-processing by StudioLine before it becomes useful.
There is no common “file format” for RAW images. The format varies between different manufacturers and models. StudioLine can import RAW images from all popular “Raw capable” camera models.
A special object status icon (see below) is used to identify RAW images after import.
![]()
If StudioLine can determine the camera model used to capture the RAW image, then it will choose the applicable pre-processing. If the default processing does not yield optimal results, click the “RAW” object status icon to control the pre-processing in detail.

Use the “RAW Settings” panel to fine-tune StudioLine’s pre-processing to suit your taste. Any change in the settings requires that StudioLine has to process a potentially large amount of raw image data to render a new image. It may take a little while, before the new image becomes visible in the Image Archive. Images with customized RAW pre-processing appear with a different object status icon:
![]()
Once you have found optimal RAW pre-processing settings that are ideal for your camera, click the “Use as Defaults” button. Your settings will be copied to the “RAW Default Settings” in the “Preferences” menu.
RAW based images can be further enhanced using any other StudioLine tools and filters, as with any other image type.
There may be occasions when you would like to have more than one copy of the same image to work with. StudioLine addresses this situation with two functions.
To duplicate a picture, click the right mouse button on the image and choose “Create a Duplicate” from the context menu. The resulting duplicate is an entirely new entity; you may edit the duplicate and add unique descriptor texts.
This feature is helpful if you want to separately manage different cut-out areas for one and the same picture, or to compare different combinations of tools and settings against the same image.
To create an image shortcut, click the right mouse button on a picture and choose “Create Shortcut” from the context menu. Image shortcuts are easily recognized by the arrow icon in the bottom left corner of the thumbnail (see below).

An image shortcut is not a separate entity, but simply a placeholder object that refers back to the original. Any editing or changes against an image shortcut will actually be applied against the original. Editing and changes that are applied against the original will be reflected by all its shortcuts, if any. Deleting the original image will also remove all its shortcuts from the Image Archive.
This feature is helpful if you want the same image with identical descriptions and tool and filter settings to appear in more than one folder.
A crucial step in the management of images is the adding of descriptions to your photos. Only extensive descriptions turn a basic filing system into a powerful Image Archive and database. Image tags (known in StudioLine as “Descriptors”) are used to store your descriptive information in different categories. Descriptors can automatically be printed below the images, included with emails or added to web galleries. They also help the search engine in grouping images that match a common theme. Additionally, they can be used for sorting.
In addition to your own “User Descriptors”, StudioLine will also preserve the image tags that were added by your digital camera (see “Digicam Descriptors, Exif”).
Once you load an image into the Image Archive, the descriptors “Image Name”, “Description” and “File Date and Time” will display below the thumbnail (unless you previously configured different descriptors). Some will already have information.

“Image Name” defaults to the file name of the imported picture. The same information is also stored in the descriptor “File Name”. Often, the file name is automatically generated by digital cameras or scanners and rather cryptic (e.g., “DCF0033”), which makes it entirely unsuitable as an image title in web galleries, emails or prints. Therefore, you should immediately give each picture a meaningful image name. You may even give similar images the same name – there is no need to add numbers in sequence.
The descriptor “Description” is left empty, inviting you to enter your own text. The “File Date and Time” are carried over from the creation date of the original file.
To add or edit text, simply click on the specific descriptor below the picture. This opens the panel “Descriptors”. Alternatively, you can click the right mouse button on the thumbnail picture and choose “Descriptors” from the context menu.

The “Descriptors” panel maintains the text information and other tags associated with an image. You can also switch the Image Archive pane to the “Descriptors” view by clicking the “Descriptors” button on the Image Archive pane. The function of the descriptors panel and the descriptors Image Archive pane view are identical.
The top of the “Descriptors” panel shows a preview of the current image. Click the “minus” button to hide the preview. Next to the title “Image Preview” are two VCR style navigation buttons (see below) to browse to the next or previous image.

If only one image had been selected, then the navigation buttons will automatically select the previous or next image in the current folder.
If more than one image had been selected, then the navigation buttons will browse to the previous or next image of the selection.
The image descriptors are organized in four categories, which can be collapsed or expanded by using two +/- buttons in front of each category:
![]()
Click the left +/- button to control the display of any descriptors with content. Click the right +/- button to control the display of all descriptor tags in the category, regardless if they have content or not.
Below is an explanation of the different StudioLine descriptor types and their unique capabilities.
This is the only category where you can create your own descriptor tags, such as “Event” or “Holiday”, and then fill-in your content. This will improve the success rate of locating your images later. You can delete obsolete descriptor tags, which will also delete their content.
![]()
Use the two buttons to the right of the “User Descriptors” title (see above) to add or remove descriptor tags.
To the left of any descriptor tag, there is a “Copy” button as it is also found in the title bar of many other StudioLine panels:
![]()
To copy a descriptor to other images, click and hold the mouse button on the “Copy” button, then drag it to other images. Alternatively, you can first press the “Ctrl” key while selecting a number of images. Then click the “Copy” button to copy the descriptor to all selected images.
A green “Copy” button indicates that all selected images already have the same descriptor content. A red “Copy” button indicates that some images do not yet have matching content.
These descriptors were created by StudioLine during installation. Some will have default values (e.g., Image Name), others are initially empty (e.g., Note).
The “Copy” button to the left of each descriptor tag is explained under “User Descriptors” in this chapter.
Modern digital cameras will record various properties with each image, e.g. camera model, exposure, f-stops, etc. These properties are stored in Exchangeable Image File format (“EXIF”).
Most of the EXIF information appears in dark red, indicating that the content cannot be modified. Consequently, there is no “Copy” button to copy those descriptors to other images. Instead, a simple green icon indicates that all selected images have identical information for a particular EXIF descriptor. A red icon indicates that some images have different content.
These are descriptors following the standards of the International Press Telecommunication Council and the Newspaper Association of America.
For these descriptors you can supply or revise the content. If images are exported to JPEG file format, they will include the IPTC/NAA descriptors for use in other applications.
The “Copy” button to the left of each descriptor tag is explained under “User Descriptors” in this chapter.
These descriptors were introduced with Windows XP, where they can be accessed from the Windows Explorer. In StudioLine, you can supply or revise the content of these descriptors. If images are exported to JPEG file format, Windows descriptors are included for use in other applications.
The “Copy” button to the left of each descriptor tag is explained under “User Descriptors” in this chapter.
Previewing Descriptors Before Loading
Exif, IPTC and Windows descriptors can be previewed in “StudioLine Explorer – My Computer” even before the images are loaded into the Image Archive. To view the descriptors, click the right mouse button on an image in the “StudioLine Explorer – My Computer” panel and select “Descriptors” from the context menu.
For quick viewing and editing, frequently used descriptors can be organized into groups. The first item below the title “Personalized Groups” is actually the system-provided group “Current Captions”. It shows the descriptors that appear below the thumbnail images of the current folder.
To create a group, click the “Create Personalized Group” button to the right of the title “Personalized Group”. Type a group name and click “OK”. The new group will appear in the group list. To create or change the list of descriptors assigned to a group, click the “Edit Personalized Group” button to the left of your group’s name. The panel “Edit Personalized Group” works the same way as the “Image Titles” panel described under “Displaying Thumbnail Information” later in his chapter.
To add descriptors to a personalized group, simply drag descriptors to the title line of the personalized group.
Use the “Copy” button next to the group name to copy content from all descriptors in this group to other images.
There may be occasions, such as when traveling across time-zones, where the timestamps recorded by the camera or provided in IPTC/NAA descriptors may not be correct.
You can correct the information for
“Creation Date”, “Date (Original)”, “Date (Modified)” by double-clicking the
content for those descriptors, or choose the appropriate function from “Edit”,
“Date and Time” menu.
To update more than one picture, select the images before double-clicking the
descriptor content.

The option “Edit Date/Time” is ideal for updating a single image. If more than one picture is selected, all would be set to the exact same time.
The option “Adjust Date/Time” is ideal for updating a series of images. The date and time for each image will be adjusted up or down by the same offset, e.g., to account for time-zone changes or daylight savings time.
To add a sequence number to a description, right-click the appropriate descriptor and choose “Insert Sequence Number” from the context menu:

The panel “Sequence Number” offers several display options and a preview at the bottom of the panel. If you would like to use your sequence number for sorting purposes, make sure to choose a number format with leading zeroes.
Displaying Thumbnail Information
You control the display of information below each thumbnail picture. To add or remove descriptors, or to change their order, click the right mouse button on the background of the Image Archive workspace. Choose “Image Titles” from the context menu.

From the left half of the “Image Titles” panel lists, you can switch between descriptor types and view available descriptors. The right half shows the descriptors that presently appear under the thumbnail picture.
To include an additional descriptor for display, click the descriptor name on the left and click the “Add Descriptor” button with the “right arrow” symbol. To exclude a descriptor from being displayed, click the descriptor name on the right and click the “Remove Descriptor” button with the “left arrow” symbol. To change the order of appearance, click a descriptor on the right and use the buttons “Move Up by One”, “Move Down by One” as needed.
To sort the content of a folder by descriptors, click the "Sort" button on the toolbar:
![]()
The attached menu offers quick sorting by the most common criteria. For each critieria you can choose ascending or descending order.
To sort by other or more complex criteria, choose "Sort by Descriptors" from the context menu.

The panel “Sort by” is equivalent to the previously discussed panel “Displaying Image Titles”; the left side lists available descriptors, the right side shows the descriptors used for sorting the thumbnail images in the current folder. Review the general usage instructions from the section “Displaying Image Titles”.
The order of descriptors on the right half of the panel controls multi-level sorting. For example, you could sort first by “Date and Time (Exif)” and then by “Image Name”. The result will be thumbnails appearing in the order that they were taken with a digital camera. In case multiple images were taken at the exact same time, they would appear in alphabetical order.
You can also choose between ascending or descending order. A sort by date in descending order will display the most recent images first.
In the “Classifications” view, images can be quickly assigned keywords or ratings and then organized by those classifications or marked for specific uses.
Open the Image Archive to a particular album or subfolder. Use the “Classifications” selector button to switch the Image Archive pane to “Classifications” view.

To assign, click a keyword, hold the mouse button and drag it to a desired picture in the work space. To assign a keyword to multiple images, select the images in the workspace and then drag the keyword to any one of the selected images, or drag the images to the keyword.
Any keywords you assign will be appended to the IPTC “Keywords” descriptor. This allows you to review all keywords that have been assigned to an image by opening the image descriptors.
You can associate keywords with different image descriptor fields. Click the right mouse button on the keyword and choose “Set Target Descriptor” from the context menu. In the panel “Choose Target Descriptor” you can pick a suitable descriptor field that the current keyword would be added to.
To add a keyword to a specific descriptor, open the “Descriptors” panel and drag the keyword to the descriptor of choice.
When a keyword is first used, an icon of the image will be used to visually represent the keyword going forward. To change the icon, simply drag a different image to the keyword in the Image Archive pane.
Images with keywords will display with the following object status icon.
![]()
Click the “Create Keyword” button.
![]()
The new keyword is added to the current keyword list. Replace the text “New Keyword” with the keyword label. Keyword labels are not strictly limited to single words. However, phrases or terms of more than a few words should be entered as descriptions, not keywords.
Keywords can be grouped into hierarchical lists – equivalent to folders and subfolders. To open or close a keyword group, click it with the mouse. A new keyword group is created with the “New Group” button.
![]()
To move keywords to a group, drag the keyword to the icon for the desired group. To rearrange the order of keywords in a group, simply drag it to its new position.
If you have an extensive list of keywords, it may be advantageous to switch to smaller icons. Click the button “Switch View” to toggle displays.
![]()
To view all images assigned to a keyword, click the check-box in front of the keyword.

The workspace will show all images that were assigned this keyword, regardless of which albums or subfolders they normally reside in.
To include images with other keywords, click the checkboxes of those additional keywords. Now, images that were assigned any of the selected keywords will be displayed together (“or” condition).

To display only images that were assigned all selected keywords, click the "All Keywords" checkbox at the bottom of the classifications view (“and” condition).

To remove a keyword from an image, click the appropriate object status icon below the image and choose the keyword that is to be un-assigned.
![]()
In the alternative, click the image and drag the keyword from the keyword list in classification view to the recycle bin. You may also click the right mouse button on the keyword and choose “Remove Keyword” from the context menu.
To remove a keyword from all images, click the check-box in front of the keyword to locate all images that were assigned that particular keyword. Then click “Select All” on the toolbar (or press “Ctrl+A”) and drag the keyword from the keyword list to the recycle bin.
To delete a keyword from the keyword list, click the keyword, and then click the “Delete Keyword” button.
![]()
Note: Deleting a keyword will not remove the keyword from the IPTC descriptor “Keywords” or any alternate target descriptor in the pictures. If you want to delete the keyword label from all associated pictures, then first “un-assign” the keyword (as discussed earlier in this chapter) before deleting it.
To change a keyword (e.g., “Holidays” to “Vacations”), click the keyword with the right mouse button and choose “Rename Keyword” from the context menu. Type a new label over the old one.
Note: Renaming a keyword will not update the IPTC descriptor “Keywords” or any alternate target descriptor in the pictures. If you want to replace the keyword label in all associated pictures, then first “un-assign” the keyword (as discussed earlier in this chapter), then rename the picture and finally assign the “new” keyword to the appropriate images.
You may need to exchange your keyword or category list with other users or applications. StudioLine can export keywords and categories in XML format, and import either XML or plain-text format.
To export or import a list, open the classifications view and click the right mouse button on the "Keywords" or "Categories" node. Choose the desired action from the "Import and Export" submenu. If you right-click any of the nodes below "Keywords" or "Categories", then your action will be limited to that particular node and its child-nodes.
The “Classifications” view also allows ranking images on a scale from 1 to 5.

Click on the “Ratings” group to view the five available ratings. Then click on a suitable rating and drag it onto a picture, or drag the picture to the rating. To assign the same rating to multiple images, select the images in the workspace, then drag the rating to any one of the selected images or the images to the rating. The current rating for an image can be viewed in the System Descriptor “Rating”.
Rather than switching to “Classifications” view, you can also manage ratings directly in album view. Select the desired images, then click the “Ratings” button on the Image Archive toolbar to view a drop-down list of available functions to assign, revise or remove the rating for an image. You may also sort the images by their rating.

The "Information" pane lets you also view and edit the rating. If necessary, use the the “Show Bars” submenu of “View” menu to show this pane.
Rated images will display with one of the following object status icons.
![]()
Click the rating icon to change or remove the rating for the image.
Alternatively, to remove a rating from an image, click the image and drag the rating from the rating group in classification view to the recycle bin. You may also click the right mouse button on the rating and choose “Remove Rating” from the context menu.
The classification view also allows you to temporarily mark images from many folders for a common task.

As with keywords, categories and ratings, simply drag the appropriate marker to the image or the image to the marker.
Rather than switching to “Classifications” view, you can also set markers directly in album view. Select the desired images, then click the “Marker” button on the Image Archive toolbar to view a drop-down list of markers you can set.

The "Information" pane lets you also view and edit markers. If necessary, use the the “Show Bars” submenu of “View” menu to show this pane.
Images that have been marked display with the following object status icon.
![]()
Click the object status icon to remove the marker.
Alternatively, to remove a marker from an image, click the image and drag the marker from the "Mark for…" group in classification view to the recycle bin. You may also click the right mouse button on the marker and choose “Remove Marker” from the context menu.
Marking Images for a Specific Task
Images can be marked for use in email, printing, web galleries, CD/DVD writing or for placement in a lightbox.
After marking images for a particular task, simply click the right mouse button on the marker and launch the selected action from the context menu. In the alternative you can also click on the appropriate button on the QuickStep bar. For instance, if images have been marked for "Email", choose "Email" from the email marker's context menu or the QuickStep bar, or choose "Send Images via Email" from the "File" menu. StudioLine will remind you that there are pending images that have been marked for email use. You can choose to email the marked images immediately or to keep them marked for later. You will still able to select and email other images at this time.
After using the marked images in an email, you will be prompted to remove the markers or to retain them.
The equivalent steps apply for images marked for printing, web gallery use or CD/DVD export – first mark the images, then use the QuickStep bar or the main menu to call up the appropriate function.
Marking Images for the Lightbox
The lightbox presents a unique case, as there is no predetermined use for the marked images. The lightbox allows you to temporarily group images coming from many different folders and compare them side-by-side. For that reason, the lightbox displays larger thumbnails by default, as compared to regular folders.
To view all images in the lightbox, click the check-box in front of the lightbox marker.
In the preferences panel "Image Archive" (accessed via the item "Image Archive" in the "Preferences Menu"), you can customize the lightbox thumbnail size. Click on "Classifications" and change the desired "Maximum Preview Dimensions for Lightbox".
The timeline view automatically organizes images by date. To access the timeline view, click the “Timeline” button near the bottom of the Image Archive pane.

The top of the timeline view has a drop-down list where you can choose the date by which images are sorted:
· Order by Exif Date
This option sorts images by the creation date as recorded by the digital camera. You’ll quickly find last year’s vacation photos and can enjoy your memories day by day.
· Order by File Date
This option sorts images based on the day that they were copied to your computer. This can be helpful for scanned and other images that lack Exif information.
· Order by Modification Date
This option sorts images based on the date when they were last edited. This is an excellent way to locate images that you recently have been working on – regardless of which albums and subfolders they may reside in.
To drill down to a particular day, click on a year, and then a particular month. The calendar control will switch to the selected month, highlighting days with images.

Click a highlighted day to view all images for that particular day. Click the “right arrow” or “left arrow” button to browse to a different month.
In the preferences panel "Image Archive" (accessed via the item "Image Archive" in the "Preferences Menu"), you can choose that the timeline view will display matching images as soon as you have picked either a year or a month. To set your preference, click on "Timeline" and then click a checkbox under "Show Images in Month or Year View".
Keep in mind that this setting might result in larger number of images being displayed. Of course, starting from the yearly view, the number of images displayed typically will get less, as you drill down to a particular month or day.
Not only can the StudioLine search engine be used to find a specific image, but it can also be used to collect images from various folders which match a certain theme. The Image Archive “Search” function collects all matching images in a temporary “Search Results” folder.
Searches are based on the content of image tags (“Descriptors”). By making extensive use of descriptors and entering detailed descriptions, you will be rewarded with much more relevant search results.
In the album view of the Image Archive pane, click the “Search” button. You can also find that button in the StudioLine Explorer “Image Archive”.
![]()
In the “Search Image Archive” panel (see below), you can enter search criteria and also limit the search to certain descriptors and folders.

By default, the entire Image Archive will be searched. Use the folder list on the right to restrict the search to any folder. The "Search in" field will show which folder is currently selected, or "\" for the entire Image Archive.
The drop-down list “Include Descriptors” allows you to specify which image tags are used to find the search argument. From the drop-down list, select “Choose…” to open the “Choose Descriptors” panel.
For an even more targeted search, click the “Advanced Search” button in the “Search Image Archive” panel.

Here you can define complex search criteria, e.g., locate all pictures that mention “Italy”, except those that mention “Rome”.
It helps if you have a general idea when images were taken, loaded into StudioLine or recently edited. This way you can use the advanced search options “Date between” or “Time between” to set a time span.
To choose which date or time to look for, open the drop-down list “use descriptor”.
·
Order by Exif Date
This option includes images based on the creation date as recorded by the
digital camera. You’ll quickly find sunset photos from last year’s
vacation.
·
Order by File Date
This option includes images based on the day that they were copied to your
computer. This can be helpful for scanned and other images that lack Exif
information.
·
Order by Modification Date
This option includes images based on the date when they were last edited. This
is an excellent way to locate images that you recently have been working on.
The panel "Search Image Archive" is also used to perform a global change against the descriptors of several images. This comes in handy when you are trying to standardize spellings or abbreviations for certain terminology.
· Type the word or phrase to be replaced into the field "Search Argument".
· Click the "Replace" checkbox. Below, type the replacement text.
The replace is "case sensitive" – the search argument you typed must use the same combination of upper and lowercase letters as the text you are trying to replace.
Matching images are arranged in a temporary Image Archive folder called “Search Results”. This special purpose folder will be discarded as soon as a different folder is selected in the album view of the Image Archive pane.
The found images can be viewed as a slide show, printed, emailed, exported or used in a web gallery.
You can permanently retain any collection of theme-related pictures.
· First, open the StudioLine Explorer “Image Archive” and navigate to a target folder for your images, or create a new one. (You could also click the right mouse button on “Image Archive” in the album view of the Image Archive pane and choose “New Folder” from context menu.)
· Click the “Select All” button on the toolbar, or press Ctrl+A, to select all images in the search results.
Now, you need to decide about the application for the search result pictures:
· You may simply want to retain the search result for now so that you can process them at a more convenient time. In this case, press and hold the “Alt” key while dragging the images from the search results to the target folder. New shortcut objects are created in the target folder, but all pictures remain at their original locations. This also guarantees that the shortcut objects will always use the same descriptions, filters, image tools and settings as the reference images at their original locations. Of course, if you ever delete any of the images in their original locations, the shortcut object will be removed as well.
· If you are trying to process the search results pictures with different descriptions, filters or tool settings, then press and hold the “Ctrl” key while dragging the images from the search results to the target folder. Copies of all search result picture objects are created in the target folder. Any work performed against the image copies will not affect the pictures at their original locations. However, thanks to the underlying StudioLine database technology, extra disk space is not required for duplicate physical images.
· If you are trying to reorganize your pictures, drag the selected images from the search results and drop them into their target folder. The pictures will be moved from their original location to the target folder.
The Image Archive “Search” function returns the result in a single folder. The Image Archive “Filter” returns the matching pictures in their respective Albums and subfolders – omitting any folders that contain no matches.
To create a filtered view of the Image Archive, click the “Image Archive Filter” button near the bottom of the Image Archive pane. The top of the Image Archive Filter view has an input field for quick filtering. Enter a search argument and click the green “Go” button. StudioLine will look through all descriptors for the search argument and will then display a subset of folders which contain matching images.

Just as in "Album" view, you can use the button "Include/Exclude Subfolder Content" at the top of the Image Archive pane to show a collection of all images contained in a folder tree without having to manually open one subfolder at a time. (See: "Viewing Folders with Subfolder Content" earlier in this manual.)
In the preferences panel "Image Archive" (accessed via the item "Image Archive" in the "Preferences Menu"), you can opt to automatically revert to normal tree view the moment a parent folder is clicked. To set that preference, click on "Image Archive Filter" and then select the option "Hide subfolders after switching folders".
You can also change the default sort order from image name to any other descriptor. From the drop-down list, select your preferred descriptor that will be used for the default sort order.
For a more targeted search you can combine multiple arguments. Click the “Advanced Filter” button:
![]()
The “Image Archive Filter” assistant opens.

Choose a descriptor from the first drop-down list.
Choose a comparison operator from the second drop-down list. For example, the “contains” comparison will look for a partial match. It will find images where the entered value can be found anywhere in the chosen descriptor, even as part of a word. Alternatively, the “equals” comparison will look for images where descriptor content matches the entered value character for character with identical lengths.
Comparisons are not case sensitive – upper and lower case letters are treated the same.
The third field has a dual function. You can either enter a search value or use the drop-down list to choose from values that appear in the Image Archive for the chosen descriptor.
After choosing or entering values from the three fields, you can press the “OK” button for StudioLine to start filtering. The tree view in the Image Archive pane will show only those folders containing matching pictures.
Combining Arguments
By combining multiple filter arguments, you can narrow or widen the search. Open the “Advanced Filter” assistant and set up a first filter argument as discussed above using the descriptor, comparison and value field.
·
To widen the search,
click the button “Include More Pictures”.
· To narrow the search, click the button “Restrict the Search”.
Pressing either button will display a new row to define an additional search argument. A hit counter displays the number of matches so far. You will be able to define a total of 20 filter arguments.

To remove a filter argument, click the “+” button in front of the argument and choose “Remove Row”.
Before you can work with images, they need to be imported into the StudioLine Image Archive. For details, see the chapter “Loading Images” in this manual.
Click “Edit” on the QuickStep Bar.
![]()
This opens a launch panel “Edit Images” (see below), which gives you quick access to image tools, descriptors and classifications. Click on "Apply Image Tools".

In StudioLine, you edit your pictures by applying image tools to them. Each image tool performs specific functions against a picture. For instance, there are tools to rotate and crop, adjust color tones, correct red-eye issues, as well as various special effect filters.
For each image, StudioLine will save the tools and settings you chose and apply them before an image is displayed or otherwise used. The master copy in the Image Archive remains unchanged. This way, you can experiment with image tools, change settings or reverse any actions – even months later.
The image toolbox can be accessed from the QuickStep Bar, the “Image” menu, the toolbar menu linked to the image toolbox button, or by clicking the “Image Toolbox” button near the bottom of the Image Archive pane.

To access a specific image tool, click the tool in the toolbox panel. The tools can also be accessed directly from the "Image" menu or the "Image Toolbox" toolbar button, where they are grouped by function:
· Preprocessing
These tools perform initial corrections such rotate, crop, red-eye correction, ICC color profiles and resizing, all of which should occur before optimizing colors, exposure and other aspects.
These tools are used to optimize your images, e.g., by correcting blurring, improving exposure and addressing color shifts.
With effect filters, you let your creativity run wild.
Working with the Image Tools Pane
When you select an image tool it opens in the image tools pane. As you select more image tools, they too will be added to the image tools pane. If there is insufficient room for all image tools, then click on an image tool title bar to minimize it. You can also undock an image tool by clicking the appropriate button.

Click the “Dock Image Tool” button to re-dock the tool to the image tools pane.
To apply an image tool to a picture in the Image Archive, select the particular picture by clicking on it with the left mouse button, then select an image tool. A panel opens with the settings for the selected tool. Use the various controls to change the tool settings.

StudioLine will immediately update the picture to show the effect.
There is no need to confirm your actions with an “OK” button. All tools and settings can easily be changed or reversed at any time.
Image Preprocessing Tools
One of the key features of StudioLine is the ability to apply a complete set of image optimizations to an entire series of similar pictures. For proper image alignments, to crop unwanted borders or to correct the dreaded pupil discolorations in people or animals (red-eye/pet-eye effect), use the appropriate tool from the “Preprocessing” section of the “Image Toolbox” panel.
![]()
Since pre-processing tools are specific to each picture and would not be copied to other images, they are omitted from the “Active Image Tools” list which is documented later in this chapter.
If you simply need to change a photo from horizontal to vertical alignment (portrait vs. landscape mode) or vice versa, click the “Rotate Clockwise” or “Rotate Counter-Clockwise” button on the toolbar.
![]()
These buttons will record the appropriate settings in the "Crop and Rotate" preprocessing tool.

The "Crop and Rotate" tool performs a number of tasks:
·
Rotate
If your camera has no orientation sensor, then you will likely need to rotate
portrait images by 90°.
·
Mirror
This can be helpful if a slide or transparency was scanned bottom side up.
· Crop
Use the cropping knife handles in the panel to trim off any scanning margins or to define a better cut-out area.
· Align
If the camera was tilted or an image was not perfectly aligned in the scanner, you can place the alignment handles along a known vertical or horizontal line in the image.
· Choose Aspect Ratio
Enter the desired aspect ratio and then select the "Fix" checkbox. Now the horizontal and vertical cropping knife handles will always move together so that the resulting cut-out area will maintain the chosen aspect ration.
A dreaded result of flash photography are red pupils in people and other pupil colors in animals. To correct this effect use the "Red Eye Removal" preprocessing tool.

In the left "Select Area" pane, click on a discolored eye. The "Select Red Eye" pane on the right zooms into the selected area so that you can make an accurate selection. In the right pane, click exactly inside the red (or otherwise discolored) pupil.
StudioLine will correct the discoloration. If the result is not satisfactory, you can manually adjust the result:
· The slider "Color Tolerance" expands or reduces the area that will be corrected, in case too much or too little of the pupil was effected.
· The slider "Adjustment Effect" controls the intensity of the color correction.
Repeat these steps for as many eyes as necessary. Each corrected eye is tagged with a number. This way you can later pick individual eyes and make further corrections. To remove the correction for a particular eye, choose it with the "Eye No." control and then click the "Delete" button next to it. To remove all red-eye corrections, drag the "Copy" button of this panel to the recycle bin.
ICC color profiles are based on a vendor-independent standard by the International Color Consortium and define distinct color spaces for individual devices, such as monitors and printers. This assures printed output will match the appearance on your monitor, assuming the devices support ICC color profiles.
To manage the ICC color profile associated with an image, select the image and open the “ICC Color Profile” pre-processing tool from the image toolbox.
![]()
If there is already an associated color profile, it will be displayed. To assign a new color profile, open the drop-down list and choose the color profile for the device that recorded the original image - typically your digital camera or your scanner. (The drop-down list will only show color profiles for the RGB color space.)

When images are loaded that have new ICC color profiles, then those profiles are added automatically to the “ICC Color Profile” list and can be used with other images.
You can set default color profiles to be associated with images that are loaded from specific sources. Choose “Image Archive” and “ICC Color Profile” from the “Preferences” menu.

The
“Cameras” list includes all models found in the Exif descriptors anywhere in
the Image Archive. From the “File Extension” list, choose a graphics file type
used by the specific camera. From the “ICC Color Profile” list, choose the default
color profile to be associated with the selected camera/file extension
combination. You can use the “Add” button to import new ICC color profiles from
disk or other media. Click the “Apply” button to save the default color profile
association.
Resizing
Even though it is not recommended as a standard practice, there may be occasions when you wish to permanently reduce the size of your original images. The size of digital images can be measured in two ways:
· Pixel Size
The pixel size (e.g., 1024 x 768 pixels) defines the number of color dots that comprise the image. A large number of pixels requires more storage space, but allows for better resolution with more detail being recorded. Images with a large pixel size are suitable for good quality and large prints. A small pixel size may limit a picture for use in emails or on web sites.
· Print Size
The printed size of an image, measured in inches or cm, is a function of its pixel size and the printer resolution (e.g., 300 DPI). A high resolution printer prints pixels closer together, resulting in a smaller output. Best results are accomplished with an image that has a large pixel size printed on a high resolution printer.
For maximum flexibility, StudioLine will catalog images without changing the pixel size. During export or when sending emails, you can choose a pixel size to suit your needs (see chapters “Exporting” and “Sending Images via Email”). When printing, you can choose a suitable print size (see chapter “Printing – Custom Print”).
StudioLine does allow you to permanently reduce the pixel size of original images. This may be useful if you scanned an original in better resolution than you ever expect to need. Keep in mind that print and Internet technology keeps advancing and disk storage has become increasingly affordable. In a few years you could find yourself scrambling for that original size, which may have seemed excessive today.
Because resizing will cause a loss of resolution, it is critical that you first perform any another pre-processing tasks. From the Image Toolbox, choose “Crop and Rotate” to define the ideal cut-out area for your images. Choose “Red-Eye Removal” to correct any discolored pupils in people or animals. Only after these preliminary steps are complete, choose one or multiple images and click on “Resize Original” in the Image Toolbox.
![]()
StudioLine opens the panel “Resize Original”.

Similar to the export, you can save and recall frequently used settings.
The “Image Size” drop-down offers a multitude of options, including common standard sizes.
The choice “Use Original Image Size” will retain the current size. Use this option if you just want to convert between graphics formats, e.g., from TIFF to JPEG.
“Custom” activates the width and height controls to pick any custom size.
The standard or custom size you choose defines a bounding rectangle into which StudioLine will proportionally scale the images. Consequently, one side of the resized image may be smaller than the chosen “Maximum Size”, if the selected width/height proportions don’t match the images’ proportions.
For best results, StudioLine will never enlarge images.
Next to the image size input fields, you can choose the unit of measurement as pixels, inches or centimeters. That is helpful if images are later emailed to be printed at a given paper size. The field "DPI" will let you control the print resolution.
Near the bottom of the panel you select the file format. The default is the “JPEG” format, which uses a very effective compression algorithm to reduce file size. For “JPEG” format, you can further control the image quality. The higher the quality, the more disk space the resized file will use.
Other file formats have a static image quality, equivalent to the original quality. However, these formats have high disk space requirements.
The highly intuitive white balance tool is ideally suited for removing color hues. It's as quick as it is simple.
Click "White Balance" in the tool bar or the image toolbox.
![]()
Click the “Pick-up Grey Point” button to turn the mouse pointer to a pipette. Click the pipette in an area of the image that you know should be grey. You can click either inside the thumbnail image or in the image viewer.
StudioLine automatically corrects the color hue.

If necessary, use the various options or the “Effect” setting to perfect the results.
With the help of gradation curves, you can precisely control the luminescence of the individual color separations, as well as the entire image.
![]()
The gradation tool has a toolbar to control the display, choose the color channels and manage points in the curve.

To get started, choose a color space from the toolbar, either “Tone Levels” or one of the color channels. Initially, you can only control the end-points on the curve. Use the “Insert Point” button on the toolbar to create additional handles that you can manipulate with the mouse.
Once you determine the perfect settings for a particular camera, you can save those by name.
![]()
Another image tool worth mentioning is the “Text” tool. It superimposes text and/or descriptor content onto the picture. One classic usage would be a copyright notice.

The upper section of the panel defines the text to be displayed. The default setting refers to the system descriptor “Copyright”.
Descriptor values can be inserted manually by bracketing the descriptor name with “%%”, e.g., %%name%%. You can also click the “Insert” button and conveniently choose from a list of available descriptors. Of course, you will have to make certain that “Copyright” or any other descriptor does contain text. Alternatively, you can simply replace the descriptor with regular text input. For multi-line text, type “\n” to force a line break.
The middle section of the “Text” panel defines the font, style, shading and shadow color. Shading is recommended, when text is superimposed on an area with light and dark background.
The shadow color should be a strong contrast to the font color, e.g., use a black shadow for a white text color.
The lower section of the “Text” panel defines the position and orientation.
Normally, the font size will remain constant for all picture sizes, e.g., thumbnail, zoomed, image viewer. The text will only be scaled if it otherwise would not fit into the picture.
To compare the outcome of your image editing with the original image, click the image with the right mouse button and choose “Image Viewer / Slide Show” from the context menu. Initially, images are displayed in their edited version. To split the display between the original and the edited version, click the “Split Image Display” button.
![]()
StudioLine will display a divider, showing the original version on one side of the divider and the edited version on the other.

Drag the divider to an area of the image where you can best assess the effects of any image editing.
Click repeatedly on the “Split Image Display” button to toggle the display between horizontal or vertical splits, with the edited image appearing either at the right, bottom, left, or top. Use the right mouse button to toggle the display in reverse order.
The current split-image setting is retained when the image viewer is closed.
Applying Image Tools to Multiple Images
To apply the same tool against multiple images, select these images before accessing any tools or changing settings: Press and hold the Ctrl key while clicking the desired images with your mouse. You may also click the left mouse button on the workspace background. Then hold the mouse button down while moving the mouse pointer across the desired images to create a selector band. You may add additional images to your selection by using the Ctrl key. Other techniques for selecting objects are covered in an appropriate chapter of the Online Help.
StudioLine collects all tools, filters and their settings in a stack (the “Active Image Tools” list), which will be stored along with the unchanged original in the Image Archive. To view the active image tools list, select an image and choose “Active Image Tools” from the “Image” menu. You can also click the right mouse button on an image and choose “Active Image Tools” from its context menu.
You can control the order in which tools are applied against an image by moving them within the Active Image Tools list. StudioLine will apply the tools top to bottom.
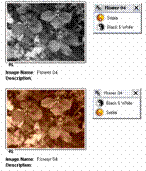
To illustrate the effect of different processing orders, select an image, apply the “Black & White” tool and then the “Colorize” tool to achieve a sepia effect. This will give the picture an aged appearance. If you reverse the sequence of the filters, then the “Black & White” filter cancels out the “Colorize” tool.
To discard the effect of an image tool, simply drag the tool from the “Active Image Tools” list of a particular image into the Recycle Bin in the upper right corner of the StudioLine window. You can also click the right mouse button on any tool in the list and choose “Delete” from the context menu. Alternatively, if the tool’s settings panel is currently open, you can select the particular image and drag the “Copy” button from the top left corner of the tool’s settings panel to the Recycle Bin.

For additional information about managing the “Active Image Tools” list, refer to the Online Help.
There are a number of ways to copy tool settings from one image to another.
1. Dragging the “Copy” Button to a Single Image
· Click the left mouse button on the image containing the correct image tools settings.
· Open the image tool you wish to copy.
· Drag the “Copy” button of the image tool’s settings panel to any other image that should inherit the identical settings.

2. Clicking the Copy Button
· Click the left mouse button on the image containing the correct image tools settings.
· Open the image tool you wish to copy.
· Hold down the Ctrl key to select additional images (be certain that the original image remains selected!)
· Click the “Copy” button of that image tool’s settings panel to apply the same settings to all selected images.
3. Using the Active Image Tools list
To copy the settings of a single image tool, drag that particular tool from the Active Image Tools list to any target images. To copy all image tools, drag “Copy” button of the Active Image Tools list onto any target images (or use the Ctrl key to select additional images and then click the “Copy” button.)
The “Lock” button (see below) is used to copy tools and settings to images in other folders

Normally, the tool panel will display the settings in effect for the currently selected image. If multiple pictures are selected, the panel will display the settings for the image that had been selected first. Clicking the “Lock” button will turn the button red, indicating that the settings are locked (see below).
![]()
You are now free to browse through folders and select different images – the settings will remain “frozen” on the originally selected picture. When you have located and selected the target image(s), click the “Copy” button in the settings panel.
Access the histogram by selecting an image and then click the “Histogram” button near the top of the Image Toolbox.:
![]()
The histogram displays the distribution of pixels based on brightness and frequency. The x-axis (extending from left to right) represents brightness, ranging from black (0) to white (255). The y-axis (extending upwards) represents the frequency of pixels for a particular brightness.

Ideally, an image should have an even balance of dark, mid-tone and bright pixels. Images with an excessive number of bright pixels will appear washed out. An image with a too high number of mid-tone pixels will appear pale. . Too many pixels in the dark areas will result in a lack of detail. The StudioLine histogram helps with assessing the effect of image tools to achieve a well balanced picture.
The histogram can be switched to different views to match various image tools. “Gray”, the default view, shows the distribution of brightness combined for all color channels. You can also select one or multiple individual color channels, or view the distribution of saturation or color. In addition, you can choose logarithmic or linear view and overlay the chart with a grid.
To illustrate the use of the histogram, let’s observe the effect of the “Auto Tone Levels” tool. Select a pale or “flat” looking image which lacks contrast. Open the “Auto Tone Levels” tool and the histogram from the image toolbox. In the histogram, choose the “Gray” view.

Our sample above shows that the image is virtually lacking any dark pixels. Now click “Auto-Contrast” in the “Auto Tone Levels” panel. The histogram shows how the narrow graph is now spread across the entire brightness range.

The balanced brightness results in a much more vibrant image. You can move the sliders in the “Auto Tone Levels” panel and instantly observe the result in the histogram and on the image itself.
Editing with Third-Party Applications
You can open pictures in your favorite bitmap editing or freehand tool directly from the Image Archive. Click the right mouse button on an image, choose “Original” from the context menu, and select the menu item “Open With”. You will see a list of applications that Windows has associated with the file type of the original image. There will also be an option “Choose Program…” to manually pick a specific program.
Use the option “Edit Program Shortcuts” from the same context menu to define shortcuts to your own program choices.

You can manage any existing program shortcuts in the panel “Edit Program Shortcuts”. Click the “New” button to create a program shortcut.

In the panel “Create New Program Shortcut” enter a shortcut name. Then use the “Browse” button to locate the appropriate program file. Accept your choices with the “OK” buttons and you will see your new program shortcut appear in the context menu.
Once your application has been launched, you can edit the picture as appropriate and then save the file.
When launching third-party applications from StudioLine, you should be mindful of certain facts:
· Any changes made with third party applications cannot be reversed by StudioLine. If that is a concern, make a copy of the picture before making any changes. Click the image with the right mouse button and choose “Create Duplicate” from the context menu.
· Many programs offer a “Most recently used” list in the application’s “File” menu. Do not use the “Most recently used” list or any other technique to open StudioLine-managed pictures, as StudioLine would be unaware of any changes made. Instead, always open these pictures by launching the application directly from the Image Archive.
· Do not close StudioLine while you are editing a StudioLine-managed picture with a third-party application. If you closed StudioLine, then do not start it again until after you have completed your work and exited the third-party application. If your changes did not carry over into StudioLine after restarting, then click the right mouse button on the image, choose “Original” from the context menu and select the “Refresh” function.
· StudioLine will launch the third-party application with the unaltered master-copy of your picture. The effects of any filters or tools applied by StudioLine will not be available to the third party application. Therefore, you should limit the use of third-party applications to those effects that cannot be accomplished natively with StudioLine tools. Only StudioLine tools can be changed and reversed at any time.
· Once you have completed your work in the third-party application, choose the normal “Save” option in the application’s “File” menu, or the closest equivalent. “Save” will simply replace the image on the hard disk. Do not use “Save As” or “Save as Copy” or similar advanced functions, because StudioLine would not know where to find the updated picture.
When exporting images to standard graphics files, you have the choice of including the effects of all tools and filters performed within StudioLine (see the section “Exporting” elsewhere in this manual.) Sometimes, it may be desirable to do the same within the Image Archive in order to consolidate the effects of all StudioLine tools and filters permanently into a picture.
Click the right mouse button on an image, choose the sub-menu “Image with image tools applied” and select one of the available functions:
· Open Copy With
This function is equivalent to the function “Original”, “Open With”, discussed previously in the section “Editing with Third-Party Applications”. However, this time StudioLine will first create a copy of the selected image and its descriptors, as well as permanently incorporate the effects of all filters and tools, including any image preprocessing. Obviously, the copy will have an empty “Active Image Tools” list because all tools have been processed and directly rendered into the copy. The copy will then be opened in the third-party application.
· Create as Copy
StudioLine will create a copy of the selected image and its descriptors, as well as permanently incorporate the effects of all filters and tools, including any image preprocessing. The copy will have an empty “Active Image Tools” list because all tools have been processed and directly rendered into the copy.
To delete, click and hold the left mouse button on an image, then drag it to the Recycle Bin, located to the right of the toolbar. You may also press the “Delete” key on your keyboard.
To delete images that are presently used in a web gallery you have to first delete the respective web galleries.

Deleted images are kept in the Recycle Bin. To view the content of the Recycle Bin, double-click the Recycle Bin, or click the right mouse button and select “Open” from the context menu.

The panel “Images in Recycle Bin” allows you to recover images using the “Restore” button. To permanently remove all deleted images, click the button “Empty Recycle Bin” (see below) or click the right mouse button on the Recycle Bin and select “Empty Recycle Bin” from the context menu.
![]()
The Recycle Bin is limited to a size of 300 pictures. When that limit is reached, StudioLine will offer to permanently delete the oldest pictures first.
When deleting an external picture in StudioLine, only the information and settings of the picture in the Image Archive will be deleted. The externally stored graphics file will not be affected.
Select all images to be included in your slide show and click “Slide Show” on the QuickStep Bar.
![]()
The slide show displays the first image in full-screen mode with an appropriate hint panel. The floating control bar can be moved around freely and allows you to play and configure the slide show.

Click the VCR-style “Start” button to display all selected images, one at a time. Interval and other options can be controlled by clicking “Configure Slide Show”.

You can change the settings while the slide show is in progress. This way you can instantly verify the results, e.g., if the time interval is perfect.
For captions, click the button to the left of the “Show Descriptors” field. This opens the “Text” tool to choose a descriptor and define its on-screen location and presentation. For more information, see the chapter “Image Editing – Text Filter”.
“Transition Effects” give your slide show an extra professional appearance. Choose “random” if you can’t decide on any single transition effect.
The “Content” setting lets you choose to display either the selected images only, or to include all other images in that folder and even its subfolders.
Below “Interval” setting, you can choose the option to replay the slide show continuously.
With the final setting, you control the “Order” in which images appear.
If the control bar is not visible, you may previously have deselected the option "Control Buttons in Full Screen Mode" in the "Configure Slide Show" panel. Just click the right mouse button anywhere on the full-screen image. The context menu allows you to show the control bar, exit the full-screen mode or manage the slide show without displaying the control bar at all.
You can also launch the slide show from the context menu for thumbnail images. Select the images in the image archive, click the right mouse button and choose “Slide Show (Full Screen)”.
You can export any portion of the Image Archive as a native StudioLine file (File type “.SLI”). StudioLine files will retain all folder and image information, e.g., folder structures, names, image descriptors, tools, filters and their settings. This format is ideally suited to copy information between StudioLine users, either on the same LAN (local area network) or remotely. Third-party applications, however, will not be able to process a StudioLine-internal file.
To create an SLI file, choose “Export (Save As)” from the “File” menu and select “StudioLine File”.

On the “Choose Objects to Export” panel, double-click “Images” to access the Image Archive. To export an entire folder structure (including sub-folders), click the folder and click the “OK” button. To export individual images, navigate to the appropriate folder and then select the specific images. Click the “OK” button. You will now be able to specify a name for the exported file and a destination folder.
To import a StudioLine file (File type “.SLI”), choose “Import” from the “File” menu and select “StudioLine File”. On the “Import StudioLine File” panel, locate and select your StudioLine file. After clicking “OK”, you’ll see a content listing for the SLI file.

Click “Import” and StudioLine will recreate any necessary folder structures and load the images into their respective locations.
Choose the option “Import to Image Archive Folder” if you want StudioLine to disregard the exported folders and import all images to the currently active Image Archive folder.
To safeguard your most precious moments, you should back up your Image Archive to CD or DVD on a regular basis. The backup function is built into StudioLine.
If you store your backups at a secure off-site location away from your computer, you will be able to recover your images even in the case of a catastrophic loss.
The backup function can be performed against folders or the entire Image Archive. StudioLine will copy the original images together with any descriptors, tool and filter settings onto CD or DVD. (Web galleries are not included in the Image Archive backups. To safeguard your web galleries, use the StudioLine Explorer “Pages” and export to “StudioLine File” format.)
· To backup a folder, click the right mouse button on the folder in the album view of the Image Archive pane. Choose “Write CD/DVD” and “Backup” from the context menu. If applicable, StudioLine will prompt you whether to backup any subfolders.
· To backup the entire Image Archive, click the right mouse button on “Image Archive” in the album view of the Image Archive pane. Choose “Write CD/DVD” and “Backup” from the context menu. When prompted whether to backup any subfolders, click “Yes”.
The panel “Backup Folder to CD/DVD” opens.

You can overwrite the default title that StudioLine proposes for the disc. If applicable, you can choose which of your CD or DVD recorders to use, erase any re-writable media and set the recording speed.
The lower part of the panel displays information about the current disc, the amount of data to be written and the number of discs that will be required. Click “OK” to commence the backup.
Once complete, StudioLine will suggest how you should label your disc(s). Since StudioLine will refer to discs by its label, you should follow the suggestion and then store your backups in a safe location.
A backup disc can also be used to load images into other computers that are running StudioLine. The loaded images will include all descriptors, filters, tools and settings. However, given the critical importance of your backup disc, it is recommended that you never let it out of your possession.
StudioLine keeps track of any new images that are added to a folder after it is backed up. When you select that folder for another backup, StudioLine will offer to perform either a full backup of all images, or just an incremental backup of new images.
Restoring the Entire Image Archive
You can recover from a loss of your entire Image Archive (e.g., due to a hard drive failure) by following these steps:
· Reinstall StudioLine.
· Start StudioLine and open "File" menu and choose "Restore from Backup".
· Follow the on-screen instructions.
To restore individual images, open the backup disc in StudioLine Explorer “My Computer”. Navigate to the backup images and drag them onto the Image Archive.
StudioLine will recognize if you try to restore an image that already exists in the Image Archive and display the panel “Image Already Exists in Image Archive”.

The two topmost fields display the name of the backup image and its location in the Image Archive. For external images, you can view the location of the physical picture by resting the mouse pointer over the second field.
A drop-down list offers choices on how to proceed with the image.
For internal images, you can:
· Reload Original from Backup
StudioLine replaces the master copy in the Image Archive with the backed up image from the backup disc. The option “Include Filters and Descriptors” will be off by default; changes made after the backup will be retained. If you choose the option “Include Filters and Descriptors”, then the image, its descriptors, tools, filters and settings are restored from the backup – effectively reversing any changes made after the backup.
Keep in mind that the image will be restored to the original Image Archive location illustrated in the second field of the panel. If this is not the same folder where you dragged the disc icon to originally, then appropriate image shortcuts will be inserted into that folder.
· Create as New Image
StudioLine creates a new image in the target folder where you dragged the disc icon to. The option “Include Filters and Descriptors” is always active. You will now have two copies of the same image in your Image Archive.
· Reload Original and Create Shortcut
This function’s like the option “Replace the Original with the Backup”. However, StudioLine will create a shortcut in the folder where you dragged the disc icon to, which refers to the restored image at the original Image Archive location.
· Skip
StudioLine will not restore the image. This is equivalent to clicking the “Cancel” button.
The option “Apply to All Backed Up Images” is only relevant, when you are restoring more than one picture at a time and you want the same choice to be used for all other images that may already exist. If you deselect this option, you will be prompted for each image individually.
After a while, you may no longer need to work with images in certain folders. The offload function allows you to move the large master-copies of all images into a folder, CD or DVD. Once the offload is successful, the physical images will be deleted off the hard disk, conserving valuable disk space. Descriptors, filters, tool settings and a lower quality proxy image will remain in the Image Archive. This way, you can continue to manage and locate the image as before.
The proxy image is a lower resolution, lesser quality, space-saving version of the original image. You can adjust proxy image properties by choosing “Proxy Images” from the “Preferences” menu.
To offload a folder, click the right mouse button on a particular folder and choose the sub-menu “Write CD/DVD” from the context menu. Select the function “Offload”. If applicable, StudioLine will prompt you whether to offload any sub-folders. The panel “Offload Folder to CD/DVD” opens, which is discussed in the section “Offload to CD or DVD” of this manual.
After clicking “OK”, StudioLine will commence the offload operation, spanning as many discs as necessary. At the end of the offload, the discs are verified before prompting for a confirmation that the original images should be deleted from the Image Archive. Click on “Yes” to conserve hard disk space.
Label the offload disc(s) as proposed by StudioLine and store them in a safe location. Whenever you need to print, export or perform other actions that require the high-resolution original, StudioLine will ask for the appropriate disc by name. If an offload disc should be lost or damaged, then you would only have the low quality proxy image. Therefore, it is a good idea to perform a backup prior to the offload and to store the backup disc securely off-site.
Offloaded images can easily be identified by the disc symbol below the thumbnail.
![]()
Reload Images from Offload Discs
There are several methods on how to reload original images back into the Image Archive:
· To reload individual images, click the disc symbol below the thumbnail. StudioLine will inquire whether or not you want to store the image internally. If you click “Yes”, then StudioLine will prompt for the appropriate disc.
· To reload multiple images, select the images and click the right mouse button on one of them. Choose the “Original” submenu from the context menu and select “Store Internally”.
You can also insert an offload disc into your drive and then open it with the StudioLine Explorer “My Computer”. Drag images or entire folders from the disc to the Image Archive. If applicable, StudioLine will display the panel “Image Already Exists in Image Archive”. Choose “Save Image Internally” to reload the original pictures to the Image Archive. The rest of the panel is explained in the section “Backup to CD or DVD”, earlier in this manual.
You may need to use images that were optimized in StudioLine in other applications such as word processing or desktop publishing. StudioLine allows you to convert images to the most common graphics formats and store them on your hard disk or other media.
Open the StudioLine Explorer “My Computer” by clicking the appropriate button on the toolbar (see below).
![]()
Navigate to the target folder where the exported files should be stored, or create a new one. In the Image Archive, select all images to be exported, click and hold the left mouse button on one of them and drag the mouse pointer to the StudioLine Explorer.

Alternatively, you can start by selecting images to be exported and then click the right mouse button. From the context menu choose “Export (Save As)”.
In the panel “Export Object as…” (see below), define details such as the image size, file format and file name.

The option “Export Original” will export the unedited image in the original file format and size. You will have the choice to enter a different file name.
You may find that certain projects or certain clients demand specific file formats or sizes. To save frequently used settings for easy recall, choose the appropriate export options and then click on “Save Settings” near the bottom of the panel.
Later, simply recall the same options from the “Saved Settings” drop-down list.
Maximum Image Size
The “Maximum Image Size” drop-down offers a choice of standard sizes. The “Use Original Size” option will export images in the size of the Image Archive originals. You can also use the width and height controls to pick any custom size.
The standard or custom size you choose may not yield those exact dimensions for the exported images. For best results, StudioLine will never enlarge images beyond their original sizes or distort images if the selected width/height proportions don’t match the images’ proportions.
Instead StudioLine uses the “underfill” technique. The size you choose defines a bounding rectangle into which StudioLine will proportionally scale the images, as necessary.
The example below illustrates a custom size of 400 by 400 pixels into which a portrait or landscape image is scaled until their respective largest dimension is 400 pixels:

The checkbox "Automatically Adjust for Orientation" will consider the orientation of each image and use the larger specified "size" with the longer "side" of your image, and vice versa. If you were to define a size of 640x480 pixels, then a landscape image would be exported 640 pixels wide, while a portrait image would be 640 pixels high.
Next to the two size controls is a drop down list for the unit of measure, either pixels, inches or centimeter. Images intended for printing or desktop publishing can thus be exported in their proper size based on the preferred unit of measure. The field "DPI" will let you control the print resolution.
The choice of file format is controlled by the intended application for the exported image. To use a picture on the Internet, you would commonly limit the maximum picture size and choose the “JPEG” format. This format is supported by all web browsers and uses a very effective compression algorithm to reduce file size. You can choose the level of compression with the "Image Quality" control.
For print or archiving applications, you may want to choose a “loss-less” format, such as “TIFF” and use large image sizes for best desired resolution.
Below the "Format" control is a list of additional options. Active options are displayed with a checkmark. Click an option to activate or deactivate.
·
Apply Image Tools
If you deactivate this option, StudioLine will keep any pre-processing, but disregard
other image tools, filters and effects that you may have used with this image.
This allows you to export an unedited version of your image.
·
Colorize Transparent Areas
By default, transparent areas (the "alpha channel") will be exported
if the chosen file format supports transparency (e.g., TIFF or PNG). Activate
this option if you want the transparent areas to be colored white instead. For
graphics formats that don't support transparency (e.g., JPEG, BMP), transparent
areas will be always be exported as white color.
·
Omit Camera Specific Exif Data
StudioLine will export images with Exif, IPTC and Windows tags if supported by
the chosen graphics file format. However, certain Exif information would disclose
make and model of the camera, as well as camera settings in effect while an
image was taken. Select this option to omit any such camera specific
information from the exported file.
·
Crop to Aspect Ratio
As explained in the topic "Maximum Image Size", StudioLine uses an
"underfill" technique to fit the image inside a bounding rectangle
defined by the maximum image size specified. As a result, it is possible for
one side of the image to be less than the maximum allowed. Select this option
to crop the image to the exact aspect ratio defined by the maximum image size.
·
Overlay Text
This option launches the "Text" tool. You can enter text or use
descriptor values to be superimposed on the images, such as a copyright notice.
·
Increase Sharpness
Images that are scaled down in size often lose sharpness. Selecting this option
launches the "Sharpness" tool where you can counter the effect.
·
Add XML Information
This option will create an XML file for each image and place them in the same
export location. The XML file contains all image information, such as
descriptors, keywords and image tools used.
One application is the transfer of original images to another StudioLine
system. When the original images are imported into the other StudioLine system
and the same folder also contains XML files, then the XML information will also
be imported.
Click the "Export Preview" button to verify the result of your export settings before the files are outputted. A preview window will show the images based on all settings in the specified size and quality (for JPEG images). It's easy to find the ideal settings because the preview will automatically refresh after any change.

The toolbar allows you to browse between images and choose a preview size, or you can click the right mouse button in the preview.
Images for Web Use
For web images, the goal is to minimize the file size. Choose the JPEG file format
and set the preview size to 100%. Progressively lower the "Image Quality"
while you observe the resulting quality vs. the projected file size information
in the status line. By experimenting with the "Image Quality" settings,
you'll be able to find an optimal compromise of quality and size.
Images for Print Use
For images in JPEG format that will be used to create prints or cropped in other
applications, set the preview size to "Scale up to 100%". Watch the preview
window while you experiment with the "Image Quality" settings until
you find the lowest value that does not impact quality.
If you launched the Export by dragging images to the "StudioLine Explorer – My Computer", then the export path will already be set. Otherwise, or if you want to change the export location, click the "…" (browse) button next to the path and navigate to the folder of your choice.
Click the down-arrow in the path field to recall the most recently used 5 export locations from a drop-down list.
By default, StudioLine will use the "Image Name" descriptor value as the export file name, represented by an asterisk. You can replace the asterisk by typing any other name. StudioLine will automatically append a sequence number to your name if multiple images are exported.
The input field "File Name" also has a down-arrow. The drop-down list offers different options for automatic file name schemes:
·
* (Asterisk)
This option only appears if more than one image is selected for export. It represents
the "Image Name" descriptor value. Choosing this option will use the
image names as file names. If multiple images have the same name, a sequence
number will be appended for uniqueness.
·
{Number}
This option represents a serial number that corresponds with the order of images
in the Image Archive. You can sort images in the Image Archive and export them
with filenames that preserve that order. One application might be a picture CD
or DVD that will play images in the right sequence on TV. You can prefix or
append any text in the "File Name" input field to create more descriptive
file names such as "Vacation 001.jpg", or "001 Vacation.jpg".
·
{Descriptor}
With this option, the file name is based on the content of an image descriptor.
The "Insert Descriptor" panel will open where you can view and choose
suitable descriptors.
To preview the resulting file name, hover the mouse over the "Path" input field. A tool-tip will show the export file name for the first image.

Click "OK" to initiate the actual export process.
Exported images can be loaded back into StudioLine. However, they will be treated as entirely new images without any active tools and with the default descriptor values. However, StudioLine will insert any information found in a compatible XML file located in the same folder as the image.
Export in the “StudioLine File” (.SLI - Image Archive) file format if you want to retain all picture information.
To order prints from your local photo store, you can create CDs or DVDs using the most common graphics formats. On the album view of the Image Archive pane, click the right mouse button on a folder. From the context menu, choose “Write CD/DVD” and then “Export”. If applicable, you will be prompted whether to write sub-folders to the disc as well.
To write individual images to a CD or DVD, select the desired images and click on one with the right mouse button. From the context menu choose “Write to CD/DVD”.
Next, you’ll be able to decide on a file format and image sizes, as previously discussed in the section “Exporting”. For best resolution, you would keep the original image size. Finally, the panel “Write Images to CD/DVD” will open, which was discussed in the section “Backup to CD or DVD”.
Images that were exported can be loaded from a disc back into StudioLine. However, they will be treated as entirely new images without any active tools and with the default descriptor values. Use the “Backup” function or the StudioLine File format (.SLI – Image Archive) if you want to retain all picture information.
After successfully recording a disc, StudioLine will offer to print a content index. You can choose to print the complete or a partial index.
DVDs in particular can hold a large amount of images. It may be best to print only one or two index pages that can represent the entire content and serve as a reminder for you.
Web galleries are photo albums that you can share with anyone over the Internet or on CD/DVD. StudioLine generates web pages complete with navigation links, which can be viewed with all popular web browsers. It can also publish them directly to a server where your Internet provider has assigned you web space.
Each web gallery has an index page showing thumbnail images of all pictures in that gallery. By clicking a thumbnail image, a page will open showing a larger view of that same image, together with any narrative text. Navigation buttons allow you to browse other images in the gallery or to return to the index page.

In the Image Archive, select any number of images. Then click the “Web Gallery” button on the QuickStep Bar.
![]()
The “Web Gallery” panel will open and allow you to choose from a number of gallery designs.

The left pane lists the different styles. Click on any of the styles to preview the gallery’s index page in the right pane. A text block provides further information about the selected style.
The hint panel indicates the maximum number of images that can fit on the index page for the selected style. If necessary, StudioLine will create additional index pages and add the necessary navigation links between them. The hint panel also identifies which descriptors will be used to display informational text with each image (see chapter “Working with Images: Adding Descriptions”. Accept your design choice by clicking the “Continue” button.
The next panel will offer settings relevant to the particular style chosen, e.g., you’ll be able to enter page titles and other text.

Texts can still be revised later in the completed gallery.
With the option “Rollover Effects”, thumbnail images will change appearance when a visitor moves their mouse pointer across them. This will provide good visual feedback, but somewhat increases the size of the final HTML code and its components. When this option is turned off, the page will load slightly faster.
Enter an optional URL if you want the Gallery to include a link back to your regular web site. You can also enter an email address if you want your web gallery to include a “contact” link. Under “Detail Views” you can choose if clicking on a thumbnail will pop-up a small or large detail view of that image.
Click “Continue” to see a preview of your web-gallery page based on the settings you entered. Review the results and click the “Back” button if you would like to make any changes.

Click “Continue” and you will be prompted to name and save the web gallery.
After clicking the final “Continue”, there will be a slight delay while StudioLine generates the web gallery.
After generating the web gallery, StudioLine will switch to Page Editor mode to display the result. You can now work on your gallery pages. Refer to the QuickStep Bar for additional instructions.

To return to the Image Archive, click the appropriate button on the QuickStep Bar, or, click the drop-down list “Page Editor” between the menu and tool bars and select “Image Archive”.
The “Gallery Styles” panel also contains the category “User Styles” with the style “Startup”. Choose the “Startup” style and click “Continue” to create a personalized design, using many customization options not available with any other styles

After customizing the settings, click “Continue” to preview the result. Below the preview window is a button to save your design as new user style.

Click “Continue” again and StudioLine will open your personalized web gallery in the page editor.
Once you open an automatically generated web gallery, you’ll notice that some text blocks such as headlines only contain placeholder text.
Opening the Top-Most Text Block
To replace the placeholder text with your own copy, click “Edit” on the QuickStep Bar. This opens the text editor for the top-most text block.

You may now type over the placeholder text. Once complete, you can close the text editor by clicking anywhere on the background of the page editor workspace. If you go back and click “Edit” on the QuickStep Bar, the text editor will open for the same top-most text block.
Opening the Text Blocks in Sequence
With the text editor open, click “Edit” a second time. Now, the text editor focus shifts to the next text block in sequence. (After the bottom-most text block has been edited, the text editor will simply revolve back to the top-most text block.)
This is a convenient way to open, review and edit all available text blocks on a page.
Opening a Specific Text Block
To directly edit a specific text block, simply double-click with the left mouse-button. You should note that the content of some text blocks is predetermined by the web gallery style you chose and cannot be changed. These texts (e.g., the image captions) were carried over from the descriptors of the particular images and can only be revised in the Image Archive (see section “Adding Descriptors” in this manual).
To return to the Image Archive, click the appropriate button on the QuickStep Bar, or, click the drop-down list “Page Editor” between the menu and tool bars and select “Image Archive”.
To preview and test a web gallery with a web browser, click “Preview” on the QuickStep Bar.
![]()
StudioLine will generate the necessary HTML documents. This process may take a few minutes depending on the number and size of images.
A message box will advise you, once the web gallery has been rendered. Choose “…browse a preview of the rendered pages” to open the gallery in your computer’s default web browser.

Verify that the appearance of the pages meet your expectations and test the links from the index page, as well as the navigation between the individual image view pages.
If necessary, close the browser and make adjustments in the StudioLine page editor. For another preview, click “Preview” once again. StudioLine will reopen the browser once the updated web gallery has been rendered.
To return to the Image Archive, click the appropriate button on the QuickStep Bar, or, click the drop-down list “Page Editor” between the menu and tool bars and select “Image Archive”.
Advanced users may wish to access the native HTML documents and the image files that StudioLine renders for your gallery. To learn the path to those files and view them, render a new or updated web gallery and wait for the prompt “Open Browser”. Click the button “… open directory in Windows Explorer” or choose “Open Directory in Windows Explorer” from the “Publish” menu.
Transferring Web Galleries
To view your web gallery on the Internet, it needs to be published from your local workstation to a public web server. Sometimes, your Internet Service Provider (ISP) provides free web space as part of your monthly access charges. Otherwise, you will have to arrange web space with one of many web-hosting providers.
Registered StudioLine users receive free web space to test the web gallery features for a limited time.
StudioLine uses the universally supported “FTP” (File Transfer Protocol) for uploading your files to the web server. It is strongly recommend that you let StudioLine perform the uploading. StudioLine has built-in validation to confirm that all new or updated components of your web gallery are uploaded successfully.
Click “Transfer” on the QuickStep Bar.
![]()
The “Edit Profile” panel opens – either as an empty form or with the information you had previously entered. The information in the publishing profile enables StudioLine to contact the web server and transfer a gallery.
StudioLine Photo Edition uses the same publishing profile for all of your web galleries.

The information for the publishing profile has to be obtained from the provider of your web space.
Usually, you’ll only need to fill in the FTP Server, Login/User, Password and the “Root URL”. The remaining fields can remain at their default values.
If your provider does not specify a separate FTP server, then it may be the domain name of your web site (e.g., “www.YourDomain.com”) and the URL of the web site root would be “http://www.YourDomain.com”.
To upload your pages to specific folders on your FTP server, specify the “Remote Directory”. If the FTP folder translates to a corresponding folder on your web space, then append the folder name to the URL of the web site following a forward slash, e.g. a remote directory of “MyFolder” would be represented in the URL as “http://www.YourDomain.com/MyFolder”.
The name of the “Default Document” is server-specific, usually “default.htm”, “index.htm” or “index.html” and can be obtained from your web-hosting provider. StudioLine requires this name to generate proper names for your pages. If you are unable to obtain the name, StudioLine will attempt to determine that name for you while testing the publishing profile (see below).
The number of “Maximum Concurrent Connections” tells StudioLine, how many parallel FTP sessions it may open in an attempt to maximize bandwidth and reduce total upload times (possibly reducing your connection fees.) Some providers do not permit more than one connection. StudioLine will attempt to determine the maximum number while testing the publishing profile.
Sometimes, workstations are running behind firewalls or have personal firewall software installed to avoid intrusions by unauthorized parties. Depending on the firewall technology and configuration, it may be necessary to specify a “Proxy Server”, a “Port” or to select the option “Passive”. Your local system administrator will be able to assist you with the correct configuration.
After filling in the profile, click the “Test” button. StudioLine will connect to your web server and verify your settings and make any corrections as needed. If the test fails and StudioLine cannot determine the correct settings, then an error message will indicate the specific circumstances.

It is possible, that your web server requires less common settings for “Remote Directory”, “Root URL” and “Default Document”, which differ from the above examples. In that case, you will need to contact your web-hosting provider for the correct information.
To return to the Image Archive, click the appropriate button on the QuickStep Bar, or, click the drop-down list “Page Editor” between the menu and tool bars and select “Image Archive”.
After editing any images that were used in a web gallery (see “Image Editing”), or after changing the descriptors (see “Working with Images: Adding Descriptions”), you may want to update the web gallery to reflect your changes. Some web gallery styles also permit you to revise some of the text passages. In any case, StudioLine will have to re-render the web gallery pages and transfer a new version to the web server.
Click the drop-down list “Image Archive” between the menu and tool bars and select “Page Editor”. If you have been using the “Page Editor” since starting StudioLine, then the same web gallery will open. Otherwise, a panel will prompt you to open the most recently used web gallery, or choose from existing ones.
You may also click “StudioLine Explorer – Pages” on the toolbar.
![]()
This will open an Explorer panel showing all available web galleries. Click the right mouse button on a web gallery and select “Open Page”.
Switching to a Different Web Gallery
Click “Open” on the toolbar to switch to a different web gallery.

You may also click “StudioLine Explorer – Pages” on the toolbar. This will open an Explorer panel showing all available web galleries. Click the right mouse button on a web gallery and select “Open Page”.
To return to the Image Archive, click the appropriate button on the QuickStep Bar, or, click the drop-down list “Page Editor” between the menu and tool bars and select “Image Archive”.
To rename a web gallery, click “StudioLine Explorer – Pages” on the toolbar. In the Explorer panel, click the right mouse button on the respective web gallery and choose “Rename” from the context menu. In the “Rename” panel, enter a new name.
To delete a web gallery, click “StudioLine Explorer – Pages” on the toolbar. In the Explorer panel, click the right mouse button on the respective web gallery and choose “Delete” from the context menu. You can also drag the gallery to the recycle bin.
Web galleries may be exported for backup purposes or to copy to other StudioLine workstations. This process is similar to the one documented in the section “Export as StudioLine File”. From the “File” menu, choose “Export” and then “StudioLine File”.
In the Panel “Choose Objects to Export”, click on “Pages”. To export all web galleries, click “OK” without selecting a specific gallery. To export individual galleries, select one or multiple web galleries in the right pane. Remember that you can select multiple galleries by holding down the “Ctrl” key while clicking on individual galleries.
Exporting Web Galleries to CD or DVD
You can write your web galleries to CD or DVD, where they can be viewed on other PCs using standard web browsers.
After you created your web gallery, have StudioLine render the necessary files. Then choose “Publish Web Gallery onto CD/DVD” from the “Publish” menu.
StudioLine will open the panel “Write Folder to CD/DVD”, which was covered in the section “Backup to CD or DVD”. Click “OK” to create the disc. Web galleries on CD/DVD will have “Autostart” information, which enables Windows PCs to automatically display the gallery as soon as the disc is inserted into a drive.
If “Autostart” has been disabled for a particular computer, simply double-click the disc in Windows Explorer. Locate the folder with the name of your web gallery and then the document with your index page (typically, “index.html” or “default.htm”).
If you are uncertain about the naming convention for your index page, click “Transfer” on the QuickStep Bar and look for “Default Document” in the Publishing Profile.
StudioLine can create a new email message, attach your images and then pass it on to one of the popular email programs. Select any number of images, then click “Email” on the QuickStep Bar. Or, click the right mouse-button on the selected images to open the context menu, then select “Send Images via Email”.
![]()
The “Send Images via Email” panel opens (with an appropriate hint panel), where you can determine the size and file format of your image attachments.

As discussed in the earlier chapter “Exporting”, you can save frequently used email settings for easy recall.
Maximum Image Size
The “Maximum Image Size” drop-down offers a choice of standard sizes. The “Use Original Size” option will email images in the size of the Image Archive originals. You can also use the width and height controls to pick any custom size.
The standard or custom size you choose may not yield those exact dimensions for the emailed images. For best results, StudioLine will never enlarge images beyond their original sizes or distort images if the selected width/height proportions don’t match the images’ proportions.
Instead StudioLine uses the “underfill” technique. The size you choose defines a bounding rectangle into which StudioLine will proportionally scale the images, as necessary.
The checkbox "Automatically Adjust for Orientation" will consider the orientation of each image and use the larger specified "size" with the longer "side" of your image, and vice versa. If you were to define a size of 640x480 pixels, then a landscape image would be 640 pixels wide, while a portrait image would be 640 pixels high.
Next to the two size controls is a drop-down list for the unit of measure, either pixels, inches or centimeter. Images intended for printing or desktop publishing can thus be emailed in their proper size based on the preferred unit of measure. The field "DPI" will let you control the print resolution.
StudioLine will propose to email images in the widely recognized and very compact JPEG format. The transmission times during sending and receiving will benefit from the resulting small message size. The estimated size of the email message appears near the bottom of the panel.
For the JPEG file format, you can further customize the image quality by entering a different number. High qualities result in larger emails. Low qualities may be suitable for a series of images that are sent solely for discussion purposes.
Other file formats will always use the quality of the original image. These file formats should only be used for specific applications – such as sending images for print purposes. If you need to send an image with transparent areas or irregular shapes, choose the TIFF or PNG file formats and deselect the option “Colorize Transparent Areas”, as described below.
Below the "Format" control is a list of additional options. Active options are displayed with a checkmark. Click an option to activate or deactivate.
·
Apply Image Tools
If you deactivate this option, StudioLine will keep any pre-processing, but disregard
other image tools, filters and effects that you may have used with this image.
This allows you to email an unedited version of your image.
·
Colorize Transparent Areas
By default, transparent areas (the "alpha channel") will be preserved
if the chosen file format supports transparency (e.g., TIFF or PNG). Activate
this option if you want the transparent areas to be colored white instead. For
graphics formats that don't support transparency (e.g., JPEG, BMP), transparent
areas will be always be colored white.
·
Omit Camera Specific Exif Data
StudioLine will include Exif, IPTC and Windows tags with images if supported by
the chosen graphics file format. Select this option to omit any such camera
specific information from the emailed file.
·
Crop to Aspect Ratio
As explained in the topic "Maximum Image Size", StudioLine uses an
"underfill" technique to fit the image inside a bounding rectangle
defined by the maximum image size specified. As a result, it is possible for
one side of the image to be less than the maximum allowed. Select this option
to crop the emailed image to the exact aspect ratio defined by the maximum
image size.
·
Overlay Text
This option launches the "Text" tool. You can enter text or use
descriptor values to be superimposed on the emailed images, such as a copyright
notice.
·
Increase Sharpness
Images that are scaled down in size often lose sharpness. Selecting this option
launches the "Sharpness" tool where you can counter the effect.
·
Include Descriptors
This option will copy the system and user descriptors to the message body.
·
Add XML Information
This option will include an XML file for each image. The XML file contains all
image information, such as descriptors, keywords and image tools used. If the
email recipient is using StudioLine, they can save all images and associated
XML files to a folder on their hard disk and then import from there to their
StudioLine Image Archive. As long as the XML files are found in the same folder
as the image, then the XML information will also be imported.
Click the "Preview" button to verify the result of your email settings before the files are sent. A preview window will show the images based on all settings in the specified size and quality (for JPEG images). It's easy to find the ideal settings because the preview will automatically refresh after any change.
For most emails, the goal is to minimize the file size. Choose the JPEG file format and progressively lower the "Image Quality" while you observe the resulting quality vs. the projected file size information in the status line. By experimenting with the "Image Quality" settings, you'll be able to find an optimal compromise of quality and size.
The toolbar allows you to browse between images and choose a preview size, or you can click the right mouse button in the preview.
Sending
Click “OK” on the “Send Images via Email” panel. If you have compatible email software installed, the program will start and open a new message with the selected images as attachments. Simply enter the recipients’ email addresses, type a message and send when ready.
To order prints you can export your image to CD/DVD and bring it to your photo retailer or send it to a lab.
For maximum convenience, StudioLine can also send images to an online order service. Select any images and click the “Online Order” button on the tool bar.

A drop-down list shows the available StudioLine partner services. To proceed, follow the on-screen prompts provided by the particular service.
StudioLine offers several different printing functions. The quickest way to put your images on paper is the “Standard Print”.
Select images to print, then click on the button “Print” of the QuickStep Bar (see below) and choose “Standard Print”.
![]()
You can also click the “Print | Standard Print” button on the toolbar or choose “Print | Standard Print” from the “File” menu.

First choose from the available printers, if more than one is connected to your computer. You can click the “Settings” button to access the printer specific options.
Click “Continue” to open the “Standard Print” panel (see below).

Choose a page layout and image sizes. Note the print preview in the right pane.
Towards the bottom of the panel, you can choose the number of prints per picture.
The option “Crop Images Automatically” will proportionally scale images to the chosen width and height. If necessary, either the long or the high sides of the pictures are cropped to exactly fit the chosen format.
If the option is de-selected, then StudioLine underfills the images – the images will be printed without cropping, but one side may be smaller than the chosen format.
Print projects include CD jewel case covers and inserts, greetings cards and calendars. Depending on the intended project, choose either one or multiple images, then click “Print” on the QuickStep bar, “Print | Print Project” on the toolbar or choose “Print | Print Project” from the “File” menu.
![]()
On the “Print Project” panel, choose a style from the available categories.

The “CD” category offers templates for a CD index, front, and back covers. For the covers select a single image; for the index you may choose up to 30 images.
After choosing a style, enter a name for your project. Click “Continue” and you will be prompted for additional text required by your project. Next, StudioLine will compose the print output and display the page editor.
The CD index cannot be modified in the page editor, but you can change pictures and text for the CD covers.
This category offers greeting card templates in portrait and landscape format. Choose only one image – if more than one image is selected, then the first one will be used.
After choosing a style, enter a name for your project. Click “Continue” and you will be prompted for additional text required by your project. Next, StudioLine will compose the print output and display the page editor, where you can still change the picture and edit the text.
This category offers templates for calendar pages and covers. For the cover, choose a single image. For calendar pages, choose up to 12 images.
After choosing a style, choose the calendar year and starting month. By default, StudioLine will start with month number 1 – January. Next, enter a name for your project. Click “Continue” and you will be prompted for additional text required by your project. As you continue, StudioLine will compose the print output and display the page editor.
In the page editor, you can still change the picture for calendar pages and the cover. In addition you may edit the text for calendar covers.
If you are creating multiple calendar pages, then the first page will appear in the page editor. The “StudioLine Explorer – Pages” will also open. Click the right mouse button over one calendar page at a time, then choose “Open” from the context menu to review, edit and print each calendar page.
Depending on the style chosen for your project, you may be able to update certain aspects in the “Page Editor”.
· To edit text, click “Edit” in the QuickStep Bar. Each click will offer a different text element for editing.
· To replace a picture, open the “StudioLine Explorer – Image Archive” and browse for a suitable picture. Drag the replacement picture from the StudioLine Explorer panel to the old picture in the Page Editor.
Once you are happy with your pages, click “Print” on the QuickStep bar to open the “Standard Print” panel.

First choose from the available printers, if more than one is connected to your computer. You can click the “Settings” button to access the printer specific options. Click “Continue” to proceed with printing.
To return to the Image Archive, click “Image Archive” on the QuickStep bar, or choose “Image Archive” from the “mode selector” drop-down list below the toolbar (Initially, it will display the current mode “Page Editor”).
Accessing or Deleting Print Projects
Your print projects are saved under the name you had entered and are available for review and printing in the future. To access previously saved projects, open the “StudioLine Explorer – Pages”. If the explorer shows only web galleries, then click the button “One Level Up” until “Print Projects” appears in the folder pane.
![]()
Click the “Print Projects” folder to view your saved projects. Click the right mouse button on a page and choose “Open” from the context menu to open the Page Editor.
To delete a page, drag it from the StudioLine Explorer to the Recycle Bin, or click the right mouse button on the page and choose “Delete” from the context menu.
Emailing and Exporting Print Projects
Print projects can be sent by email directly from within StudioLine and can be exported. Simply click the appropriate button on the QuickStep Bar.
· For email use, StudioLine renders your print project into a graphics file. You control the file format and size. For more information about email settings, refer to the earlier chapter "Sending Images via Email".
· For export, StudioLine renders your print project as a high resolution graphics file. You control the file format and pick a target location on our disks.
Ready-made print projects cannot possibly cover the entire range of creative ideas. Therefore, StudioLine allows you to completely design your very own print projects. With "User Styles", you freely place images and text on a blank page.
Select any image you would like to use for your user style and open the "Print Projects" panel – either by clicking "Print Projects" on the QuickStep Bar or by clicking the print button on the toolbar and then choosing "Print Project".
In the panel "Print Project", choose "User Styles" and "New Page".

After clicking "Continue" you get to name your page. Enter a name and click "OK" to proceed.

Using the "Page Setup" panel you define the page format for your project. You can later review and change those settings by choosing "Page Setup" from the "File" menu. Click "OK" to access a blank page in the StudioLine page editor.

The white canvas represents the paper format you've chosen.
To place images on your page, click the "StudioLine Explorer – Image Archive" button on the toolbar.
![]()
In the StudioLine Explorer, navigate to an Image Archive folder with images you'd like to use. Drag the images from the StudioLine Explorer panel to the page editor work space.
You can now select one or multiple images and move them freely around the page. Press the "Ctrl" key to restrict the movement to either horizontally or vertically. For minute control, use the arrow keys on your keyboard. Each time you press an arrow key, the image will move 10 pixels in the chosen direction.
Overlapping images are stacked in specific order. Initially, the order is controlled by the order in which they were placed on the page. For a collage, you can change the stacking order by clicking the right mouse button on any image that needs to either be stacked above or below another image. From the context menu, choose "Stacking Order" and then one of the stacking actions:
· Bring to Front
Moves an object to the very top of the stack.
· Send to Back
Moves an object to the very bottom of the stack.
· Step Forward
Places the image on top of the next image in line.
· Step Backward
Places the image behind the previous image in line.

If a single image is selected, then the selector frame will have 8 sizing handles.

Click and drag any of the four corners to resize the image proportionally. The aspect ratio is maintained.
Click and drag any sizing handles in the middle of each side to stretch or shrink the height or width of the image; this will leave the image distorted.

Stretching and shrinking is useful to accurately fit layout elements such as shapes or lines.
Graphical elements, such as colored shapes or lines, help perfect your layout. You can import shapes into StudioLine like any other images. For many applications that won't even be necessary.
Click the right mouse button on the page background. From the context menu choose "Insert", then "New Design Element".

The newly created design element can be moved like any image. The sizing handles can be used to resize, stretch and shrink the design element to suit your needs. For pixel-perfect sizing, click the right mouse button on the design element and choose "Size" from the context menu.
Other display options are controlled by choosing "Design Element Properties" from the design element's context menu.

The panel "Design Element" opens up some interesting possibilities to add a decorative touch to your page:
· Background and Color
Deselect the "Fill Background" option to create empty frames. To create a color pane, select the "Fill Background" option and pick a suitable color.
· Lines and Corners
Use the long "line" controls to choose for each of the four sides, whether your design element will have a border and its color and thickness. Use the "corner" controls to create square or rounded corners. For rounded corners, you can define the radius. (You can define rounded corners even if your design element doesn't have any borders.)
· Top and Bottom Color Bands
You can fill the top and/or bottom portion of the design elements with unique colors.
Additional effects for the design object can be accomplished with the help of the image toolbox.
You can use image tools directly on the images on your page or on text objects to create effects such as drop shadows. This chapter will focus on the unique aspects of using image tools in print projects vs. using them in the Image Archive.
Similar to the Image Archive, you can open the image toolbox by choosing "Image Toolbox" from the "Image" menu, or by clicking the "Image Tools" button on the toolbar and then choosing "Image Toolbox" form the drop-down list.

The image tools are organized in three categories. The Image Archive "Preprocessing" category has been replaced with the category "Orientation and Size". It offers tools to rotate, scale and crop your images.
The category "Effects" has the added tool "Buttonize and Shadow", which would not be useful in the Image Archive.
More details for each image tool are available by accessing the tool's panel and then pressing "F1" for help.
When placing images from the Image Archive onto the page, StudioLine will incorporate any image tools that you may have applied in the Image Archive mode to create a new "working copy" of the image. You cannot access or change these tools settings from within the page editor. You can, however, switch back to Image Archive mode to make your changes, which will then update the working copy that's used on your page. Conversely, any image tools that you apply in page editor mode can not be accessed from the Image Archive.
Must of your print projects will require some text, e.g., for banners, labels or annotations.
Create a new text object by choosing "New Text Object" from the "Text Processing" menu. You can also click the right mouse button on the page background and then choose "Insert" and "New Text Object" from the context menu.
The mouse pointer changes to an "I-Beam" insertion mark. Click the mouse at whatever position you would like to start your text. A new text object is created.
![]()
You can start typing text or paste it from the Windows clipboard. To copy from another text editor to the Windows clipboard, highlight any text in the other application, then use its "Edit" menu to copy the selected text (or use the Ctrl+C key combination). To paste the text into StudioLine, use "Edit" menu or the Ctrl+V key combination.
Click a text object once, and you can move it with the mouse or the arrow keys on your keyboard. You can also use the sizing handles on either side to change the width. A second click on the text object will let you edit the content with the StudioLine text editor.
The StudioLine text editor offers a wide variety of text formatting options, including typeface, font size and color. The usage of the StudioLine text editor is equivalent to other word processing tools. This chapter will concentrate on functions may be less familiar or that are unique to StudioLine.
Working with Text – Using Descriptors
Any titles, captions and other descriptors that you added to your images can be used to dynamically generate content in text objects.
The first step is to place at least one image with descriptors on your page. Next, open or create a text object. In the text editor, click the button "Insert Descriptor".
![]()
The panel "Insert Descriptor" offers the available descriptors organized in the familiar groupings.

Choose a descriptor and StudioLine will insert a place holder (e.g., "%%Name%%") into the text object. Once you deselect the text object by clicking outside of it, you'll be able to view the dynamically generated text.
If there is more than one image on a page, you need to associate a text object with a particular image. Click the right mouse button on a deselected text object and choose "Descriptor Association" from the context menu. Drag the circular association icon from the "Descriptor Association" panel to the image that holds the descriptors you'd like to use in this text object.

A single text object can refer to any number of descriptors, but only from one specific image.
Working with Text – Spell Check
StudioLine comes complete with a multi-lingual spell check engine.
Every text passage must have the proper language setting. To verify the language, select a text passage in the text editor and note which flag is displayed. To change the language, select a text passage, click on the flag and pick the appropriate flag.
The spell check can be performed against all text objects on a page or be limited to the currently selected one. To start the spell check, choose "Spell Checker" from the "Text Processing" menu or click the "Spell Checker" button in the text editor toolbar.

Click "Start" to commence the spell check. For suspect words the spell checker will stop and display a list of suggested spellings in the panel.
· To accept a suggestion, select it and then click either "Change" or "Change Always" to affect either just the current occurrence of that word or to affect all occurrences.
· If the list has no acceptable suggestions for a misspelled word, then you can manually correct the spelling in the text editor.
· If the suspect word is spelled correctly as is (e.g., a name or trademark), then you can click "Add" to insert the word into the spell checker's dictionary.
· If a suspect word originates from a different language, click the "Dictionary" button and choose the appropriate language.
Guides enable you to perfectly align various objects along a line. Guides are not design elements, they will not appear in the printed output.
To create a new guide, click the mouse on the horizontal or vertical ruler and drag it to the workspace.

You can move your guides at any time by clicking and dragging them. To remove a guide, simply drag it back to its ruler. Arrange multiple guides on the place to create a general layout pattern for your page.
To space guides evenly or to keep pixel-perfect distances, move the mouse pointer over a guide. The current position of the guide and its distance to either neighbor will display.

By default, guides act "magnetic". Objects that you bring near a guide will automatically snap to the guide's exact position. To change the behavior of guidelines and related settings, click the right mouse button on the page background and choose "Guides" from the context menu.

In the panel "Guides" you can control the "magnetic" property of guides as well as their position and appearance. With the "Save Settings" button, you can add a pattern of guidelines to the list of stored settings for possible later reuse on another page.
If too many guides are starting to become a distraction, you can use the "Clear Guides" button to remove all guides instantly.
Once your page design is complete, click "Print" on the QuickStep bar to open the panel "Standard Print".

Choose the target printer (if more than one is connected to your computer). If you need to change the printer's defaults, such as paper size and orientation, click the "Settings" button. Click "Continue" to commence printing.
You can now switch back to the Image Archive by pressing that button in the QuickStep bar. You can also click on the mode selector above the top left corner of your page, which currently states "Page Editor" and choose "Image Archive" from the list of StudioLine modes.
Rather than printing, you can also email your page or export it. Click the appropriate button on the QuickStep bar.
· For email use, StudioLine renders your print project into a graphics file. You control the file format and size. For more information about email settings, refer to the earlier chapter "Sending Images via Email".
· For export, StudioLine renders your print project as a high resolution graphics file. You control the file format and pick a target location on our disks
The custom print gives you complete control over print options and offers a number of additional functions.
Select images to print, then click on the button “Print” of the QuickStep Bar (see below) and choose “Custom Print”.
![]()
You can also click the “Print | Custom Print” button on the toolbar or choose “Print | Custom Print” from the “File” menu.
The selected images will appear in the “Print Spooler" panel. (If you want to open the Print Spooler without automatically including images, click the “Print Spooler” button on the toolbar or choose “Print Spooler” from the “File” menu.)

The “Switch View” button on the left toggles the image list between different display styles. The buttons on the right control the print process in detail, such as the size, number and layout of images.
This button opens a panel to choose the number of times an individual image is printed.
![]()
This can be helpful, if various guests of an event ask for copies of different photos. At this point you should already have all desired pictures in the print spooler. Now, select one or multiple images in the print queue, or use the keyboard shortcut “Ctrl+a” to select all images. Click the “Number of Prints per Image” button, then enter the number of prints needed respectively. The advantage is that once you have defined the desired prints for each image, you can start the entire print process and attend to other matters.
Click this button to change the cutout area, orientation, size or resolution of an image.

The drop-down list below the viewing area will list all popular image sizes. The cropping handles in the image preview area will adjust automatically if the aspect ratio of the chosen picture format is different than that of the picture itself. Any excess area is filled with a background color, which can be chosen by clicking the “Background Color” button. The option "Inverse Orientation" will swap height and width. This allows to you crop a portrait image to landscape format, or vice versa.
To crop the image to a smaller cut-out area, drag the cropping handles in the image preview area. Two perpendicular cropping handles will always move proportionally to maintain the aspect ratio of the chosen picture format. To move the cutout area, click in the center between the cropping handles and drag the cutout.
You may also enter custom sizes in the two input fields below the size drop-down list. The cropping handles will adjust to your input. Next to the input fields for size is a drop-down list to change the unit of measure between centimeters and inches.
Changing the image size, unit of measure or cut-out area affects the print resolution, which is displayed next to the unit of measurement. Print resolution is calculated as pixels per inch (ppi) simply by dividing the pixel count of the image by the chosen physical image size. Please note that small or severely cropped images could result in resolutions less than 100 pixels per inch, even if StudioLine is optimizing the print output. In that case it would be best to choose a smaller image size.
If quality is your primary concern, then you can preset a fix print resolution instead of choosing a picture format. In the drop-down list for image sizes, choose the option "Fix Resolution (DPI)". A different set of options will appear below the viewing area:

The drop-down list for "DPI" offers to use the image's native resolution. You can also choose from a list of other common print resolutions or enter a custom DPI value.
Two input fields let you define the aspect ratio. The cropping handles will adjust to your input. If you drag a single cropping handle, the aspect ratio will change accordingly. Choose the option "Fix Ratio" to lock-in the current aspect ratio. Now, two perpendicular cropping handles will always move in unison.
The option "Inverse Orientation" will swap height and width. This allows you to crop a portrait image to landscape format, or vice versa.
Changing the resolution or aspect ratio affects the resulting print size, which is displayed next to the aspect ratio. "Resulting Size" is calculated in centimeter or inches, simply by dividing the pixel count of the cropped image by the chosen DPI value.
After choosing appropriate options for each image, proceed by clicking the “Print” button. This will include all images in the Print Spooler. To choose specific images for printing, select those images in the Print Spooler before clicking the “Print” button.

The “Print” panel opens.
If you have access to more than one printer, choose one from the drop-down list. The “Settings” button will allow you to change options that are hardware-specific.
Two option buttons allow you to limit the print process either to any images that were selected from the Print Spooler – or to disregard the selection and print all images.
The “Copies per Page” option determines how often each page will be printed.
Use the “Crop Marks” option if you intend to cut the printed images with the help of a ruler and cropping blade.
To print captions below each picture, use the “Print descriptors below images” option. The panel “Choose” operates like the “Descriptors” panel covered in the “Adding Descriptors” section, earlier in this manual.
Click the “Print Preview” button to view the effect of any options you have chosen.
“Images per Page” can be used to limit the number of images that are printed on the same page. This may be helpful when pages are intended for a photo album.
The “Maximum Number” option will minimize the use of expensive photo paper.
“Optimize Utilization” will change the order and orientation of images across all pages to further minimize the number of printed pages. This option should be combined with the “Maximum Number” option if you plan to cut the individual images from the printed page.
“Center on Page” will center the page content on the paper. This will produce the most aesthetically pleasing look and probably leave the most room for writing any notes next to images.
“Optimize Quality” will determine the exact resolution of the printer. If necessary, images are printed slightly larger to best match the printer resolution. The results are higher-quality prints – however, the printing process may be slowed down significantly. It may require some experimentation to determine whether or not the slight improvements in quality warrant the increased time in printing.
Our online discussion group is available 24 hours a day to exchange experiences, discuss problems or post your questions. We will make every effort to reply by the next business day:
http://www.StudioLine.biz/?URL=ConferenceEN
Updates, news and related products can be found on the product web site:
http://www.StudioLine.biz/
Customers who purchased one of our products may also contact us directly. Please have your product activation code ready.
Email: Support_US@StudioLine.biz
Fax: +1 201 934-9206
Phone: +1 201 934-3414 (Mon-Fri, 9:00 AM – 6:00 PM Eastern Time)
H&M Systems Software, Inc.
600 East Crescent Avenue
Suite 203
Upper Saddle River, NJ 07458-1846
U.S.A.
A
Active Tools......................... 45, 103
Address...................................... 200
Apply Tool.............................. 87, 89
Automatic-Sequencing.............. 58
B
Backup....................................... 123
Batch Processing 102, See Button "Copy"
Button "Copy"............................ 104
Button "Lock"............................. 106
C
Camera....... See Digital Cameras
Captions....................................... 59
CD Recording 123, 128, 139, 140, 161
Contact....................................... 200
Copy.................. See Button "Copy"
Create Folder.............................. 41
Crop Marks................................ 198
Custom Print........... 174, 178, 192
D
Date............................................... 56
Delete (Images)....................... 114
Descriptors.................................. 51
Digicam...... See Digital Cameras
Digital Cameras................... 34, 55
Discard Tool.............................. 104
Duplicate............................. 49, 111
DVD Recording 123, 128, 139, 140, 161
E
Edit (Web Galleries)................ 150
Effects.............................. 82, 85, 86
Email.......................................... 165
Exif................................................. 55
Export (Edited Image).............. 112
Export (Images)........................ 130
Export (StudioLine File)........... 121
Export (Web Galleries)............ 160
External Image..................... 45, 46
F
File Format................. 97, 132, 166
File Transfer See Publish (Web Galleries)
Filter................................. 82, 85, 86
Find..................... 62, 69, 71, 75, 77
Firewall....................................... 156
Folder............................................ 41
Folder Pane................................. 18
Free-Hand Editing........... 106, 110
FTP.............................................. 155
Full Backup................................ 123
H
Help............................................... 17
I
Image Editing.............. 82, 86, 150
Image Size.......... 95, 97, 132, 166
Image Titles................................. 59
Image Viewer............................ 116
Import – StudioLine File.......... 122
Installation................................... 14
Internal Image............................. 46
IPTC........................................ 55, 56
L
Language Support..................... 14
Lock............................................ 106
M
Magnifying Glass.......... See Zoom
Main Menu.................................... 18
Menu Bar...................................... 18
N
NAA......................................... 55, 56
O
Offload Images......................... 128
Offloaded Image......................... 45
Original Image.......... 46, 106, 110
P
Page Editor....................... 147, 150
Paint................................... 106, 110
Preprocessing Tool............. 45, 89
Preview (Web Galleries)......... 152
Print Preview............................. 198
Print Quality............................... 198
Print Size.................................... 194
Printer Selection....................... 197
Printing............ 172, 174, 178, 192
Product Activation Key................ 14
Profile....... See Publication Profile
Provider...................................... 154
Proxy Image................................. 31
Publication Profile.................... 155
Publish (Web Galleries)......... 154
R
RAW.............................................. 47
Red-Eye Correction............. 45, 89
Reload........................................ 129
Remove (Tool Settings).......... 112
Restore...................................... 125
Rollover Effects......................... 145
Rotate........................................... 89
S
Scanner........................................ 41
Search................ 62, 69, 71, 75, 77
Search Results........................... 79
Server......................................... 155
Shortcut........................................ 49
Size................................................ 95
SLI Format................................. 121
Slide Show................................ 116
Sort Order 60, 62, 64, 65, 67, 68, 73, 74
Sorting 60, 62, 64, 65, 67, 68, 73, 74
Standard Print........................... 172
Support....................................... 200
System Descriptors............. 52, 54
System Requirements.............. 11
T
Text (Web Galleries)....... 144, 150
Text Filter............................. 98, 100
Thumbnail.................................... 44
Thumbnail Images (Size)......... 26
Time.............................................. 56
Time-Zone................................... 56
Tool Stack........... See Active Tools
Toolbar......................................... 18
Tools................................ 82, 85, 86
Trash Can......................... 104, 114
Turn............................................... 89
TWAIN.................................... 34, 41
U
User Descriptors........................ 54
W
Web Galleries........................... 143
WIA.......................................... 34, 41
Z
Zoom............................................. 44