 Help
Help
There are three ways to insert an image into a
page:
- as an Element;
- as an Imported File;
- Copy and Paste or drag-and-drop from
another open page on the same MiniWeb.
As an Element
This is the most common way to insert an image that already exists
as a local file or somewhere on the Web.

 Insert an image as an
Element:
Insert an image as an
Element:
- Position the cursor where you want the image to be.
- Choose Element->Image... to bring up the dialogue box below.
Element->Image dialogue
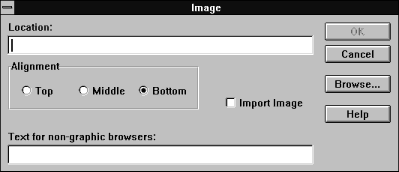
- Enter the Location of the image. Either:
- Enter an URL or the local file name in the Location field;
or
- Click the Browse button
to search for the file, then click the Insert button.
- Choose, by clicking, a Text Alignment option-Top,
Middle, or Bottom-to choose how the image is aligned with the
adjoining text.
- The first line of the adjoining text lies next to the image and, as it
wraps, the line continues on the line below the image.
- Click, optionally, on Import Image.
- If imported, the image file is saved to the page's MiniWeb and has
a relative link.
- Otherwise, the image remains outside the page's directory. Its location
is a full URL.
- Fill in the Text for non-graphic browsers box with the text
you want to appear instead of the image, so that those browsers that do not
display graphics at least give you a clue about what the image contains.
- Click OK, and the image appears where the cursor was positioned.
As an Imported File
Insert an image as an Imported
File:
- Position the cursor where you want the image to be.
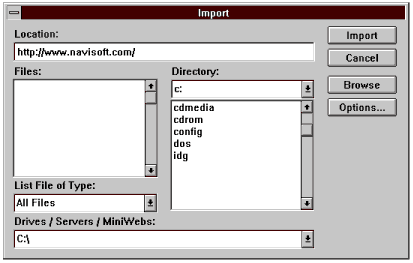
- Choose File->Import to get the dialogue box below.
- Enter the Location of the image. Either:
- Enter an URL or the local file name in the Location field;
or
- Click the Browse button to search the directories and locate and
select the file.
- Click Import, and the image appears where the cursor was
positioned. You do not need to consider the Options button.
File->Import dialogue
Copying Images from Another Page
If you are working with more than one page in the same MiniWeb, you
can copy images from one Page Window to another. The image files are already
saved in a common
directory.
Copy an image from one page to
another, either:
- Copy and Paste.
- Drag-and-drop.