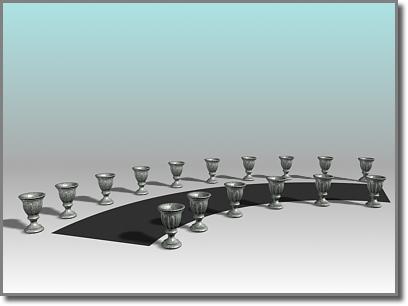
The Spacing Tool distributes the vases along the sides of the curved street. The vases are all at the same distance from each other; fewer of them appear on the shorter side.
The Spacing Tool distributes objects based on the current selection along a path defined by a spline or pair of points. The distributed objects can be copies, instances, or references of the current selected object. You define a path by picking a spline or two points and by setting a number of parameters. You can also specify how the spacing between objects is determined and whether the insertion points of the objects align to the tangent of the spline.
For details on the Spacing Tool parameters, see Spacing Tool.
To distribute objects along a path:
Select one or more objects to distribute.
 Click the Spacing Tool button on the main toolbar, or choose Tools menu > Spacing Tool.
In the Spacing Tool dialog, click Spline or Pick Points to specify a path.
If you click Spline, select a spline from your scene to use as the path.
If you click Pick Points, click a start and an end point to define a spline as the path. When you’re finished with the Spacing Tool, the software deletes this spline.
Choose a spacing option from the Parameters list.
The parameters available for Count, Spacing, Start Offset, and End Offset are dependent on the spacing option you choose.
Specify the number of objects to distribute by entering a value under Count, or by using the spinner.
Depending on the spacing option you choose, adjust the spacing and offsets.
Under Context, choose one of the following:
Edge specifies that spacing be determined from the facing edges of each object’s bounding box.
Centers specifies that spacing be determined from the center of each object’s bounding box.
Click Follow if you want to align the insertion points of the distributed objects to the tangent of the spline.
Under Type of Object, select the type of object to output (copy, instance, or reference) and click Apply.