Select object or objects. > Right-click > Transform (lower-right) quadrant of the quad menu > Properties > Object Properties dialog
Edit menu > Object Properties
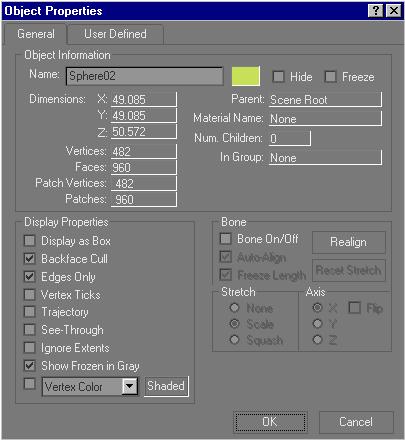
The Object Properties dialog lets you inspect an object's state, and set a variety of parameters that relates to how the object behaves in the viewports. Here you can find information about the object such as the number of vertices and faces, dimensions, materials, etc. You can also set various display options such as turning on trajectories, or displaying the mesh as a box. Object properties is also where you can choose to have the mesh display as bones.
Procedures
To display object properties for the current selection, do one of the following:
Choose Edit > Object Properties.
Right-click a selected object and choose Properties from the Transform (lower-right) quadrant of the quad menu.
Interface
General panel
Object Information group
Displays information about the selected object, including the following:
Name: Shows the name of the object. When a single object is selected, you can edit this field to give the object a new name. When multiple objects are selected, this field shows "Multiple Selected," and cannot be edited.
Color: The color swatch shows the object's color. You can click it to display the Color Selector and select a different color.
Hide: Hides the selected object or objects.
To unhide hidden objects, use the Display panel or choose Tools > Display Floater.
Freeze: Freezes the selected object or objects.
To unfreeze frozen objects, use the Display panel or choose Tools > Display Floater.
Dimensions: Displays the X, Y, and Z dimensions of the object's extents.
Vertices and Faces: Display the number of vertices and faces in the object.
These values can change over time: they are valid only for the current frame and the current view.
Shape Vertices and Shape Curves: Appear only for shape objects. Shape Vertices is the number of vertices in the shape, and Shape Curves is the number of polygons.
Parent: Displays the name of the object's parent in a hierarchy. Shows "Scene Root" if the object has no hierarchical parent.
Material Name: Displays the name of the material assigned to the object. Shows "None" if no material is assigned.
Num. Children: Displays the number of children hierarchically linked to the object.
In Group: Displays the name of the group to which the object belongs. Shows "None" if the object is not part of a group.
Display Properties group
Display as Box: Toggles the display of selected objects, both 3D objects and 2D shapes, as bounding boxes. Produces minimum geometric complexity for rapid display in viewports. Default=off.
Backface Cull: Toggles the display of faces with normals that point away from the view. When on, you see through the wireframe to the backfaces. Applies only to wireframe viewports. Default=on.
Edges Only: Displays only faces of the object in wireframe viewports. When off, all of the object's mesh geometry is displayed. Applies only to wireframe viewports. Default=on.
Vertex Ticks: Displays the object's vertices as tick marks. Default=off.
Trajectory: Displays the object's trajectory. Default=off.
See-Through: Makes the object or selection translucent in viewports. This setting has no effect on rendering: it simply lets you see what is behind an object in a crowded scene, and especially to adjust the position of objects behind the see-through object. Default=off.
This option is also available in the Display command panel and the Tools > Display Floater.
You can customize the color of see-through objects by using the Colors panel of the Customize > Preference Settings dialog.
Keyboard shortcut (default): ALT+X
Ignore Extents: When on, this object is ignored when you use the display control Zoom Extents.
This option is also available in the Display panel and by choosing Tools > Display Floater.
Keyboard shortcut: No default, but you can customize it using the Keyboard panel of the Customize > Customize User Interface dialog.
Show Frozen in Gray: When on, the object turns gray in viewports when you freeze it. When off, viewports display the object with its usual color or texture even when it is frozen. Default=on.
Vertex Colors: For editable mesh objects, displays the assigned vertex colors in viewports. The drop-down list lets you choose to display the vertices' Color, Illumination, or Alpha channel. Default=off.
You assign vertex colors at the vertex or face sub-object levels.
Shaded: When on, if the object is an editable mesh with vertex colors, shaded viewports use vertex colors to shade the mesh. When off, colors are unshaded. Default=off.
Bone group
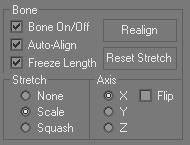
Here are the controls for the bone objects. Any object can be displayed as a bone object, just by selecting the object and clicking Bone On/Off. Here you can also control whether the bones will be rigid, or will stretch. There are tools to realign the bones and reset the stretch.
Some of these options are also available by selecting Bone Options from the Animation menu.
Bone On/Off: Controls the display of the object as a bone. Select any object and turn this on, then in the Display panel, in the Link Display rollout turn on Display Links and Link Replaces Object. The bone will be visible instead of the object.
Auto-Align: Automatically aligns the bones.
Freeze Length: Determines whether the bone's length can change.
Caution: When you turn on Freeze Length, this has no visible effect unless you transform the child of the object to which Freeze Length is applied.
Realign: Pressing this button points the selected bone back toward the correct direction, if it has become unaligned and is pointing away from the next bone in the chain.
Reset Stretch: Returns the bone to its original length.
Stretch: Determines what kind of stretch takes place. Freeze Length must be off.
None: No stretch takes place.
Scale: Lets the bone scale. The stretch happens along one axis.
Squash: Lets the bone squash. The bone gets fatter as it gets shorter, and thinner as it gets longer.
Axis: Determines the axis used for the stretch.
X/Y/Z: Choose the axis for scaling or squashing.
Flip: Flips the stretch along the selected axis.
User Defined panel
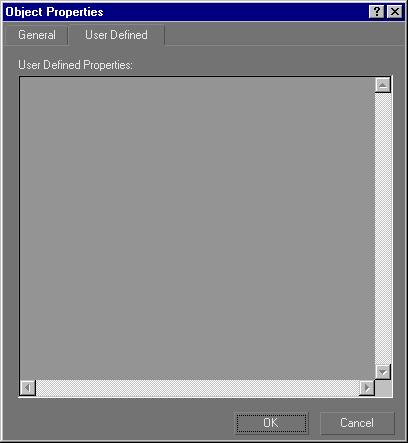
User Defined Properties: In this text box, you can enter properties for the object, or comments about it, that you define yourself. gmax doesn't use these properties, but it saves them with the scene, and they reappear whenever you view the Object Properties dialog for the object.