
Building Your First Project
It's traditional when learning to program - in virtually any programming language - to begin with a program called 'Hello', or something similar. This is just a very simple program which prints out some sort of message on the screen - usually "Hello, World!". That's what we'll do, and we'll use it to demonstrate some of the fundamental ideas behind Visual Basic. Here we go then...
- click File then New Project
The first thing we'll do is to save the form and save the project. They are saved separately because it may be that you want to use the same form for other projects and it saves you having to design the same thing over again.
- click File then Save File As...
- give the form a name, say, hello.frm
- click File then Save Project As...
- give the project a name, say, hello.vbp
OK so far? Remember to save your project whenever you make changes to it.
Now we're going to alter some of the properties for the form. There are over 40 properties listed and you could, of course, alter all of them. In practice, though, you'll soon get to know which are the important ones. Feel free to experiment with any or all of them. As far as we are concerned, we're going to leave most of them alone and we'll list the ones that we'd like you to check.
- to start with, we'd like you to check the values for the following properties on the form and alter them if necessary:
Caption
Height
Left
Top
Width
Hello
4000
2500
1600
6000
So that's decided the name, size and position of the form. Let's follow the convention of always naming a form with a name starting with frm. Note, by the way, that the Name property of the form is not the same as the filename that you choose to give the form when you saved it. If you want to set the background colour of the form then you can do so by clicking in the BackColor properties box, then clicking on the arrow that appears, and selecting a colour from the palette.
Now we're going to place a command button onto the form. There are two ways to do this:
i) double-click the command button icon in the toolbox - on our illustration earlier, it's the third one down in the right hand column
ii) single-click the command button and then click and drag on the form to create a rectangle
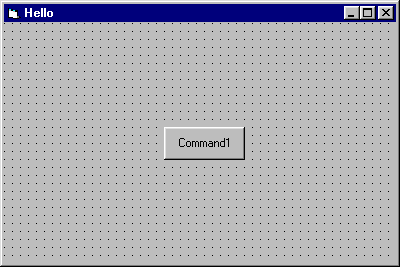
Using the first method, you should have a form looking like this:
So now we're going to set some properties for the command button in a similar way to setting the properties for the form:
- click on the command button to highlight it
- note that the properties box now contains a list for the button
- check and adjust the properties for the button as follows
Caption
Height
Left
Top
Width
Display
495
720
2280
1215
You'll notice when you make these changes, that the button now has a caption 'Display' and its position has been changed. We're going to follow the convention of always starting the name of a command button with cmd.
Continued...