Written by Christopher and Lee Bamber
THE SOLUTION
Written by Christopher and Lee Bamber
THE SOLUTION
The original Relics Of Deldroneye adventure was (and still is) one of F1's most popular titles. It had a subtle blend of not to tricky puzzles that get you instantly hooked from the start. As the game progresses it certainly gets a lot harder but the story line is great fun and Relics stills remains my personal F1 favourite by a long chalk. Relics II surprisingly still has the same magic as the original, and it is even bigger. The full version is on 5 compressed disks.
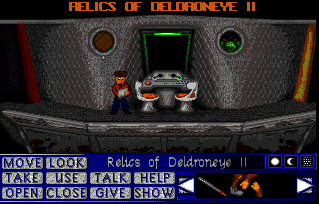
   The Island of Debreen
   =====================
   Relics of Deldroneye II - 'Island of Debreen' is an adventure filled
   with a sense of mystery.  And such an aura can be shattered forever
   by reading the entire solution to a game before even playing it.  It is
   advised the following solution should be used to help you when your
   final effort is a futile one.  Anything less than that and you are
   denying yourself the rewards that come with completing a game such as
   this on your own.  However, if you want to see it all, and see it now
   then please read on...

   You take control of Falcon on the bridge of his new spaceship, and have
   narrowly escaped collision with an unknown vessel at the expense of all
   your fuel and reserve power.  You decide to steal the nessesary power
   from the unknown vessel by manouvering your ship to its side and cutting
   your way in.

   1. Moving the Ship
   ------------------
   Use the laserpen on the Power In socket on the console to active the
   view screen.  Look at the view screen to read the situation.  Now use
   the laserpen on the Power Out socket to retrieve your valuable power.
   Move right to the engine room and open the engine panel.  Feed power
   from your laserpen into the engine to activate it.  Make your way to
   the navigation room and open the PIV Door.  Feed your last unit of
   power from the laserpen into the computer via the Power Input Valve.
   Talk to the computer and it will eventually feed some vectors into the
   main computer back on the bridge.  Before leaving the room, open the
   power output valve door and restore the power to your laserpen by taking
   it back.  Go to the bridge and new vectors will be available, so hit
   the button on the console and the ship should move to the calculated
   vector, next to the Debreen vessel.

   2. Forced Entry
   ---------------
   From here on in, you'll need a spacesuit to survive your exploration of
   the Debreen craft.  Go down the corridor from the junction between the
   navigation room and the bridge, and enter the suit-o-matic.  You should
   now be adorned with metal clothing.  Enter the docking bay, press the
   Borble and make your way to the docks bay exit.  The huge Debreen outer
   wall looms to cover the whole entrance to the docking bay.  Use the last
   unit of power from your laserpen to cut a hole in the weak part of the
   wall.  Enter the newly created hole and find yourself in a small alcove.
   Move to the automatic doors and enter.  In this long corridor, and at
   the foot of the door you have just emerged is a small green device.  Kick
   this device to brake it.  A small magnet will come loose, which you must
   collect.  Now continue down the corridor and have a chat with the robot
   sitting in the tubing.

   3. The Electric Ladder
   ----------------------
   If you continue to the far left of this corridor and enter the door, you
   will find a room with a very tasty ladder.  Unfortunately, when you climb
   it you will get stunned.  Kick the panel below the slot and look inside.
   The lever is too far so we need to reach it somehow.  Go to the next
   room at the end of the next corridor along, and find the corpse of a
   dead alien explorer.  On its remains are some gloves and a belt.  Take
   both, and then use the magnet on the belt to form a magnet on a string
   style tool.  Return to the cracked panel and fish out the lever.  Use
   this lever on the slot to deactivate the defences of the zone.  This
   includes the power supply to the ladder!

   4. The Turret
   -------------
   Ascending the ladder to the top will reveal that the Debreen craft has
   been welded to the hull of an altogether different ship.  This new area
   is guarded with a trained laser turret, the walls are clearly made of
   heat resisting material, where the floor is not and is falling apart.
   Try and get to the door, and you'll get zapped and fall to the bottom of
   the ladders.  Don't worry, the spacesuit is designed for such impacts.
   You will find it very difficult to come to harm.  Half way up the ladder
   you will find an alcove with an empty energy cell.  Take this from the
   wall and climb the ladder.  Show this energy cell to the turret and it
   will rather casually fire at it, er, and you.  When you regain your
   bearings, at the bottom of the ladder, the energy cell will be on the
   floor next to you, FULL!  Return the energy cell to its socket, and you
   should have stabilized the laser turret, and its mode will change to
   'peace' green.  Open the newly available door, and enter.

   5. Metal Hell
   -------------
   Again, a third ship has been welded to this Debreen junk-heap, but due
   to a misscalculation, the floor was placed thirty-feet lower than would
   have been ideal.  Falcon falls and destroys the only mobile robot in the
   complex when he lands IN IT!  When the dust settles, rip the pipe off
   the wall and enter the open door to the right.  In this dark room, take
   the Optiwire and container hidden in the junk, use the pipe to crowbar
   open the dome to steal the brain of the robot.  Have a pleasant chat with
   the active immobile robot, then nick his arm.  Exit this spooky place
   and return to the first metal room.  Use the pipe to crowbar open the
   door and enter.  Have a chat with the guard robot, and when he starts to
   bore you enter the adjoining open door.  take the tape from the dispenser
   and have a look at the dome.  It needs repairing.  Use the tape on the
   optiwire to make a strong sticky wire.  You can use this strong sticky
   wire to reconnect the leads leading to the dome.  Return to the guard
   room and inform the robot he can have a break, but alas he has not moved
   for so long he has rusted.  Come to the rescue and return to the first
   metal room.  use the container to collect the oil from the right wall,
   and give this to the guard robot.  He will squeek his way to the rest
   room for a very long vacation.  Use the robot arm you stole from the
   secuirty robot to activate the palm scanner near the gold door.  The
   doors will open and you can enter.  Inside, a brainy blob on a pillar
   greets you with kind words.  Give him the brain you took from the other
   robot and accept his advice, and return to the first metal room.  Try
   using the laserpen on the metal door on the north wall.  The effort was
   hopeful, but you will see your efforts fail.  Return to the blob with
   this news and he will replicate a device which will enable you to
   charge your laserpen to full power.  By returning to the metal door,
   and firing the laser, you realise doing so would be dangerous.  The
   shiny surface would reflect the laser.  Return to the guard room and
   laser open a panel hidden in a slight indent on the north wall.  Take
   the sandpaper like substance and use it on the door to make it rough.
   Now fire the laserpen to gain access to the next segment of the Debreen
   vessel.

   6. The Huamin Conflict
   ----------------------
   An opportunity to relax and enjoy the comic lunacy of two crazy alien
   ghostlings.  Simply take the spangley object from the wall in the left
   room from where you entered the maze, and continually talk from one
   alien to the other, twisting the facts and conveying mis-information
   to your new alien friends.  Eventually they will destroy each other in
   an invisible fight to the death.  As the ghostlings disappear, so will
   the obstruction and you can use the spangley key object on the floor
   of the room with the eye.  The eye will scan you and the door will
   open, awaiting your eager entry.

   7. Destination Debreen
   ----------------------
   Cross the spacewalk to the large doors and talk to the small sphere set
   into the door.  The centurion will not open the doors.  Go to the right
   and take the pole from the twisted piping.  Go to the far left and have
   a look at the junction box.  Try using the pipe you collected from the
   metal room to pull it off the wall and it will break under the pressure.
   Now try the much stronger space metal of the Debreen, and watch the
   junction box fall off the wall with ease.  When you return to the gate,
   a maintenance robot is busy finding the error, whicn you recently
   created.  He has had to open a small door to get partly outside, and you
   get leap into the gap without the centurion looking.  Once inside, make
   your way through the sandy corridors until you reach a room with a
   crater, and a metalic object imbedded in the ground.  Look for a button
   different from the rest and press it.  The Debreen will be brought from
   stasis, and revived.  Unfortunately, you have left the space-port open
   and have let out all the special air the Debreen need to breath.  He
   is slowly pleading for his life, so you must quiz him on how exactly to
   close the door and return to the port you entered.  Find the hidden
   button by walking around the port-entrance and then press it.  Return
   to the crater room and follow the Debreen into the newly revealed
   secret door to the his control center.

   When you enter the room, a large wall mounted display shows in vivid
   detail the evil sight a Medivian Nose.  The nose, horrifically, being
   firmly attatched to a battleship and in the mood for destruction.  It
   fires three plasma bolts simultaniously and rocks the entire Debreen
   vessel.  Talk to the Debreen and assess your situation, and reassess it!
   Exit his patient abode, and continue right until you cannot progress
   any further.  Find the hidden door, and open it.  Inside, you will
   find a garbage bat, which opens in the barren void of space.  You can
   also see the real, unmagnified Medivian ship floating about.  Take the
   green orb from the garbage bay power system and place it in the small
   Deldroneye Weapon on the floor.  Using the small pressure socket, the
   green orb will slot into place, and then run back to the Debreen
   Control Center.  Ask the Debreen to activate the Garbage system and it
   will activate, instead, the powerful Deldroneye laser.

   And as the passive Debreen seemed about to refuse the request, and in
   a language Falcon understood well, the strange creature said, "OK...
   Let's Fry'em!".  No sooner had Falcons amusement formed a grin wider
   than his own face, the Deldroneye laser was ripping across the small
   distance to the Medivian ship...

   ...the rest of the story opened Falcons eyes to further truths about
   the Relics Of Deldroneye, but you'll just have to complete the game and
   read THAT for yourself.