WebSphere Studio Application Developer 5.0
Deployment Part II - Deploying an Enterprise Application to WebSphere
INTRODUCTION/OBJECTIVES
This workshop takes you through the steps of deploying the WBStockPurchase
Enterprise Application to WebSphere Version 5 Beta 4.
Note: This workshop requires that
the following products are installed:
- WebSphere Studio Application Developer Early Availability Version
5.0
- DB2 UDB 7.2 FP 7
- WebSphere Application Server 5.0 Beta 4
|
Note: This workshop requires that
the following labs are completed:
- MDB Lab
- EJB QL Lab (Note: It is ok to have completed all
the labs)
|
Section 1 - Exporting and Installing the EAR
___ 1. Export WBStockPurchaseEAR
a. Start WebSphere Studio Application Developer.
b. Choose File->Export.. from the menu bar.
c. From the Export wizard, select EAR file. Click the
Next> button.
d. From the EAR Export page of the wizard, specify the following:
Parameter
|
Value
|
What resources do you want to Export
|
WBStockPurchase
|
Where do you want to export resources to
|
x:\WebSphere\AppServer\installableApps\WBStockPurchase.ear
|
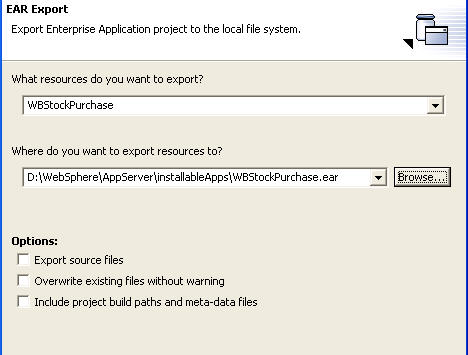
Click the Finish button to export the EAR
___ 2. Start the WebSphere Server
Note: Make sure you have stopped all
servers in WebSphere Studio before performing this task.
|
a. Open an MS-DOS prompt and navigate to the x:\WebSphere\AppServer\bin
subdirectory.
b. Issue the command:
startserver server1
After a few moments, you should see the messages:
D:\WebSphere\AppServer\bin>startserver server1
ADMU0116I: Tool information is being logged in file
d:\WebSphere\AppServer\logs\server1\startServer.log
ADMU3100I: Reading configuration for server: server1
ADMU3200I: Server launched. Waiting for initialization status.
ADMU3000I: Server server1 open for e-business; process id is 2072
___ 3. Start the WebSphere Server Administrative Client
a. Choose Start->Programs->IBM WebSphere->Application
Server v5.0->Administrative Console.
b. After the web browser appears, login using your User ID.
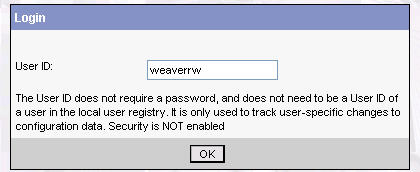
Click the OK button.
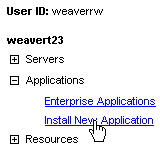
___ 4. Install the Enterprise Application
a. From the left-hand frame, expand Applications
. Click the Install New Application link.
b. From the Preparing for application install frame, Use
the Browse... button to specify x:\WebSphere\Appserver\installableApps\
WBStockPurchase.ear (Note: Use the Local path).
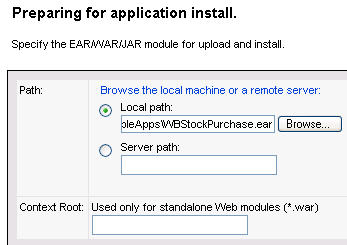
Click the Next button.
c. From the Default bindings frame, take the defaults and click
the Next button.
d. From Step 1 in the Preparing for application install frame, specify
a Directory to Install Application of x:\WebSphere\AppServer\installedApps\<your
nodename> (Note: x:\ is the drive where WebSphere was
installed).
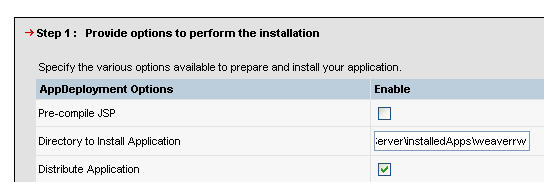
Click the Next button.
e. From Step 2 in the Preparing for application install frame, make
sure the ListenerPort is set to JMSListener. Click
the Next button.
Note: Remember that the MDB
we created in the MDB lab defined the ListenerPort name of JMSListener.
|
f. From Step 3 in the Preparing for application install frame, accept
the default JNDI names and click the Next button.
g. From Step 4 in the Preparing for application install frame, check
WBStockPurchaseEJB. Specify a JNDI Name of jdbc/AIS.
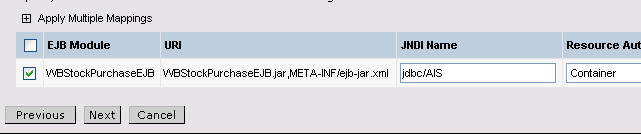
Click the Next button.
h. From Step 5 in the Preparing for application install frame, accept
the defaults and click the Next button.
i. From Step 6 in the Preparing for application install frame, accept
the defaults and click the Next button.
j. From Step 7 in the Preparing for application install frame, accept
the defaults and click the Next button.
k. From Step 8 in the Preparing for application install frame, accept
the defaults and click the Next button.
l. From Step 9 in the Preparing for application install frame, accept
the defaults and click the Next button.
m. From Step 10 in the Preparing for application install frame, accept
the defaults and click the Finish button
___ 4. Save the Changes
a. Click the Save to Master Configuration
link.

b. Click the Save button.
Section 2 - Configuring WebSphere Resources
___ 1. Create a JDBC provider
a. From the left-hand frame, expand Resources
.
b. Click the JDBC Providers link
c. From the JDBC Providers frame, make sure the scope is set to Node
.
d. Click the New button to create a new JDBC Provider.
e. From the New JDBC Providers frame, use the dropdown listbox
to choose a JDBC Provider of DB2 JDBC Provider (XA).
Click the Apply button.
f. From the New JDBC Providers frame, scroll down and click the
Apply button.
___2. Create the jdbc/AIS Datasource
a. From the JDBC Providers frame, scroll down
and click the Data Sources link..

b. From the Data Sources frame, click the New button.
c. From the Data Source Configuration frame, specify a Name
of AIS and a JNDI Name of jdbc/AIS.
d. Check the Use the Data Source in container managed persistence
checkbox.
e. Scroll down and click the Apply button.
f. Scroll down and click the Custom Properties link
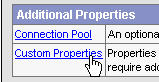
g. Fom the Custom Properties frame, click the databaseName
link.
h. From the databaseName frame, spacify a Value of AIS
for the databaseName property:
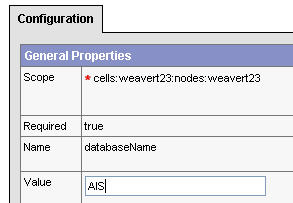
Click the OK button.
___3. Modify the WebSphere db2_jdbc_driver_path
variable
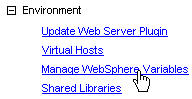
a. From the left-hand pane, expand Environment
and click the Manage WebSphere Variables
link.
b. From the WebSphere Variables frame, scroll down and click the
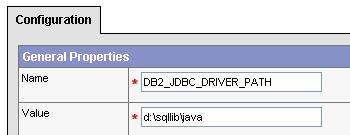
db2_jdbc_driver_path link.
c. Make sure that the db2_jdbc_driver_path variable has a value
which points to the x:\sqllib\java subdirectory (Note: x: the
location where DB2 is installed).
d. Click the OK button.
e. Click the
Save link (in the upper left corner)
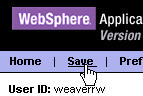
f. Click the Save button.
___4. Create the QCF WebSphere JMS Queue Connection
Factory
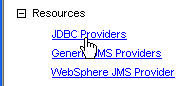
a. From the left-hand frame, click the
WebSphere JMS Provider link (Under Resources).

b. From the WebSphere JMS Provider frame, scroll down and click the
WebSphere Queue Connection Factories link.
c. Click the New button.
d. From the New WebSphere Queue Connection Factory frame, specify
a Name of QCF and a JNDI Name of jms/QCF.
e. Scroll down and click the OK button
___5. Create the Q1 WebSphere JMS Queue Destination
a. Click the WebSphere JMS Provider
link (as shown below)

b. Scroll down and click the WebSphere Queue Destinations link
c. Click the New button.
d From the New WebSphere Queue Destination frame, specify a
Name of Q1 and a JNDI
name of jms/Q1.
e. Scroll down and click the OK button.
___6. Create the JMSListener Listener
Port
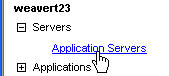
a. From the left-hand frame expand
Servers and click Application Servers.
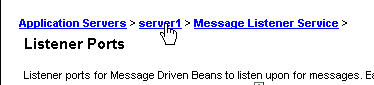
b. From the Application Servers frame, click the server1 link.
c. From the server1 frame scroll down and click the Message
Listener Service link.
d. From the Message Listener Service frame ensure the Startup
checkbox is checked.
e. Click the Apply button.
f. From the Message Listener Service frame, scroll down and click
the Listener Ports link.
g. From the Listener Ports frame, click the New button.
h. From the New Listener Ports frame, specify the following:
Parameter
|
Value
|
Name
|
JMSListener
|
Connection Factory
JNDI Name
|
jms/QCF
|
Destination JNDI
Name
|
jms/Q1
|
i. Scroll down and click the OK button.
___7. Configure the JMS Server Component
a. From the Listener Ports
frame, click the server1 link.
b. Scroll down and click the Server Components link
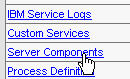
c. From the Server Components frame, click the JMS Servers
link.
d. From the JMS Servers frame, add Q1 to the Queue Names
(as shown below). Also make sure the Initial State is set
to Started.
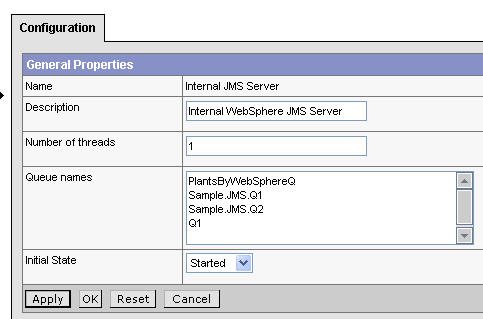
e. Click the OK button.
f. Click the Save link to save your changes
g. Click the Save button.
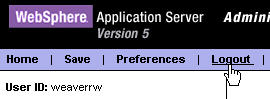
h. Click the Logout link
i. Close the web browser
j. Switch to the MS-DOS prompt and issue the command:
stopserver server1
Section 3 - Testing the Application
___1. Start the Server
a. Switch to the MS-DOS
prompot and issue the command:
startserver server1
b. Check the SystemErr.log
and SystemOut.log (Note: found in x:\WebSphere\AppServer\logs\server1
subdirectory) for any errors.
___2. Test the Application
a. Open a Web browser
and specify the URL:
http://localhost:9080/WBStockPurchaseWeb/StockPurchaseApplication/StockPurchaseForm.jsp
b. From the Stock Purchase form, enter the following:
Parameter
|
Value
|
Account Number
|
1
|
Stock Symbol
|
IBM
|
Number of shares
|
11
|
c. Click the Submit order button.
d. To verify
the order was submitted successfully open a DB2 Command Window and issue
the following commands:
db2 connect
to AIS
db2 select * from db2admin.stock_prch_txn
You should see a new record (showing 11 stocks of IBM purchased) in the
table.
Note: If you do not see any new records in the table, check the server
logs (SystemOut.log) for any error messages.
|
Congratulations!
You've deployed the WBStockPurchase Enterprise Application to
WebSphere Application Server! You have now completed Part II of
the Deployment lab for WebSphere Studio Application Developer 5.0!