Options window

This window permits you to change a large number of factors which affect what the backup does and how it works.

The Options window

  1. Load target
    Drag a script file here to load it into HardBack. If Shift is held down, then any files in the Selected and Ignored windows will be cleared before the script file is loaded, otherwise the items currently there will remain and the selected/ignored parts of the two files will merge.

  2. Scrolling section (pane)
    This section contains the options themselves and can be scrolled by using 3. It is officially called a pane.

  3. Scroll bar
    Use this to scroll the scrolling section, as you would any other Risc OS window.

  4. Reset
    This button resets the options to what they were when they were last stored - when Start or Update was clicked, or when a script file was loaded or saved. Note that Selected and Ignored files, plus the contents of the 'Only file of type:' list are stored each time a new entry is added, removed, selected or deselected, and so these values will not change.

  5. Update
    This updates the copy of the options stored within the program to that shown in the options window.

  6. Cancel
    This is the same as reset, but it also closes the options window.

  7. Start
    This is the same as update, but it also starts the backup operation described by the options.

Scrolling options

This is the main part of the options window, which contains the icons which allow you to set the criteria by which the backup is carried out. It is divided into several parts:

Source/Destination

The Source and Destination areas of the options window

  1. Source box
    Dragging a file or directory here will fill in the source icon with its name. Dragging with Ctrl held down will enter the name of its parent into the source icon.

  2. Source icon
    This icon allows you to type in and edit directly the name of the source directory or file - i.e. the name of the directory or file to copy files from onto floppy disc.

  3. Destination icon
    This icon allows you to enter and edit the name of the destination drive and directory - i.e the drive and directory to back up the source onto. In this version, this must include a drive specifier (e.g :0) rather than a disc specifier (e.g :FredsDisc). However it can contain any number of directories - if these are not present on the disc they will be created. It must mention a filing system, which must be controlled by FileCore. This includes most major filing systems such as SCSI, ADFS, IDE, RAMFS, but not networks, ArcFS or DeviceFS. The registered version does not have such limitations.

    For example:
    scsi::5.$.Backups.WorkAug95

  4. Destination menu icon
    This icon opens a pop-up menu containing a selection of possible destinations. It auto-senses how many ADFS floppies and SCSI drives are connected and puts only valid items onto the menu.

Options

This region permits you to set some of the major, but non- compulsory options.

The Options section of the options window

  1. Selected files
    This allows you to choose particular files and directories to backup. They needn't be in the same directory or even on the same drive or filing system. When this is selected, incremental backups are disabled and so 4, 5, 6, and 9 are disabled. Click on Select... to display a window into which you can drag particular files. When selected files is used, the source name is not necessary. However, it is still stored in the backup file as the 'parent' of all the files, as if they all came from the same directory, and it is used as the default directory when you are restoring the whole backup. If no name is present, Backup.Selections will be used instead.

  2. Ignored files
    This allows you to opt to ignore certain files and directories that you don't want to be backed up. The files to ignore can be anywhere within the directory structure as long as a parent is specified to be backed up; if it is not specified then clearly nothing will happen. If a file or directory is present in both the Selected and Ignored windows then it will be ignored.

  3. Select.../Ignore...
    Clicking either of these buttons brings up a window to which you can drag files and directories to respectively choose to backup or not to backup.

    The selected files window

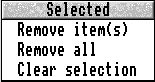
    You can select particular items in the same way you would do in a Filer window, and clicking Menu over the window brings up a menu giving you options to remove files or directories from the window.

    The selected files menu

  4. Incremental
    This option allows you to backup files that have changed since a certain date. It does not apply to directories; all directories are scanned, but their contents will not be backed up if it is older than the date specified. Files which are untyped - i.e have load/ execution addresses rather than a filetype and date stamp will always be backed up.

  5. Last backup
    This option, when Incremental is switched on, will read the date of the last backup from the BackupDate file stored in the source directory, and back up all file created after the date held within it. If a BackupDate file is not present in the source then an error will be given when you try to start the backup. You can check the date held in a BackupDate file by loading it into a text editor such as Zap or Edit. It is stored in a human-readable form at the end of the file.

  6. On/at
    This allows you to specify a date and, if necessary, a time, directly by typing it into the icons. The date should go in the top icon in the form day/month/year, and the time in the bottom as either hours:minutes or hours:minutes:seconds. The year can either be as four digits (1998) or as two (98). If it is as two, then it is assumed to be in the 20th century. Alternatively, dragging a file or directory will set the date and time to when it was last saved.

  7. Only files of type ...
    This option allows you to choose to only backup files of specified filetypes, including Impression documents stored as applications. The list which contains those filetypes you do want to backup can be added to by clicking on the pop-up menu icon to the right (8)

  8. Only files... pop-up menu
    Clicking on this icon opens the menu which contains a list of those filetypes you want to backup. At the top of the menu is a list of the filetypes that have been entered already. You can click on any of these and it will toggle whether that type is to be backed up or not. If a filetype is to be backed up, its entry will be ticked. At the bottom of the menu is a writeable icon, into which you can enter filetypes. This can either be in the name of the type, such as 'DrawFile', or its hexadecimal type, such as '3FB'. The entry will then be put on the menu and automatically ticked. The Impression option recognises an Impression file as being a directory with a file called !DocData inside it. If you have any directories with !DocData files inside them which are not Impression files, then they will be backed up. Also if you have any Impression files without !DocData, then they will not be backed up.

    The basic only files... pop-up menu
    Basic menu

    The only files... pop-up menu with a few types added
    With a few types added

  9. Write BackupDate file
    The BackupDate file is used to store the date of the last backup - see 4 Incremental for more details. If this option is off, a BackupDate file will not be created in the source directory. This is useful if you do not intend to do an incremental backup on a particular source, or because the source is read only, such as a network.

  10. Image filing systems...
    Under Risc OS 3 only, image files are partitions of a disc which are actually a file, but when double-clicked open like a directory - for example, PC partitions and ArcFS 2 archives. This section provides three possible ways of backing them up:

    1 file: This treats the image file as a file, and backs it up in the exact form it is on the disc. This means you can restore an identical copy from either the Entire backup or Selected items part of Restore, but you will not be able to access the files inside it under Selected items.

    Directory: This treats it as a directory, and so opens it and backs up each of the files inside individually. In Restore, you can only access the contents under Selected items - you cannot restore the whole thing in Entire backup, or drag out the image file itself from Selected files because HardBack has no way of knowing how the original image file was structured. Restore entire backup will simply ignore image files stored in this way.

    Ignore: This ignores all image files completely. Please note that an image file is only recognised as an image file if the relevant software is loaded - for instance, until ArcFS 2 is loaded all ArcFS archives will be treated as normal files. HardBack can cope with files which have names up to 255 characters long. However, in Restore under Selected items, the directory display may be slightly messed up if they have more than 12. This should have no effect on restoring them.

Optimisation

This section allows you to speed up HardBack to the greatest possible extent and produce smaller backup files. Due to compression being missing from this demo version, only one option is available.

The optimisation section

  1. Buffer size
    This allows you to expressly set the size of file buffers used when reading data from files and copying it into the backup file. Basically, the higher this value, the faster the backup proceeds. Another way to increase the size of the file buffers is to open the Task Manager's Task Display, and drag the red bar next to HardBack (Backup) to the right, thus increasing the memory allocation. For more details see the section Memory Management.

Errors

This is a rather small section, containing just one item.

The errors section

  1. Ignore file errors
    If this is set HardBack will not warn you about errors concerning individual files in the source such as 'Access violation', 'Disc error...' etc. It will display the error in the messages icon in the option window, but will not open a window and ask you to click on Continue. This option is useful if you want to do an unattended backup - obviously you don't want it stopping half way through and waiting for you to click on OK.

Go to the title page, the demo index, the backup index, the starting up section, the status windows section, or the restore section.