SPECIAL EFFECTS (EXPLOSIONS) by Stefan
Didak
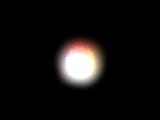
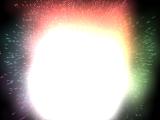
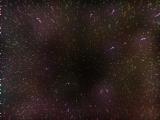
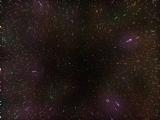
The following is a
sequence out of a 100 frame animation which you can do after following the
guidelines presented here in this small how-to tutorial on explosions.
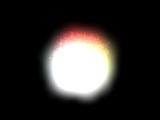
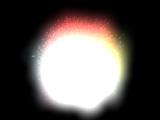
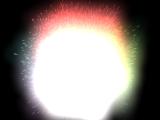
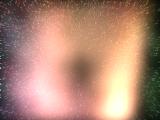
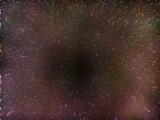
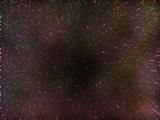
Each frame presented here is taken in intervals of 5
frames.
So how do we start
blowing things up?
Well, first let's start up 3D Studio
MAX. That will be the first step to take, and a very good one. We will
be using all the default settings that MAX starts up with, so we will
create a small 100 frame explosion effect. In the tutorial we are
assuming basic knowledge about MAX and how MAX
works.
1. Creating the first
particle emitter
The first thing we need to do is
contruct 6 particle emitters (of the spray type). Since there are only
plannar emitters available we need six emitters to create the illusion
of sphercical explosion.
From the CREATE
panel select Particle
Systems and click on SPRAY.
Build the particle emitter in any given plannar viewport and be sure to
make the emitter rectangular in form (for this tutorial we will stick
with an emitter that is 20 x 20 units in size). It helps to switch on the grid snap and angle snap.
When you are done placing the rectangular emitter in the scene, switch
to the MODIFY panel and select the emitter you have just created. This will
give you the list of parameters associated with this
emitter.
2. Setting the color of
the emitter
On top of the panel you will see the
name of the emitter along with a colored rectangular box indicating the
color of the particles. Since we won't be using any shaders or materials
for this tutorial you should set the color of the particles by changing
the color of the object. Select the colored rectangle and select a
color. Hot and bright colors will work best. For now, though, set the
color to bright red.
3. The emitter
parameters
While in the MODIFY
panel you will see the
associated paramters which we are about to change. I will list the
values of the parameters as they were used in the images you have seen
here.
Viewport Count :
500
The number of particles that will be
displayed in the viewport. This number worked fine for me but if you are
running on less powerful systems you can set it to a lower value, like
250 or less.
Render Count :
2500
The number of particles that will be
generated during the rendering phase. The higher you set this parameter,
the more dense the explosion will be. For the emitter size and example
shown here 2500 worked out fine.
Drop Size :
5
The size of the particles. Make sure
you have the particles also set to <U>drop</U>, ofcourse.
The rendering method to use should be set to
tetrahedron.
Speed :
10
A speed of 10 will give you a nice
explosion. Set the parameter higher for faster explosions or lower for
slower explosions.
Variation :
15
The variation parameter is a very
important parameter in this tutorial. The plannar emitters will emit
particles perpendicular to the plane of the emitter and yet we want a
more dispersed explosion effect. Changing the variation adds randomness
to the particles and will also disperse them from the emitter. A value
of 15 worked well for this sample. If you move ahead a few frames with
the frame slider and increase and decreate this paramter you can get a
good feel of what it does and how you want the particles move in
relation to the emitter.
Start: 0 and Life :
100
Since we want the animation of the
explosion to be 100 frames, the starting frame is set at 0 and ending
frame at 100.
Birth Rate :
1250
The birth rate is very important.
Since we want the particle to explode from a center point in one big
blast we need to spend all of our particles at once or in rapid
succession and launch them into infinity fast. The number of particles
was set to 2500, so the birth rate will be set to 1250 particles. (This
gives a more natural explosion effect and it is used to create the
majority of particles for the explosion
body.)
4. Setting the G-Buffer
Object Channel
With the particle emitter selected,
call up the object properties and set the G-Buffer Object Channel to
1. Why this is done will
be explained later in this tutorial, for now, just do
it.
5. Creating the form of
the explosion
You have now constructed you first
red particle emitter with the right parameters set to it. Time to
construct the actual explosion shape by using this first emitter as the
'template'. Depending on the position and orientation of your first
emitter, make sure that it's now pointing upward into the Y
direction. To help you
position and orient the particle spray, set the frame slider between
10 and 20
frames.
We are now ready to start rotating
and copying the template emitter. Set the angle snap to
ON to make your life a
little easier and switch to select and rotate mode.
Rotate the
emitter 180 degrees
around either the X or Z axis to create a mirror copy that has it's particle spray
emitting into the downward Y direction. Hold down the
SHIFT key
to clone the particle emitter.
Select any of the two particle
emitters and repeat the rotation again, this time creating a spray that
is oriented into the negative Y direction. This is your third emitter. Enter the MODIFY panel in
case it wasn't active and change the parameters of the third emitter you
just created. Change the render count and birth rate to 1200. Both, that is. As you will see, we are
changing the explosion slightly for the particle surrounding the first
two red emitters. Now, change the color of the third emitter into
something other than red. Yellow
will do fine.
Rotate and copy the third emitter 180
degrees around the Z axis to create a mirrored copy again. You now have
created your fourth emitter. At this stage you should have two red
particle sprays and two yellow ones.
Select the third or fourth emitter
and rotate and copy it once more, this time creating a spray oriented
into the positive X direction. Change the color of this emitter to
green. Et Voila, the fifth emitter is created. Select this fifth one and
create another copy which is rotated 180 degrees to create a mirror
copy. Change the color of this sixth emitter to
blue.
6. Ready, Set,
Glow!
You are now free to go off and render
the effect, add a camera, lighting, whatever you want. But if you want
the explotion effect to look really nice, you'll hang on for the final
steps to take in creating the explosion. For now you will be safe if you
position the explosion effect into a perspective viewport for previewing
purposes. Rotate, zoom and move around in the perspective viewport until
you are satisfied with the view.
Call up the Video Post dialog and
select ADD
SCENE EVENT. In the
associated dialog set the view to perspective and the start and end
frames to
0 and 100 respectively.
In the list you will now see the scene event being represented by the
blue teapot. Select and highlight the event and select
ADD IMAGE
FILTER EVENT.
The plug-in filter to select is
GLOW.
Make sure the start and end frame are once again set to 0 and 100
respectively. Now you are ready to set up the glow filter parameters.
Set the
glow control source to Object Channel and make sure that the Object Channel is set to
1. You will recall that we previously have set
the Object Channel for our particles, and this is why. We want the
particles to be glowed using the object channel of the particles. The
color control should be set to material (which right now is the plain
color we assigned to the particle emitters). The size is very important
since it defines the density of the explosion glow. For the sample we
created here us a glow size of 15.
7. Ready to
Render.
You have completed your tutorial here
and are now ready to render the animation to whatever file or device of
your preference, but do remember to render it from the video post. Have
fun blowing stuff up.
3dstudiomax.punkt.pl
|