Injecting Styles
You can designate CSS stylesheets to be injected into websites. Your stylesheets can add to or override styles provided by the website author.
About Injected Stylesheets
Injected stylesheets are treated as user stylesheets, as defined by the W3C. This means that first your injected styles are defined, then the author’s styles are added, then any of the author’s properties declared as !important are added, then your properties defined as !important are added. At each stage, a new definition overrides any previous one.
This means that style properties in your injected stylesheets are added to existing page style properties, but do not override them, unless you declare them as !important.
For example, to override a website using colored text on a colored background and set it to black text on a white background, you could add these styles:
body { |
color:black !important; |
background:white !important; |
} |
Adding a Stylesheet
To add an injected stylesheet, follow these steps:
Create an extension folder—open Extension Builder, click +, choose New Extension, give it a name and location.
Drag your stylesheet into the extension folder.
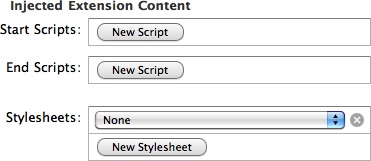
Click New Stylesheet under Injected Extension Content in Extension Builder, as illustrated in Figure 9-1.
Choose your stylesheet from the pop-up menu.
You can have more than one injected stylesheet.
In order for your stylesheets to be injected, you must specify either Some or All website access for your extension. You can have your stylesheet apply to a single webpage, all webpages, or only webpages from certain domains. For details, see the description of whitelists and blacklists in “Access and Permissions.”
If you reference images or other external resources in your stylesheets, you can use relative URLs to indicate sources within your extension package, relative to the stylesheet.
Important: In injected scripts, relative URLs are relative to the webpage the script is injected into. In injected stylesheets, relative URLs are relative to the stylesheet.
Last updated: 2010-08-03
