
Enterprise Java with J2EE
Enterprise Java is a popular subject these days. An increasing number of web applications are being deployed using application servers which conform to the Java 2 Platform Enterprise Edition (J2EE) standard. J2EE adds a set of extensions to server-side Java which aid in writing distributed and multi-tier applications. If you’re completely new to J2EE, you may want to review the pages at http://java.sun.com/j2ee/overview.html.
The J2EE standard covers several technologies, including EJB (Enterprise JavaBeans), Servlets, JSP (JavaServer Pages), JNDI (Java Naming and Directory Interface), and JDBC (Java DataBase Connectivity). In this article, I’ll try to give you all the information you need to start deploying and testing your J2EE applications on Mac OS X using the open-source servers JBoss and Jetty.
JBoss is an open-source J2EE application server that claims to be ”the most downloaded J2EE web server in the world.” The JBoss product is open source, but the developers encourage users to buy their documentation. There are several documentation options, all detailed at http://www.jboss.org/docs/index. This article covers only a tiny fraction of JBoss’s capabilities. If you’re going to use JBoss, I strongly recommend buying the documentation.
Jetty is an open-source HTTP server and Servlet container. It’s available for download in a bundle with the JBoss server. You can also download JBoss with the popular open-source Tomcat server. The combination of JBoss with Jetty (or Tomcat) provides a complete J2EE container.
Installing and Configuring JBoss and Jetty on Mac OS X
Since Mac OS X 10.3 includes JBoss, these installation instructions are only relavent to non-server versions of Mac OS X. All versions of Mac OS X come with Java 2, so pure-Java applications like JBoss and Jetty can be rapidly deployed. First, get the current stable JBoss/Jetty bundle from http://www.jboss.org/downloads/index. Versions of JBoss after 3.0 have Jetty included by default. In this article, I’ll be using JBoss-3.0.2.zip.
Pick an installation location (I picked /usr/local/jboss) and make sure you can write to the folder.
shell> sudo mkdir /usr/local/jboss
Password:
shell> sudo chown liz:staff /usr/local/jboss
Then move the .zip file to its installation base directory (if it isn’t there already) and unzip it using the jar command.
shell> mv jboss-3.0.2.zip /usr/local/jboss
shell> cd /usr/local/jboss
shell> jar -xf jboss-3.0.2.zip
Now you’ll need to make the startup scripts executable.
shell> cd jboss-3.0.2/bin/
shell> chmod ug+x *.sh
If you happen to be using a version of JBoss prior to 3.0, you may have to fix a glitch in one of the startup scripts. This bug has been fixed in JBoss 3.0. In earlier versions, the run.sh script incorrectly identifies a HotSpot server VM (Mac OS X comes standard with only the HotSpot client VM). You can fix this problem by replacing this line in jboss/bin/run.sh:
HOTSPOT=`java -version 2>&1 | grep HotSpot`"x"
with this one
HOTSPOT=`java -version 2>&1 | grep HotSpot | grep Server`"x"
Now you’re ready to start JBoss and Jetty:
shell> bin/run.sh
The JBoss/Jetty bundle comes pre-configured and ready to run simple J2EE applications. One of the nicer features of JBoss is its ability to instantly deploy an application. Once you’ve created your application, drop it into the jboss/deploy directory and it will be loaded. There’s no need to re-start the server.
In order to compile and deploy the example code in this article, you’ll need to install the Jakarta project’s open-source build tool, called Ant. I’m using version 1.4.1 and installed it in /usr/local/ant, with these commands:
shell> sudo mkdir /usr/local/ant
Password:
shell> sudo chown liz:staff /usr/local/ant
Password:
shell> mv jakarta-ant-1.4.1-bin.tar.gz /usr/local/ant
shell> cd /usr/local/ant
shell> tar -xzvf jakarta-ant-1.4.1-bin.tar.gz
In order to use Ant, you’ll want to have the environment variable $JAVA_HOME set, and you may want to add the Ant bin directory to your $PATH.
shell> export JAVA_HOME=/usr
shell> export PATH=$PATH:/usr/local/ant/jakarta-ant-1.4.1/bin
Of course, you can put these commands into a dotfile (a Unix shell startup file) so they’re permanently available. See the man page for your default shell for how to set up dotfiles (for example man tcsh or man sh). Click Terminal/Preferences/Shell from within the Terminal application if you don’t know which shell you’re running.
Enterprise JavaBeans and EJB Containers
JBoss is an EJB 1.1-compliant application server. If you’re completely new to EJB, I recommend that you review the pages at http://java.sun.com/products/ejb/.
Why use Enterprise JavaBeans? The EJB container (the environment in which your beans run, like JBoss) can easily handle some typically cumbersome tasks. It can handle transactions, session management, and can even abstract database code if you want it to. EJB technology also makes it easier to write scalable applications, with code distributed across more than one machine. There are three types of Enterprise JavaBeans: Entity, Session, and Message-Driven. I’ll show you examples of Entity and Session beans in this article.
Session beans represent a single client’s session. They can be either stateful or stateless. They do not persist beyond a single client’s session. Entity beans represent objects maintained in persistent storage (like a database).
One of the cool things about using EJB technology is that your application server handles all kinds of tricky things for you. The cost of all these free goodies is that your applications are forced to have a fairly complicated setup process. But after creating a J2EE application or two, you’ll get the hang of it. And if you shelled out for a graphical J2EE development environment, that tool will automate most or all of the setup process for you. For now, though, I’ll show you how to create some simple J2EE applications using only command-line tools.
Here’s a snapshot of the files necessary to create a “Hello World” application consisting of a servlet and a session bean.
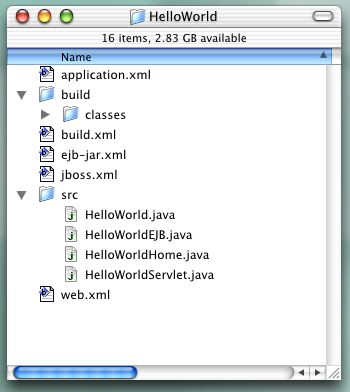
Here is a tarball that should be helpful for the HelloWorld application, as well as HelloEntity and MailList which we explore below:
The J2EE Platform Specification calls for class and XML files to be bundled together in a specific format for deployment. Web objects, like servlets and their associated web.xml files, go into a WAR (Web ARchive) file. EJB classes and their XML config files go into a JAR (Java ARchive) file. Then both those archives get bundled with a file called application.xml into a new EAR (Enterprise ARchive) file. Once that’s done, you can deploy your new web application by copying the EAR file into your jboss/deploy directory.
First, let’s look at the XML files. The first two define a session bean called HelloWorld. The jboss.xml file is not strictly required for this application, but I’ve included it anyhow. This is the file that would contain vendor-specific configuration information relating to your EJBs. Another file, called jboss-web.xml (not shown) can be used for JBoss-specific configuration relating to your web application.
shell>cat ejb-jar.xml

<?xml version="1.0" encoding="UTF-8"?>

<!DOCTYPE ejb-jar PUBLIC
'-//Sun Microsystems, Inc.//DTD Enterprise JavaBeans 1.1//EN'
'http://java.sun.com/j2ee/dtds/ejb-jar_1_1.dtd'>

<ejb-jar>
  <display-name>Hello World</display-name>
  <enterprise-beans>
    <session>
      <description>Hello World EJB</description>
      <display-name>HelloWorld</display-name>
      <ejb-name>HelloWorld</ejb-name>
      <home>HelloWorldHome</home>
      <remote>HelloWorld</remote>
      <ejb-class>HelloWorldEJB</ejb-class>
      <session-type>Stateless</session-type>
      <transaction-type>Container</transaction-type>
    </session>
  </enterprise-beans>
</ejb-jar>
shell> cat jboss.xml

<?xml version="1.0"?>
<jboss>
   <enterprise-beans>
      <session>
         <ejb-name>HelloWorld</ejb-name>
      </session>
   </enterprise-beans>
</jboss>
The web.xml file should look familiar to you if you’ve worked with other servlet engines, or have read the Apple Internet Developer articles on Tomcat. This project includes a bare-bones web.xml file.
shell> cat web.xml
<?xml version="1.0" encoding="ISO-8859-1"?>
<!DOCTYPE web-app
PUBLIC '-//Sun Microsystems, Inc.//DTD Web Application 2.2//EN'
'http://java.sun.com/j2ee/dtds/web-app_2.2.dtd'>

<web-app>
   <display-name>Hello World</display-name>
   <description>Hello World</description>
   <servlet>
   <servlet-name>HelloWorldServlet</servlet-name>
      <servlet-class>HelloWorldServlet
      </servlet-class>
   </servlet>
   <servlet-mapping>
      <servlet-name>HelloWorldServlet</servlet-name>
      <url-pattern>/HelloWorlds</url-pattern>
   </servlet-mapping>
   <ejb-ref>
      <ejb-ref-name>HelloWorldHome</ejb-ref-name>
      <ejb-ref-type>Session</ejb-ref-type>
      <home>HelloWorldHome</home>
      <remote>HelloWorld</remote>
      <ejb-link>HelloWorld</ejb-link>
   </ejb-ref>
</web-app>
Finally, here’s the application.xml file, with information about the application as a whole.
shell> cat application.xml

<?xml version="1.0" encoding="UTF-8"?>
<!DOCTYPE application
PUBLIC '-//Sun Microsystems, Inc.//DTD J2EE Application 1.2//EN'
'http://java.sun.com/j2ee/dtds/application_1_2.dtd'>

<application>
   <display-name>Hello World</display-name>
   <description>Hello World</description>
   <module>
      <ejb>HelloWorld.jar</ejb>
      </module>
   <module>
      <web>

         <web-uri>HelloWorld.war</web-uri>
         <context-root>HelloWorld</context-root>
      </web>
   </module>
</application>
Next, let’s look at the Java code in HelloWorld/src. The first two files, HelloWorld.java and HelloWorldHome.java, define the home and remote interfaces for the new session bean.
shell> cat HelloWorld.java

import java.rmi.*;
import javax.ejb.*;

public interface HelloWorld extends EJBObject
{
    public String hi() throws RemoteException;
}
shell> cat HelloWorldHome.java

import java.rmi.*;
import javax.ejb.*;

public interface HelloWorldHome extends EJBHome
{
    public HelloWorld create() throws RemoteException, CreateException;
}
Next is the class file for the bean. This is the file that contains your “business logic.” It creates a string with the contents “hiya”. Finally, here’s the servlet code.
Now that you’ve got a pile of .xml files and a pile of .java files, you can use Ant to compile your code, bundle it, and deploy it to your application server. By default, when Ant is run, it looks for a file in the current directory called build.xml and will follow the directions inside. Here’s the build.xml for the Hello World application.
With all these files in place, you’re ready to run Ant.
shell> ant
On success, you should see output something like this.
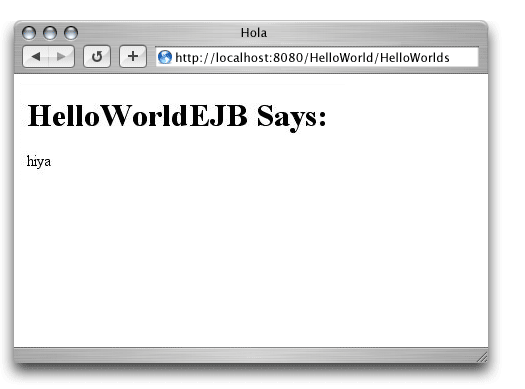
Once your application is deployed, you can visit http://localhost:8080/HelloWorld/HelloWorlds in your browser to see all that business logic in action.
Entity Beans
An entity bean represents an object in persistent storage. There are two ways to handle persistence — user-managed and container-managed. In user-managed persistence, the code author must explicitly store and retrieve the bean’s data from storage, usually via JDBC calls. In container-managed persistence, the EJB container handles all the storage and retrieval behind the scenes. JBoss comes pre-configured to use the HypersonicSQL embedded database, which means you can run this example code without changing your JBoss configuration. If you’d like to use a different database, such as MySQL, see the JBoss documentation.
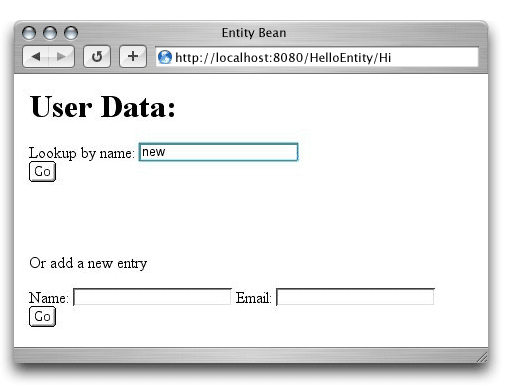
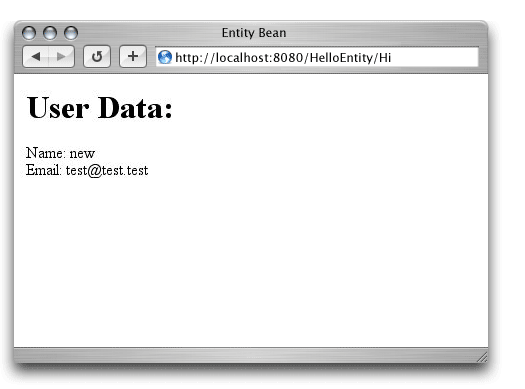
Here’s another simple web application. This one uses an entity bean to create, store, and retrieve user records. A user record consists of two data fields: “name”, and “email.” Notice that even though the records are being stored in the HypersonicSQL database, I didn’t write a line of database code. Instead, I specify the fields in my ejb-jar.xml file, and rely on my EJB container to manage persistence. Here is a listing of the other XML files this application uses.
Now to the Java source. First, the remote and home interfaces, the entity bean, the servlet, and the build.xml file.
You might have noticed by now that the build files look a lot alike. In fact, the only thing I really had to change was the “appname” property (although I also changed the project name). The rest of the file is pretty standard, and I hope you can re-use it for your projects. You will have to customize your build.xml files further, of course, once you’re building more complicated applications, using packages, and requiring more libraries in your compilation path. My advice is that you either get to know Ant, or invest in a Java IDE with project management capabilities.
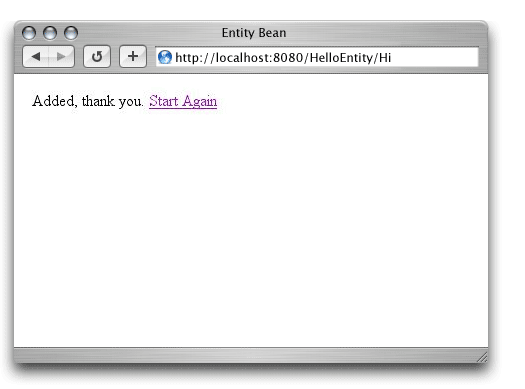
Once deployed (again, just type ant once your files and directories are in place), your application should be available via http://localhost:8080/HelloEntity/Hi.

Transactions
Transactions are multi-part actions that are required to function as one unit. Either all actions succeed together, or they all fail. Just as an entity bean’s data persistence may be user- or container-managed, a J2EE transaction can be handled by your bean code, or handed off to the container. If the container is managing a transaction associated with a certain method, it will automatically roll back any database calls in that method upon receiving a system exception. For more on transactions, visit this tutorial on java.sun.com.
You can define container-managed transactions in your bean’s deployment descriptor (the ejb-jar.xml file). See the assembly-descriptor section of http://java.sun.com/dtd/ejb-jar_2_0.dtd for full details. In general, your code will look something like this:
[...declaration for a bean called "MyExample"...]
<transaction-type>Container</transaction-type>
[...]

 <assembly-descriptor>
    <container-transaction>
      <method>
	<ejb-name>MyExample</ejb-name>
	<method-name>*</method-name>
      </method>
      <trans-attribute>Required</trans-attribute>
    </container-transaction>
  </assembly-descriptor>
JBoss comes with a built-in transaction manager. Like other JBoss component parts, it can be replaced with another JTA (Java Transaction API) transaction manager implementation. See the JBoss documentation for instructions.
Putting it Together: Simple Mailing List Manager
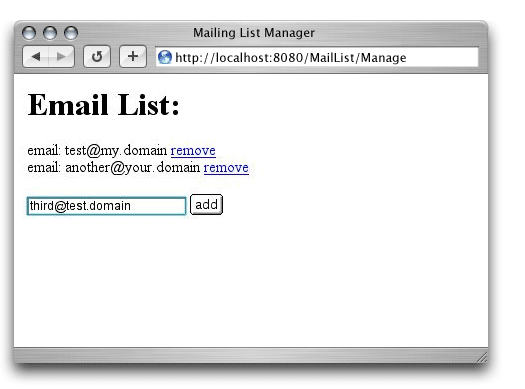
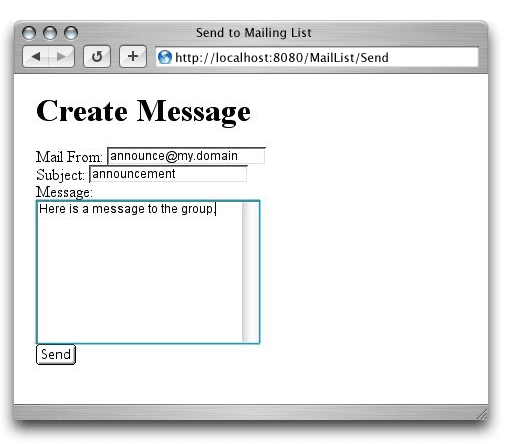
I’ll wrap up this article with a simple web application to manage an announcement mailing list. Two servlets take care of the user interface for adding/removing users and sending announcements. A container-managed entity bean handles the user data. There are several things lacking in this example application, most notably bounce handling, error checking, and any kind of security. For security reasons, I don’t recommend installing this demo in its existing form on a publicly accessible server for any length of time. If you plan on extending this code to create your own real-world application, note that JBoss makes it relatively easy to password-protect your applications (once again, via XML configuration files). See the JBoss documentation for more information.
Here are the files that make up this last application. First, a listing of the xml files, the bean interfaces, the bean class, and the two servlets.
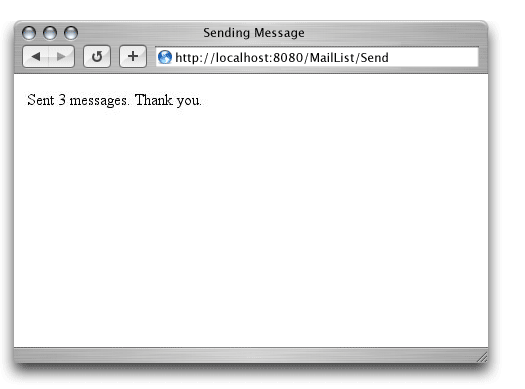
Once you’ve built and deployed your application using Ant, you should see pages like these. I’ve fudged the example email addresses in the screen shots, but you should get the idea.
Conclusion, and Suggestions for Further Reading
In this article, you’ve seen how to deploy some simple J2EE web applications using JBoss, Jetty, and Ant. You’ve also seen a few of the advantages of the EJB architecture. Being able to hand off whole sections of complex code to your EJB container is a non-trivial advantage, and in my opinion it’s well worth the learning curve. To learn more about J2EE and EJB, you can visit the excellent tutorials at java.sun.com. The JBoss documentation is also invaluable. For books on J2EE and Java, visit java.oreilly.com.
|