Apple Developer Connection
Advanced Search
Member Login Log In | Not a Member? Support

Building a Sample Core Data Application

Core Data is a powerful data-management framework introduced with Mac OS X v10.4 Tiger. When you take advantage of Core Data, it slashes the amount of custom code you need to write in order to manage application data. Opening, saving and undo management can all be handled by Core Data, freeing you to concentrate on creating unique features for your application.

Core Data is well documented in the ADC Reference Library. See the resources under New to Core Data? to the right or at the end of this article for details on what to read to get started and reference material on the ADC website.

This article is meant to address a somewhat different aspect of the power of this technology: the rapid development capability that is enabled by Core Data, Xcode and Interface Builder. To illustrate this advantage, we walk through the creation of a new Core Data document-based application, from start to finish, using QuickTime video clips. You’ll see how to use Xcode to create the project and define your data model, winding up in Interface Builder to define the user interface. Essentially, Core Data in 30 minutes or less, and only a few lines of code.

NOTE: These QuickTime files average just over a megabyte each (largest size is 2 MB), so be aware that downloading them requires adequate bandwidth.


Our Application

Our sample application, CheckIn, performs a simple task: keeping track of commit messages for your Software Configuration Management (SCM) processes.

As a developer, while you are working on an application’s code base, you may want to take notes about the changes you’re making and the features you’re adding. All of these changes lead to a related release. CheckIn provides a handy place to build up your SCM commit message as you go, at the same time filing it against a specific release (making it easy to produce a list of what’s changed from one release to another).

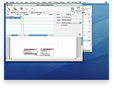
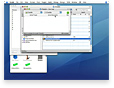
The first step is to create a new project for CheckIn: in Movie 1, we'll do that using the Xcode IDE. Click on Movie 1 to the right to learn how.

Movie 1: Creating the Project, Testing the App Movie 1:
Creating the Project, Testing the App
(File size: 1.0 MB)


Our Data Model

With our project in place, we’re ready to model our data. Our data model consists of only two related entities: CommitMessage and VersionRelease. CommitMessage represents a SCM commit transaction message that we build as we modify the source base. VersionRelease represents a binary release, and it is related to groups of CommitMessages.

We use Xcode 2’s built-in data modeling to create the two entities:

  • First, we populate the VersionRelease entity with its name string attribute and commitMessages relationship. See Movie 2 and Movie 3.
  • Finishing our modeling, we turn our attention to the CommitMessage entity, adding its messqge, creationDate, and isCommitted attributes and its versionRelease relation that points back to its owning VersionRelease. See Movie 4.

Our model is now done, so we can save it. The next step is to create a user interface for the application, and for that we'll use Interface Builder.

Movie 2: Modeling the Data and Creating Entities Movie 2:
Modeling the Data and Creating Entities
(File size: 588 KB)
 
Movie 3: Populating VersionRelease Entity Movie 3:
Populating VersionRelease Entity
(File size: 1 MB)
 
Movie 4: Populating CommitMessage Entity Movie 4:
Populating CommitMessage Entity
(File size: 1 MB)


Building the User Interface

We’ll build our interface incrementally, first starting with the table that displays the VersionRelease entity, and its associated Add and Remove buttons, as shown in Movie 5.

The table and buttons are now in place, but still need to be bound to the underlying model by creating and configuring a new NSArrayController that controls our VersionReleases as in Movie 6.

At this stage, we can already manage each document’s list of VersionReleases; see Movie 7.

But we don’t want to save any changes yet, because we still need to add the user interface for editing CommitMessages that are related to the selected VersionRelease. See Movie 8.

With the detail-level CommitMessage user interface in place, we’re ready to deploy another NSArrayController, this time to control the CommitMessages related to the selected VersionRelease. See Movie 9.

With our user interface done, we can take our new application for a spin, as in Movie 10.

Movie 5: Creating VersionRelease NSTableView Movie 5:
Creating VersionRelease NSTableView
(File size: 1.4 MB)
 
Movie 6: Creating VersionRelease Bindings Movie 6:
Creating VersionRelease Bindings
(File size: 1.3 MB)
 
Movie 7: Testing VersionRelease Interface Movie 7:
Testing VersionRelease Interface
(File size: 524 KB)
 
Movie 8: Creating CommitMessage NSTableView Movie 8:
Creating CommitMessage NSTableView
(File size: 1.4 MB)
 
Movie 9: Creating CommitMessage Bindings Movie 9:
Creating CommitMessage Bindings
(File size: 2.1 MB)
 
Movie 10: Test completed Interface Movie 10:
Testing Completed Interface
(File size: 1.3 MB)


Additional Tweaks

Our application already works, but let’s add two additional features: automatic timestamping of new CommitMessages and a search field. See Movie 11.

Movie 11: Interface Enhancements: Adding a Timestamp Movie 11:
Interface Enhancements: Adding a Timestamp
(File size: 168 KB)


Adding Custom Logic

So far we’ve managed to create a new application with a custom data model, file format and user interface without writing any code. Core Data by itself can do a lot for you, but it’s still up to you to write the custom code that makes your application unique.

In our case, it would be great if—upon creating a new CommitMessage—its creationDate was set to the current timestamp. That would relieve the user (us) from having to set it each time.

Core Data makes it easy to add your custom logic through subclassing. The first set is to inform the data model of your subclass, CommitMessageMO. See Movie 12.

Now we create a new source file named CommitMessageMO.m, and put our timestamping logic in -awakeFromInsert. See Movie 13

With our override in place, new CommitMessages are now properly timestamped.

Movie 12: Creating a Custom Entity Class Movie 12:
Creating a Custom Entity Class
(File size: 520 KB)
 
Movie 13: Subclassing NSManagedObject Movie 13:
Subclassing NSManagedObject
(File size: 1.6 MB)


Adding the Search Field

We may acquire many commit messages covering many different topics for any given release. A search field will make it easy to cut through all the noise to just the commit messages we’re interested in. It’s painless to add such a search field, requiring only a quick code-free jaunt to Interface Builder. See Movie 14.

Movie 14: Adding Live Search Box Movie 14:
Adding Live Search Box
(File size: 1.8 MB)


Next Steps

You've now completed the Core Data tutorial, and you have a working sample application. The ADC Reference Library is the next stop for learning more about using Core Data and how to implement it in your application.


For More Information

Posted: 2006-3-26