|

Strategy & Tactics: Starcraft - Terran
by Bishnu Bhattacharyya
 Terran Mission #1: Wasteland Terran Mission #1: Wasteland
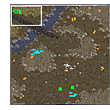
Mission Objectives: Get the SCVs and Marines you start out with at the top left of the map and head to the Confederate base in the bottom middle. There you must construct a Barracks and make ten Marines.
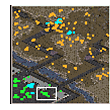
This mission features practically no combat. There are zerglings at assorted places on the map, but they do not directly attack you. If you look at the map, you'll see that there are practically no enemies (the orange spots), between you and your destination.
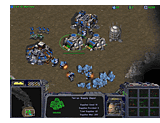 Take your Marines and SCVs and travel the most direct route to the base. Halfway there you will encounter Marshal Jim Raynor, on his Vulture. You now have a new mission objective: Ensure the survival of Jim Raynor. Continue towards the base, and you will now be attacked by three zerglings. You should be able to finish them off easily. Take your Marines and SCVs and travel the most direct route to the base. Halfway there you will encounter Marshal Jim Raynor, on his Vulture. You now have a new mission objective: Ensure the survival of Jim Raynor. Continue towards the base, and you will now be attacked by three zerglings. You should be able to finish them off easily.
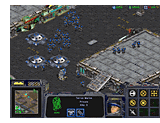
Once you arrive at the Confederate base, set all your SCVs mining minerals. When you have 150, pull one SCV off and make a Barracks. After the Barracks is complete, take that same SCV and make a supply depot, and if there are enough surplus minerals to build a Marine, do so. Once the supply depot is done, put that SCV back on minerals, and keep on building your Marines. Your base should look something like Screenshot #2, and when you have 10 Marines (Shown on the Marine Counter on the top left of the screen), you will be declared victorious.
 Terran Mission #2: Backwater Station Terran Mission #2: Backwater Station
Mission Objectives: Eradicate the Zerg infestation, and ensure Jim Raynor's survival.o
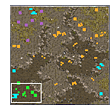
This mission is relatively easy, because no enemy zerglings will attack your base, enabling you to build up your forces unharmed. Your base is in the bottom left. When you start, with your 200 minerals build one Marine, one SCV, a refinery, and put the remaining SCV on minerals. Directly above you, on a ramp, are six zerglings and a creep colony (see the map). Take Raynor and eight Marines up there and destroy it (on the way you'll encounter about three zerglings, but that should not present a problem). Once destroyed, continue upward, and you'll encounter another Terran base (The purple units on the map).
 Meanwhile, at your base, keep building SCVs, Marines, and supply depots as you need them. You can build an engineering bay to upgrade your infantry, but that is not necessary. Meanwhile, at your base, keep building SCVs, Marines, and supply depots as you need them. You can build an engineering bay to upgrade your infantry, but that is not necessary.
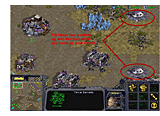
At the new Terran base, send your units close to their buildings and they will divert to your control. In the bunkers you will find SCVs, Marines, and a new unit, the Firebat. A Firebat is excellent for taking out zerglings, and the Academy at the purple base enables you to build them. Fill the two bunkers on Screenshot #2 with Marines while you build up your forces.
Take 12 Marines, 12 Firebats, and Jim Raynor and head east. Sweep the map, and kill the zerg you encounter, which will just be zerglings with two or three hydralisks. Remember, if Jim Raynor gets heavily damaged, immediately send him back to your base and repair him with SCVs. End the mission by destroying the infested Terran Command Center at the top right of the map (you wil not encounter any infested Terrans, however). When it is destroyed there will be some interplay between the characters, and then the victory box will appear.
 Terran Mission #3: Desperate Alliance Terran Mission #3: Desperate Alliance
Mission Objective: Survive for thirty minutes.
This is mission is quite easy if defences are set up the right way. You are permitted to make three combat units: Marines, Firebats, and Vultures. Most new players find this mission difficult because the try to build all three of them, which is a mistake.
Firebats and Vultures are worse than useless in this mission because the Firebat's flamethrower and the Vulture's spider mine deal splash damage, making it unsuitable for the close quarters fighting taking place. The only combat unit you should build here should be the Marine.
As the map shows, your base is totally surrounded by the zerg, so don't bother trying to expand. As the game begins, take the Marines you have and place them in the bunkers. This will be enough to repel initial attacks by the zerg. Make sure that you have your SCV repair the burning bunker and damaged Vulture.
 Initially, you should set up a powerful economy. You'll notice that the minerals are quite far from the Command Center, so you should lift off your CC and plant it closer. Then build SCVs until every mineral patch has an SCV working on. During this time you should also be making Marines at the one Barracks you have, making supply depots as needed. Also, quickly make two Missile Turrets covering your mineral site, as throughout the game a couple of Mutalisks will make an Assault Run towards it. Initially, you should set up a powerful economy. You'll notice that the minerals are quite far from the Command Center, so you should lift off your CC and plant it closer. Then build SCVs until every mineral patch has an SCV working on. During this time you should also be making Marines at the one Barracks you have, making supply depots as needed. Also, quickly make two Missile Turrets covering your mineral site, as throughout the game a couple of Mutalisks will make an Assault Run towards it.
Once your economy is in full swing, build two more Barracks and crank out Marines like there is no tomorrow. Have one SCV constantly building supply depots to keep up with Marine construction. Build two more bunkers at each entrance to your base, and fill them up with Marines. You should also contruct a Refinery on top of the Vespene Geyser. Then you can upgrade your infantry at the Engineering Bay. At your Academy, research Marine Range, but don't bother with Stimpacks.
When all six of your bunkers are full, keep building Marines, but send them out in front of the bunkers, filling up the corridor. It is important that once the Marines arrive, to issue the command Hold Ground, so they don't wander off. Once each corridor resembles something like Screenshot #2, stop making Marines and just wait for the counter to tick down. When there are about two minutes left, the zerg will marshal their forces and attack, but you should easily hold them off.
 Terran Mission #4: The Jacobs Installation Terran Mission #4: The Jacobs Installation
Mission Objectives: Retrieve data from Confederation network, Raynor must survive.
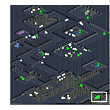
This is the first of three indoor missions in the game of StarCraft. Indoor missions force the player to incorporate new variables in his strategy. For example, you find things like hidden machine guns in the floor and hidden flamethrowers in the wall. If you look at the map, you will notice that all hidden traps such as these are marked with green dots. The player also cannot build any units--he only has the units he starts out with.
You begin with Jim Raynor, and a group of Firebats and Marines. In this mission, Raynor is a Marine, and since Marines cannot be healed/repaired, any damage is permanent. This is why I suggest leaving Raynor at the starting point. He will sustain no damage there; nothing will attack him.
Take your Firebats and Marines and head up the corridor, and turn left into the door. There you will see a bunch of civilians. Kill them; even though they don't attack it drives your kill total up. Leave the room and continue up the corridor. At the first junction, turn right, and proceed. Go up the staircase, and you will be in area #1 (See map). The beacon in area #1 is a teleporter that teleports you to area #2. There are some civilians and one Marine in there, kill them all. Be sure that none of your forces walk over the teleporter--that will beam them back to area one. Once you've killed everyone, go to the beacon beside the teleporter. It will activate security cameras, and now you can see other beacons all over the map. Teleport back to area #1, and go back down the passageway you came.
At the next junction, turn right, and go through the doors. Keep walking straight up the corridor, mopping up any enemy forces you might come across. Soon the corridor splits. Go to the right, then immediately take a right turn again, into area #3. The beacon in there will deactivate all security measures. Leave the room and continue going straight--do not turn. You will see a cage on your left filled with critters from various maps. Turn right, and you will see some zerglings in another cell. There are some Marines here, so kill them. Turn right again and go to beacon #4. This opens the cell doors. Go back the way you came, and attack the zerglings in the cell. This causes some interplay between Raynor and Arcturus. Continue past the newly-liberated creatures and turn left (eastward). Continue following the corridor, killing the Marines, Firebats, and Vultures you come against. Proceed to area #5, and select the beacon there. You will teleport to area #6. Kill the enemies there, then go out the single door and continue to area #7. There are many enemies, and a couple of traps there. Kill them, and select the beacon. The data disc will come out, and you have won the mission!
 Mission #5: Revolution Mission #5: Revolution
Mission Objectives: Bring Kerrigan to the Antigan Command Center, defend the Antigan rebels, Ensure the survival or Raynor and Kerrigan, and destroy the Confederate base.
This is the first mission where you have access to cloaking technology, in the form of Wraith Fighters, and Lt. Sarah Kerrigan. Success in this mission rides on your ability to use cloaked units.
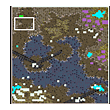
You start out in the top left with Raynor and a bunch of Marines (see map). Head south, and you will encounter Kerrigan, who joins your forces. Kerrigan is an effective hero. She can cloak, her canister rifle does 30 damage, and she has the ability to Lockdown enemy mechanical units.
Take your force and keep heading south. You will soon see a road. Follow the road, and you will see three missile turrets protected by one Marine. Kill the Marine, and destroy the missile turrets. Continue along the road, and destroy whatever enemy forces you encounter. When the road ends, head east. When you destroy the Wraith, stop. If you look to the east, you will see two bunkers protecting a missile turret. There is a ramp, and up the ramp you can see a purple command center. You have to send Kerrigan to the beacon beside the command center. Take your forces, and move in quickly and destroy the missile turret, and quickly pull your forces out before the bunkers deal any heavy damage. Then cloak Kerrigan and have her run by the bunkers and to the beacon. The purple buildings divert to your control, and a battle ensues between your bunkers and their's. Your's will easily win, but there is one enemy bunker out of the range of yours. Cloak Kerrigan and have her destroy it.
Once you've secured the base, a new mission objective will appear: destroy the Confederates. Your first duties are to set up a good base defence and get a good economy. Several of your bunkers are empty--fill them up with Marines. You should have all of your base covered by bunkers--especially the north end, where your Starport is, as many assaults come from that place. Hold off on mining vespene until your defences are established. Comsat the bottom right of the map, and you'll see an enemy vespene geyser, protected by some Wraiths and Marines. This is where your initial assault should be. Fill four dropships up with Marines, and build 6 Wraiths, with cloaking technology researched. It's a good idea to have your Marines all set to hotkeys so you can coordinate their assaults better.
Take your Wraiths and destroy the defences of the Refinery. Then land the Marines behind the Mineral cluster there. Soon the Confederates will send in some Goliaths. Cloak your Wraiths and take them out. Bring your Marines to the front and slowly advance. Always use the attack-move command, because the Confederates have a few spider mines around, and the Marines will destroy them before they hit.
If your Marines suffer losses reinforce them with Marines out of your bunkers. Once you have beaten the mission, sit back and enjoy the cut scene.
 Mission #6: NORAD II Mission #6: NORAD II
Mission Objectives: Bring Raynor and two dropships to NORAD II, Raynor and NORAD II must survive.
This mission is quite easy, if you play it right. As the map shows you, the Zerg are everywhere on this map. It is very difficult to destroy them all. It is easier to simply bore a hole through their defences to the NORAD II, which can be easily done in about 25 minutes.
Once you start, head west. After killing a couple of Zerg units, you should get to a white Confederate base. The first thing you should do is immediately repair the Engineering Bay before it is destroyed. Also, take your Marines and distribute them evenly into your three bunkers.
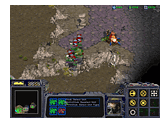 You can also now see the NORAD II. It falls under attack by zerg forces at various times during the mission, but nothing serious. Move the Marines and SCVs there into the bunkers, and move the Goliaths to the other side of the crashed battlecruiser. You can also now see the NORAD II. It falls under attack by zerg forces at various times during the mission, but nothing serious. Move the Marines and SCVs there into the bunkers, and move the Goliaths to the other side of the crashed battlecruiser.
The first thing to do is to set up a good economy. Your defences should last for the beginning of the game. Build SCVs and set them to minerals. If you have some spare minerals, build enough Marines to fill up all your bunkers. Once you start mining vespene, take your SCVs at the NORAD II crash site and repair the battlecruiser. If your bunkers, Goliaths, or even your SCVs are damaged, repair them. Tell your Goliaths to Hold Position at the very beginning of the mission, as they have a tendency to wander up the ramp.
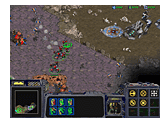 Once your economy is in full swing, build a Starport and crank out five Wraiths. Don't bother to research cloaking, you will not need it. Also build two dropships. Fill them up with Goliaths. Once your economy is in full swing, build a Starport and crank out five Wraiths. Don't bother to research cloaking, you will not need it. Also build two dropships. Fill them up with Goliaths.
Between your base and the NORAD II there are heavy zerg air defences, in the form of several Scourge and spore colonies. Take your Wraiths and attack the Spore Colonies nearest to you (See screenshot #2). Your Wraiths will suffer losses, but you will easily take out the spore colony. This clears away a small area where your dropships can land your Goliaths. Take the Goliaths, and destroy the Scourge and spore colonies there. A couple of sunken colonies will attack you, as will a few mutalisks. Take those out first. Screenshot #3 shows you what the hole through the defence force should look like. Be sure to take out all the scourge, as they do more damage.
Then, take your two dropships, load Raynor up into one, send them to the beacon, and you've beaten the mission.
 Terran Mission #7: The Trump Card Terran Mission #7: The Trump Card
Mission Objectives: Bring Psi Emitter (via SCV) to the Confederate Beacon (The pink dot in the map), Kerrigan must survive
This is the first mission where the enemy gains cloaking technology. The Confederates have Wraiths stationed at various points on the map. As soon as they are attacked you will find that they will cloak and retaliate.
You also have use of a new unit; the Science Vessel. It can detect cloak Wraiths so your other forces can take them out, but it doesn't have any weapons of it's own.
You start with a Science Facility and Starport, along with Kerrigan and an SCV carrying a Psi Emitter, in the top left of the map, as well as a large base in the bottom left island. As the mission begins, your forces to the north come under fire. Quickly send Kerrigan and the SCV to the protection of the island base. Lift off your Starport and Science Facility and have them move to the base as well. They'll fall under fire by enemy bunkers, but they will stop being pounded by Siege Tanks. Both buildings should survive.
Your supply depots posted past your main base's eastern bridge will also fall under attack by Siege Tanks. You can't save the depots, but pull the Marines back.
At your base, establish your economy, and fill your bunkers with Marines. Build a Machine Shopt onto your Factory and make Siege Tanks. Build another Factory, and also build an Academy and Armory.
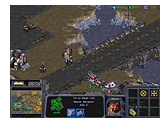 You'll need to establish your defences by putting a missile turret, a bunker, and a siege tank at each bridge leading into your base (See Screenshot #2). You may need to have more depending on how well you find they are defending. if you have extra money, upgrade your units--especially your vehicles. You'll need to establish your defences by putting a missile turret, a bunker, and a siege tank at each bridge leading into your base (See Screenshot #2). You may need to have more depending on how well you find they are defending. if you have extra money, upgrade your units--especially your vehicles.
Once your defences are established, make about six siege tanks (with Siege mode researched) and six Goliaths. At your Starport, build a control tower and a Science Vessel. Send these forces east to a new mineral depot. Establish a small base there, protected by two siege tanks, a missile turret, and two bunkers.
Once this base is established, make enough Siege Tanks and Goliaths so you have about 12 each. Slowly send them towards the beacon, followed by the SCV. The enemy will throw Wraiths, Siege Tanks and Goliaths at you. There is even a battlecruiser, but that can easily be destroyed by your Goliaths. When the path to the beacon is clear, send in your SCV and you've one the mission. If the SCV dies, send in another to pick up the beacon. It's a good idea to use the Science Vessel's Defensive Matrix on your SCV.
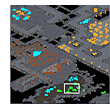 Terran Mission #8: The Big Push Terran Mission #8: The Big Push
Mission Objectives: Destroy Confederate Forces, General Duke must survive
This mission will introduce you to the Battlecruiser, arguably the most powerful unit in StarCraft. You cannot build them, but you do have access to General Duke's awesome NORAD II. You will have to use it a lot in this mission, but always repair it after it takes damage.
At the beginning of the mission, all your buildings are flying. Take the NORAD II and go east, where you will find a bunch of structural addons. Land each building beside the appropriate addon. There are two resource centers; you should take advantage of both of them.
The first thing you should do is establish an economy. Once this is done, build a choke point at the top of the ramp leading to your base (See Screenshot #2 below). Build two bunkers, fill them with Marines, and have about three sieged siege tanks, two missile turrets, and NORAD II. Use the hold position command on the NORAD II, because you don't want it wandering into enemy territory. You should also have good Missile Turret coverage as many cloaked Wraiths come at your base.
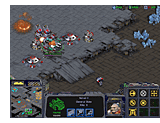 Now, build up your forces. Research Cloaking Field and Apollo Reactor and build six Wraiths. At the Covert Ops station, research as many Ghost abilities as you can--especially cloaking. Then build about 12 Siege Tanks and 6 Goliaths., and a Science Vessel. Now, build up your forces. Research Cloaking Field and Apollo Reactor and build six Wraiths. At the Covert Ops station, research as many Ghost abilities as you can--especially cloaking. Then build about 12 Siege Tanks and 6 Goliaths., and a Science Vessel.
If you Comsat, you will see a Confederate Base northwest of you (see the map). You will need that resource patch so what you should do is look at the defences between you and the base. You will see that there is an area where there is only one missile turret detecting. Build 2 Ghosts and load up Nukes at both your Silos. Take NORAD II and use it's Yamato gun to take out the lone Missile Turret. Send in your Ghosts and Nuke the area--especially the Bunkers. Once those have been incinerated, send in an assault force consisting of the 12 siege tanks, 6 Goliaths and Science Vessel you built earlier, along with NORAD II and it's accompanying Wraiths. Have the Siege Tanks go to siege mode and take out the structures while the NORAD II and the Wraiths hold position above them and take out any enemies that get too close (Cloak the Wraiths). Keep the Goliaths back, they will form the defensive component of the new base. Once the enemies have been destroyed, send in you SCVs and build a Command Center, and start mining minerals and gas. Repair your forces, and then take those 12 Siege Tanks, six Wraiths, Science Vessel, and NORAD II, and slowly sweep the entire map, destroying everything you come across. Partway through this a Confederate Battlecruiser will attack your expansion. You can easily kill it with your Goliaths.
It is not a good idea to openly attack with NORAD II. Just keep it above your Siege Tanks at all times as an anti-infantry precaution.
 Terran Mission #9: New Gettysburg Terran Mission #9: New Gettysburg
Mission Objective: Eliminate Protoss Forces, do not destroy any Zerg buildings, Kerrigan must survive.
This is the first mission where you can manufacture Battlecruisers, which will be a huge factor in beating this mission.
First, you must establish your economy. As you can see, the Command Center is quite far from your minerals. Lift it off and land it closer. Don't start mining Vespene Gas for a while, as you will not need it in establishing your defences.
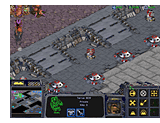 The 3 ramps at the northwestern corner of your base lead into a zerg colony, as you can see in the map. The bulk of the attacks against your base will come from there, so that's where you first fortify. Assign approximately 2 bunkers to each ramp, and line the perimeter of your base with missile turrets, as you see in Screenshot #2. Since you cannot destroy any zerg buildings, DO NOT USE SIEGE TANKS as they will certainly fire into the zerg colony and destroy one of their buildings. At the end of the level a massive zerg attack hits your base, and though it does not matter if you hold it off or not, it drives your kill total up massively, so if you can fortify some more, do so. The 3 ramps at the northwestern corner of your base lead into a zerg colony, as you can see in the map. The bulk of the attacks against your base will come from there, so that's where you first fortify. Assign approximately 2 bunkers to each ramp, and line the perimeter of your base with missile turrets, as you see in Screenshot #2. Since you cannot destroy any zerg buildings, DO NOT USE SIEGE TANKS as they will certainly fire into the zerg colony and destroy one of their buildings. At the end of the level a massive zerg attack hits your base, and though it does not matter if you hold it off or not, it drives your kill total up massively, so if you can fortify some more, do so.
You should also fortify to the east of your base, where a couple of Protoss units (Zealots and Dragoons) will come through, but the Protoss do not harass you as much as the zerg. You will not need to build a single siege tank in this mission, so don't even build the machine shop add on for your factory.
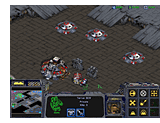 Once your defences are established, then start mining Vespene Gas. You will need to put 5 to 7 SCVs on it because the Vespene Geyser is quite far. Build 2 Starports, and a Science Facility with a Physics Lab, and start building Battlecruisers. Each Battlecruiser requires 8 supply points, so have one SCV constantly building supply depots. You will need to expand, as well. Screenshot #3 shows you the best expansion point and how to fortify the place. An ultralist attack or two will be directed at your expansion. Once your defences are established, then start mining Vespene Gas. You will need to put 5 to 7 SCVs on it because the Vespene Geyser is quite far. Build 2 Starports, and a Science Facility with a Physics Lab, and start building Battlecruisers. Each Battlecruiser requires 8 supply points, so have one SCV constantly building supply depots. You will need to expand, as well. Screenshot #3 shows you the best expansion point and how to fortify the place. An ultralist attack or two will be directed at your expansion.
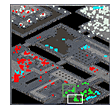
Build an Armory and upgrade Ship Weapons and Armor. With your expansion, you will find that you will have excess minerals and gas, so use it. Once you have 6 or 8 Battlecruisers, sweep the entire east end of the map, and destroy any Protoss you find (The blue spots in the map). Once that's happened, there will be some dialogue, and just watch the swarms of zerg get decimated.
 Terran Mission #10: The Hammer Falls Terran Mission #10: The Hammer Falls
Mission Objectives: Destroy the Ion Cannon, Raynor must survive.
This mission features a highly aggressive AI. The computer launches several attacks on your base, using many special tactics, including Lockdown and Cloaking.
You start the mission with several fighting units. Arrange them into a temporary cluster protecting the buildings you start out with. The first order of the day is to get your economy going.
Once your Vespene Gas and Mineral production is underway, begin building your essential structures. Fortify your defences; move your troops up the ramp and set up defences as shown in Screenshot #2 and #3. Your base doesn't have much space, so you will have to expand, but not too early otherwise the computer will just destroy it. Build your structures close together, and ensure there is good missile turret coverage all over your base as cloaked Wraiths will assault you.
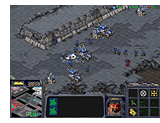 At your fortifications, you should have many Marines outside of Bunkers so that when enemy Ghosts come, you can intercept them before they fire their Lockdown rounds. Once your defences are established, build a StarPort, Science Facility, and three Battlecruisers. Build Four dropships, fill one up with SCVs and the other three with Marines. There is a good expansion point in the center of the map (see the map) and take your Battlecruisers and Dropships there. Before you do, carefully plan your path, with ComSat, because you have to snake around a couple of missile turrets (don't destroy them with your Battlecruisers, it will bring in reinforcements). At your fortifications, you should have many Marines outside of Bunkers so that when enemy Ghosts come, you can intercept them before they fire their Lockdown rounds. Once your defences are established, build a StarPort, Science Facility, and three Battlecruisers. Build Four dropships, fill one up with SCVs and the other three with Marines. There is a good expansion point in the center of the map (see the map) and take your Battlecruisers and Dropships there. Before you do, carefully plan your path, with ComSat, because you have to snake around a couple of missile turrets (don't destroy them with your Battlecruisers, it will bring in reinforcements).
Once you land your SCVs and Marines, set one SCV building a Command Center, while the other seven build Missile Turrets. Don't bother squeezing off the choke points, just protect the Command Center. Keep your four Dropships hovering right above the Command Center, you will need them. The enemy will send many Ghosts, Siege Tanks, and even a couple of Battlecruisers, against your expansion, but you should be able to hold them off if you get the Ghosts before they do damage.
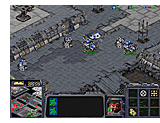 When your expansion is established, build a StarPort or two there, and keep cranking out Battlecruisers. It is essential that you also acquire Yamato Guns for your Battlecruisers, and that you do not use them, as you will need them ALL in the assault on the Ion Cannon. When you have 12 Battlecruisers, fill two of your dropships up with Marines and two up with Siege Tanks, and launch your attack on the Ion Cannon. Also send along 2 Science Vessels for cloak support. When your expansion is established, build a StarPort or two there, and keep cranking out Battlecruisers. It is essential that you also acquire Yamato Guns for your Battlecruisers, and that you do not use them, as you will need them ALL in the assault on the Ion Cannon. When you have 12 Battlecruisers, fill two of your dropships up with Marines and two up with Siege Tanks, and launch your attack on the Ion Cannon. Also send along 2 Science Vessels for cloak support.
The Ion Cannon is on an entirely separate platform, and is surrounded by Missile Turrets. use your Battlecruisers to punch a hole in the Missile Turret grid, and land your dropships. Slowly advance your Siege Tanks and Marines, with your Science Vessel right on top, and your Battlecruisers a bit behind. The idea here is to get the enemy to use all his Lockdown rounds, as that is the only hindrance for you to destroy the Ion Cannon. Whenever you can see a Ghost, kill it before killing anything else. Once you are fairly sure they are all gone, command all your Battlecruisers to simultaneously Yamato the Ion Cannon. It will be destroyed instantly, and you can watch the fabulous cut scene. |
|
|
|

