


ArtWorks 2.2
Stewart Brookes
I may as well admit it: I like drawing. Some people doodle absentmindedly on a note pad, others carve their artistic creations into hapless tree trunks. And then there's always canvas and oil for those with loftier aspirations. My medium of choice, however, is a virtual desktop and ArtWorks. It's hard to quantify, but there's something about ArtWorks that sparks my creativity, encourages me to experiment with new designs and persevere until I've finished what I'm working on. Perhaps it's the remarkably uncluttered interface that attracts me to it, the fact that there's never a need to wade through menu after menu in search of a particular feature. Certainly, it's evident that the original ArtWorks team put a lot of thought into engineering the drawing tools to be intuitive, and I suspect that this goes a long way to account for the lasting appeal of the software. I've dallied with other vector art packages, but my heart was never in it and I missed ArtWorks all the while. It was, therefore, with great excitement that I took the plunge and upgraded to ArtWorks 2 last year. Having read the impressive feature-list, I was aware of some of the more significant enhancements that had been implemented by Martin Würthner when he took over development of the software. What I hadn't anticipated was just how much he'd managed to improve upon the original design, taking the software to new levels of ease of use. That, as it turned out, was only the beginning, and Wakefield 2004 saw the launch of ArtWorks 2.2 and the features that I will explore in this review.
ClipView in action...
For years, the biggest wish on many people's ArtWorks wishlist was transparency. When, seemingly against the odds, Martin Würthner pulled that rabbit out of the hat (and very nice it is too!), it left many wondering what he would do for his next trick. The answer came in the form of the ClipView tool. Not only is ClipView the most significant of the new features in the ArtWorks 2.2 upgrade but, arguably, it rivals even transparency in the stakes for most useful new addition. But enough hype, what does it do? Well, put simply, it offers dynamic clipping. None the wiser? Hopefully, a few examples will make things clear.
Something that I often want to do is put a JPEG picture in a 'frame' with rounded corners before printing. It can be done in a bitmap package, such as Photodesk, but it's somewhat fiddly and time-consuming. With the ClipView tool in ArtWorks 2.2, the effect is both swift and easy to achieve: you simply create the border (a rounded rectangle), line it up with the picture, send the rectangle to the back, make sure that you've selected both rectangle and picture, and then choose 'Objects > Apply ClipView' (Shift-Ctrl-C).

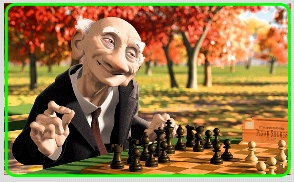
Original image (reduced size) with square corners and white border.
Green, rounded rectangle which will be used to clip the image.
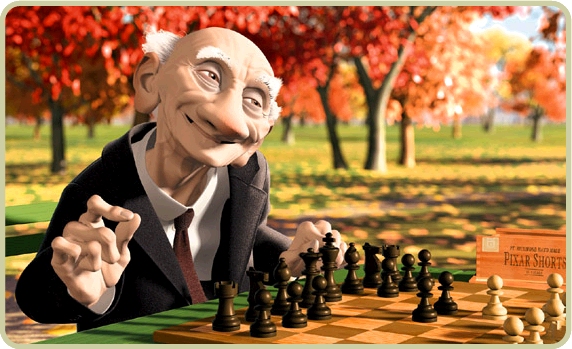
Image (full size) clipped to the shape of the rounded rectangle.
One way to look at it, is that the ClipView tool takes the rectangle (or whatever shape) that is behind the JPEG, and turns it into a window through which the JPEG can be viewed; everything that doesn't fit into that window is no longer visible. Another way to look at it, is that the JPEG is like a piece of pastry, and the shape behind is like a pastry cutter, but perhaps that analogy shouldn't be pursued until after lunch?!
It is important to understand that ClipView is quite different to cropping an image in a bitmap package; nothing is actually deleted and, at any time, you can remove the ClipView and recover the original objects ('Objects > Remove ClipView' or Shift-Ctrl-C), in much the same way as objects can be grouped and ungrouped. Moreover, even after clipping, the object used to create the ClipView remains fully editable, and you can apply fill and line colours to it. Indeed, in the example above, I changed the colour of the rounded rectangle from bright green after having applied the ClipView. Much like other objects, ClipView objects can be moved, scaled, and rotated, etc.
In the above example, I used a rounded rectangle to create the ClipView. Using the same technique, it is possible to clip an object to any shape, allowing for some interesting effects.
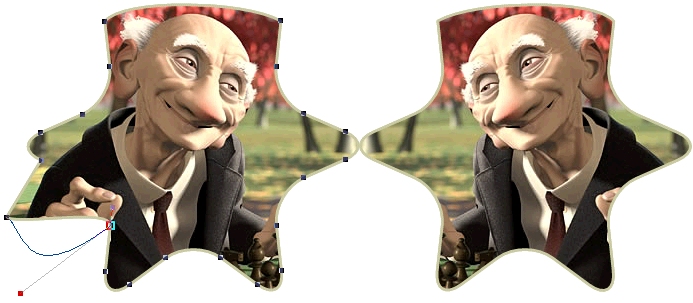
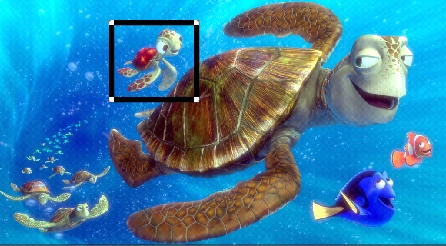
The left-hand side of the image above offers a glimpse of the 'dynamic' nature of the clipping process: the path of the object used to clip the JPEG can be dragged and portions of the picture underneath then become visible (notice the hand).
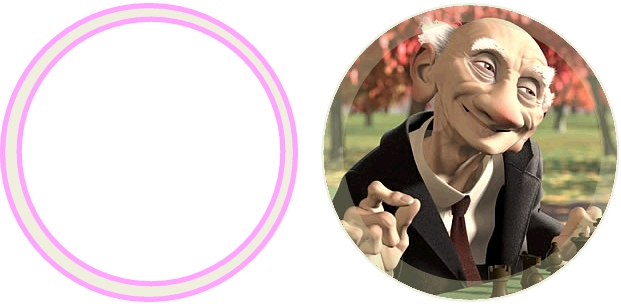
The example below shows the same image clipped to a circle. The object on the left is two circles that have been joined to form a hollow shape, not dissimilar to a very paltry doughnut ring (sorry, I meant to leave the pastry examples alone). The not-at-all doughnut-like circle has then been placed on top of the clipped JPEG, and transparency applied to create the see-through ring.
What is most remarkable about ClipView objects, is that the clipped object behaves as if there was no hidden area: the object moves swiftly, and the selection box is that of the object used to perform the clip (i.e. in the example above, it is a circle). Really, this has to be seen to be appreciated. Having said that, if you are only going to be using a small section of a large JPEG, it may be worth actually cropping the image to reduce the file size. There is no need to resort to a bitmap package as, with a little lateral thinking, ArtWorks 2 can do this itself. Place a rectangle outline over the area that you want to crop, and 'File > Export > Bitmap > Selection box'.

As the example below demonstrates, the ClipView tool can be used, in effect, to produce bitmap fills of text. The text needs to be converted to a shape first ('Lines/Shapes > Make shapes' or Ctrl-N), and joined ('Lines/Shapes > Join Shapes' or Ctrl-I), but other than that, the process is pretty much identical to the other examples that we've looked at. Effects like these can be produced very rapidly, which is good for creativity and, above all, fun!

Before we leave ClipView, it is worth mentioning that the AWViewer has been updated to handle ClipView objects, meaning that ArtWorks-compatible applications, such as Easi/TechWriter, Ovation Pro and Impression, etc., can display the clipped images.
Tool selection...
ArtWorks has always offered a good range of keyboard shortcuts for the manipulation of objects, supporting the 'standards' for copy, paste, group and ungroup, bring object to front, etc., while providing a wealth of other combinations which cover pretty much everything from line thicknesses to whether the printable margins are visible or not. When it comes to the drawing tools themselves, however, there has not been an equivalent range of shortcuts; with the notable exception of the Select tool (F2), the only way to choose an individual tool has been by clicking on the respective button on the toolbar. This anomaly is addressed in ArtWorks 2.2 with the introduction of a facility which uses the Tab key, followed by a letter, to change tools. Rather than impose the ubiquitous string of hard-to-remember key combinations on the unwary user, however, Martin Würthner has thoughtfully implemented a system which allows users to define their own shortcuts. True to form, the shortcuts are also extremely easy to set-up.
The first stage is to select a tool from the toolbar, and then it's as simple as visiting 'Utilities > Set tool shortcut' and entering a letter of your choice to be used after Tab. If the 'Case insensitive' option is left unticked, then capitals will be distinguished from lower case, thereby increasing the range of potential combinations. The final stage is to 'Save choices' on the ArtWorks 2 iconbar icon, and the shortcut is preserved.
This might seem like a comparatively minor change, but I've found it to be remarkably useful; certainly, much more so than I'd expected. Not only is it a time-saver, but being able to switch seamlessly between my favourite tools means that there's much less of a distraction from the creative process. Used in conjunction with the invaluable Left-Alt (which switches temporarily to the Select tool), the Tab shortcuts are a boon for productivity and make ArtWorks 2.2 that extra bit more pleasant to use.
I get a round...
In addition to introducing explicitly new features, Martin Würthner has done much to refine the functionality of the existing ArtWorks tools. This time around, it is the Path tool (the module responsible for the creation of rectangles, ellipses, polygons, etc.) which benefits from his expert attention. Two changes have been introduced. Firstly, a 'From centre' option has been added to the Ellipse infobar.

And secondly, a crosshair is shown at the the centre of each selected shape (ellipse, rectangle, polygon, etc.) while the object is being created or manipulated.
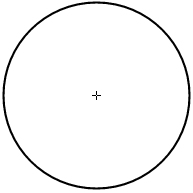
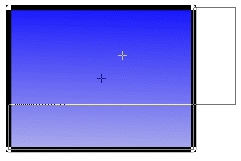
While these changes may seem fairly cosmetic, they have made a big difference, particularly in the case of the Ellipse tool. In contrast to most of the other basic tools, I've always found creating ellipses -- and in particular circles -- a rather hit and miss affair; even when using Ctrl to 'constrain' an ellipse to a circle, it has never seemed to centre where I wanted it. The 'From centre' option makes it easy to achieve the desired position and the little crosshair serves as a useful guide when creating, and altering, a shape (see example rectangle above).
And finally...
If you check the ArtWorks 2 website, then you'll see a long list of the niggly little bugs that Martin Würthner has managed to track down and eliminate. This, in itself, has enhanced the ArtWorks experience for me, with some of my 'pet hates' having been removed. The list of the 'bug fixes' that were introduced for ArtWorks 2.2 is significant, and enough to fill another page or three. More encouraging still is the ambitious list of potential features on the way. There is much to be look forward to, given that we have had a steady flow of updates from a developer who has a track record of delivering (and on time too!). In closing, I heartily recommend ArtWorks 2.2.
Stewart Brookes