|
|
| The Region List is located at the right of the large multi-track timeline window. It is a list of all the samples you currently have imported or linked to this project. There are many options associated with regions under the (coincidentally enough) Regions menu. Whenever you want to affect a region in some way, that particular region must be highlighted. In the photo at left, we are working with the piano region. |  |
|
|
Since we are building a Station ID for a mythical US television station, set your SMPTE frame rate to 29.97, the NTSC color video standard. Choose the Settings menu, and check under Framerate.
We should have our timeline begin with some sort of leader so that syncing video for broadcast later won't leave the engineers screaming quite as loudly. A good way to do this is to build a five second header, with a 1khz tone at 00:00:00:00 and 00:00:01:00, and a 2khz tone at 00:00:02:00 (see above timeline image). The actual audio for broadcast should begin at 00:00:05:00.
 |
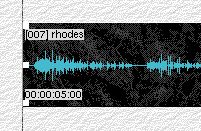
How do we do this? Well, there's an easy, quick way. By clicking on the SMPTE timecode display, as seen in the picture at left, we are presented with a timecode requestor, like the one on the right. |  |
Type in the SMPTE time you require. Our
first tone needs to be placed at 00:00:00:00, which is the timecode default,
so you need not type anything now - just leave it at 00:00:00:00, and hit OK. Now click on
pip1khz in your region list, and choose Add Object At Cursor under
the Audio menu. Or, you could simply hit ENTER. Now, your region has
inserted itself into the timeline!. You can zoom in to get a closer look by using the
down arrow, while using the up arrow will zoom back out, if needed. Now try
entering the second 1khz tone and the 2khz at times listed above. you should end up with
a timeline that looks something like the one below.

| Now you're ready to add the music tracks. Luckily, our mythical channel is the "all minimalist-jazz channel" (ha!) so this will be a very simple task - only a Rhodes organ track and a piano track. Since we know our ID will begin at 5 seconds (following the leader we just built), click on the SMPTE timecode display window as above and enter 00:00:05:00 in the requestor. Select Track Two in the timeline by clicking anywhere within its borders, highlight the region named rhodes in the region list, and hit ENTER. You should have something like that displayed in the picture at the right. |  |
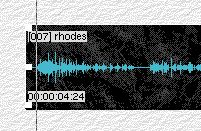
| You'll notice, by examining the waveform display, that the audio does not really start right away in this object. We need the rhodes to start right at 00:00:05:00, so what should we do? Well, click and drag the rhodes object over a bit to the left. It shouldn't be too hard to align things in a usuable manner, such as in the photo at the right. Notice the start time in the lower right hand side of the object has changed from 00:00:05:00 to 00:00:04:24. |
 |
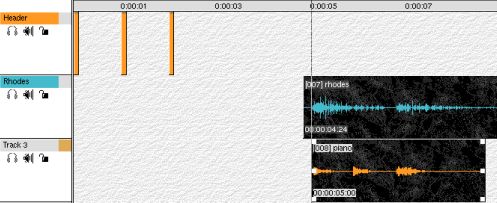
Now we can throw in the piano region on track 3, in the same way we've done the other regions. In
looking at the photo below, it appears that inserting the piano at 00:00:05:00 will do fine.

Keep in mind, you can change the name of the track to suit your project - select a track to rename and
use the Audio menu, and choose Rename Track.... Or you could just hit Left Amiga-T
to accomplish the same thing.
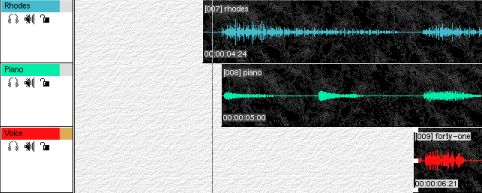
Now insert the region called forty-one (the announcers voice) somewhere around 00:00:06:21 on track 4 - drag the object
as needed to have its start sync up with the last rhodes/piano chord, as shown in the image
below.

To the left of each track's display is a speaker icon. This activates the channels on your "virtual" playback/record deck. Turn channels 1-4 on by clicking on that icon. Now hit Play on your transport controls (or the SPACEBAR). There it is! A rough cut for your Station ID!